
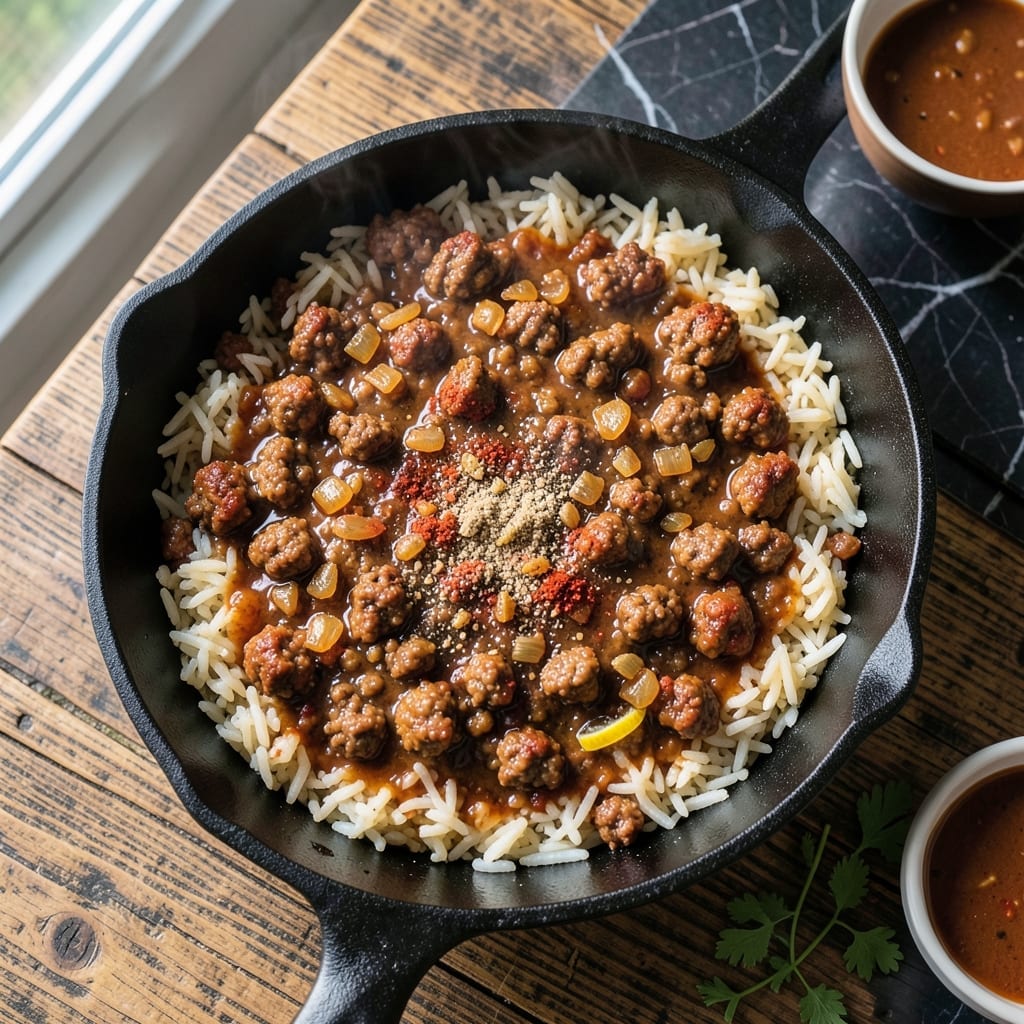
This one-pan creation layers Tex-Mex flavors into a satisfying meal that’s as easy to make as it is to enjoy. The blend of spices, ground beef, and rice creates a hearty base that bakes into a cohesive dish.
What emerges is a flavorful casserole with tender rice, seasoned beef, and a perfectly balanced mix of textures. It’s a no-fuss solution for feeding a crowd or prepping meals ahead.
Ingredients for Chili Rice Casserole
Nothing exotic here—just good stuff for a hearty one-pan meal.
| Ingredient | Amount | Notes |
|---|---|---|
| Ground Beef 🥩 | 1 lb | 80/20 lean-to-fat ratio preferred |
| Long-Grain White Rice 🍚 | 1 ½ cups | Uncooked, rinsed before use |
| Chili Powder 🌶️ | 2 tbsp | Mild or hot variety |
| Ground Cumin 🌿 | 1 tbsp | Toasted for deeper flavor |
| Garlic Powder 🧄 | 1 tsp | Not garlic salt |
| Onion Powder 🧅 | 1 tsp | Fresh ground preferred |
| Salt 🧂 | 1 tsp | Kosher or sea salt |
| Black Pepper 🌶️ | ½ tsp | Freshly ground preferred |
| Diced Tomatoes 🍅 | 1 can | 14.5 oz can, undrained |
| Tomato Sauce 🍅 | 1 can | 8 oz can |
| Beef Broth 💧 | 2 cups | Low-sodium preferred |
| Shredded Cheddar Cheese 🧀 | 2 cups | Sharp cheddar recommended |
| Yellow Onion 🧅 | 1 whole | Medium-sized, finely diced |
| Green Bell Pepper 🌶️ | 1 whole | Diced, seeds removed |
| Olive Oil 🫒 | 2 tbsp | For sautéing vegetables |
The ground beef is key—80/20 blend gives you the best flavor and moisture. Costco has great prices for bulk, but any supermarket works. I always grab long-grain white rice for this; it absorbs the liquid perfectly. The cheddar? Block cheese shredded at home melts way better than pre-shredded (trust me on this).
No chili powder? Taco seasoning at half the amount works in a pinch. Fresh tomatoes can replace canned (about 3 medium), but you’ll need to simmer them down first. The bell pepper can be red or green—whatever’s on sale. Want more heat? Add a diced jalapeño with the onion. Beef broth can be swapped for chicken or vegetable broth.
This casserole tastes even better the next day. Keeps in the fridge for 4-5 days or freezes for 3 months. Reheat in the oven covered with foil (microwave works too, but texture suffers a bit).
Why You’ll Love This Recipe
- One Pan Wonder: I brown the beef, stir in the rice and spices, and let the oven do the rest—minimal cleanup, maximum flavor.
- Smoky & Satisfying: The cumin and chili powder give that deep, warm kick that makes every bite feel like a hug.
- Feeds a Crowd: I’ve served this at potlucks and weeknight dinners alike—it’s always a hit, and the leftovers disappear fast.
- Budget Friendly: Ground beef and rice stretch far, and honestly, it tastes like I spent hours on it.
Step-by-Step Instructions for Chili Rice Casserole
Here’s how I build those perfect Tex-Mex layers in one pan.
Step 1: Brown the Ground Beef with Aromatics
Heat the 2 tbsp Olive Oil in a large skillet over medium-high heat. Add the 1 lb Ground Beef and cook, breaking it up with a wooden spoon, until no longer pink—about 5-6 minutes.
Once the beef is browned, add the diced Yellow Onion and Green Bell Pepper. Cook for another 3-4 minutes until the vegetables soften and the onion becomes translucent. You’ll smell the aroma change as they release their sweetness.
Stir in the 2 tbsp Chili Powder, 1 tbsp Ground Cumin, 1 tsp Garlic Powder, 1 tsp Onion Powder, 1 tsp Salt, and 0.5 tsp Black Pepper. Cook for 1 minute to toast the spices—this wakes up their flavors and removes any raw taste.
Step 2: Build the Rice and Chili Base
Add the 1.5 cups Long-Grain White Rice to the skillet and stir for 30 seconds to coat it with the spiced beef and oil. This step prevents the rice from sticking and helps it absorb the flavors as it cooks.
Pour in the 1 can Diced Tomatoes (undrained), 1 can Tomato Sauce, and 2 cups Beef Broth. Stir everything together until evenly combined. The liquid should just cover the rice—if it looks dry, add a splash more broth.
Bring the mixture to a boil, then reduce the heat to low, cover, and let it simmer for 20 minutes. Don’t peek during this time—keeping the lid on traps steam, which is essential for cooking the rice evenly.
Step 3: Add the Cheese and Finish
After 20 minutes, check that the rice is tender and most of the liquid has been absorbed. If it’s still firm, cover and cook for another 5 minutes. The mixture should look thick, with the rice fully expanded.
Sprinkle the 2 cups Shredded Cheddar Cheese evenly over the top. Cover the skillet again and let it sit off the heat for 5 minutes. The residual steam will melt the cheese perfectly without making it stringy.
The casserole is done when the cheese is fully melted and bubbly at the edges. Let it rest for 5 minutes before serving—this gives the layers time to set so they hold together when scooped.
Pro Tips For Making Chili Rice Casserole
- Brown the Beef Well: Cook the ground beef until it’s deeply browned, not just gray—this builds a rich, meaty flavor that carries through the whole casserole.
- Toast the Spices: Bloom the chili powder, cumin, and garlic powder in the beef fat for 30 seconds before adding liquids. I learned this the hard way—raw spices taste flat and dusty.
- Use Par-Cooked Rice: Cook the rice for 10 minutes before mixing it in, otherwise it absorbs too much liquid and turns mushy by the time the casserole finishes baking.
- Add a Splash of Beef Broth: Replace the water in the recipe with beef broth—sounds simple, but it adds depth that plain water just can’t match.
Dietary Considerations for This chili rice casserole
Gluten-Free Friendly
This dish is naturally gluten-free as written, since it uses rice as the base instead of flour-based ingredients. Just double-check your chili powder and beef broth labels—some brands add wheat as a thickener. I like McCormick for reliable gluten-free spices. 💪
Lower-Carb Option
Swap the 1.5 cups white rice for 1.5 cups cauliflower rice to cut carbs significantly. The texture will be different, but the flavors still shine through. Reduce the beef broth to 1.5 cups since cauliflower releases moisture as it cooks.
Dairy-Free Adaptation
Use dairy-free cheddar shreds—Violife or Daiya brands melt well for this. For extra richness, stir in ¼ cup nutritional yeast before adding the cheese alternative. The dish will still be creamy and satisfying.
Vegetarian Version
Replace the 1 lb ground beef with 1 lb crumbled firm tofu or textured vegetable protein. Sauté with the spices for 5 minutes to absorb the flavors. Use vegetable broth instead of beef broth for a fully plant-based meal. 🌱
Lower-Sodium Swaps
Use low-sodium beef broth and no-salt-added tomato sauce. Reduce the salt to ½ tsp and boost flavor with extra cumin or garlic powder. The natural richness of the beef and cheese will still come through.
Nut-Free Note
This recipe contains no nuts or nut derivatives, so it’s safe for those avoiding nut allergens. Just verify that your chili powder and other spices weren’t processed in a facility with nuts if cross-contamination is a concern.
Nutrition Facts
Frequently Asked Questions
Can I make this ahead of time?
Yes! Assemble it completely, cover, and refrigerate for up to 24 hours before baking. Add 5-10 minutes to the baking time if cooking from cold.
What if my rice is still crunchy?
If the rice isn’t tender after 20 minutes, add ½ cup more broth, cover, and cook for another 5-10 minutes. The liquid ratio is key for perfect texture.
Can I use brown rice instead?
Yes, but increase the broth to 2.5 cups and simmer for 40-45 minutes. Brown rice needs more liquid and time to soften.
How do I store leftovers?
Keep in an airtight container in the fridge for up to 5 days or freeze for 3 months. Reheat in the oven for best texture.

- Furikake Rice Seasoning Recipe: Umami-Packed Japanese Blend for Any Meal - October 7, 2026
- Knorr Vegetable Soup Mix Rice Recipe: Savory One-Pot Side Dish - October 7, 2026
- Lebanese Lentil and Rice Soup Recipe: Mujadara-Inspired Warmth in a Bowl - October 7, 2026