
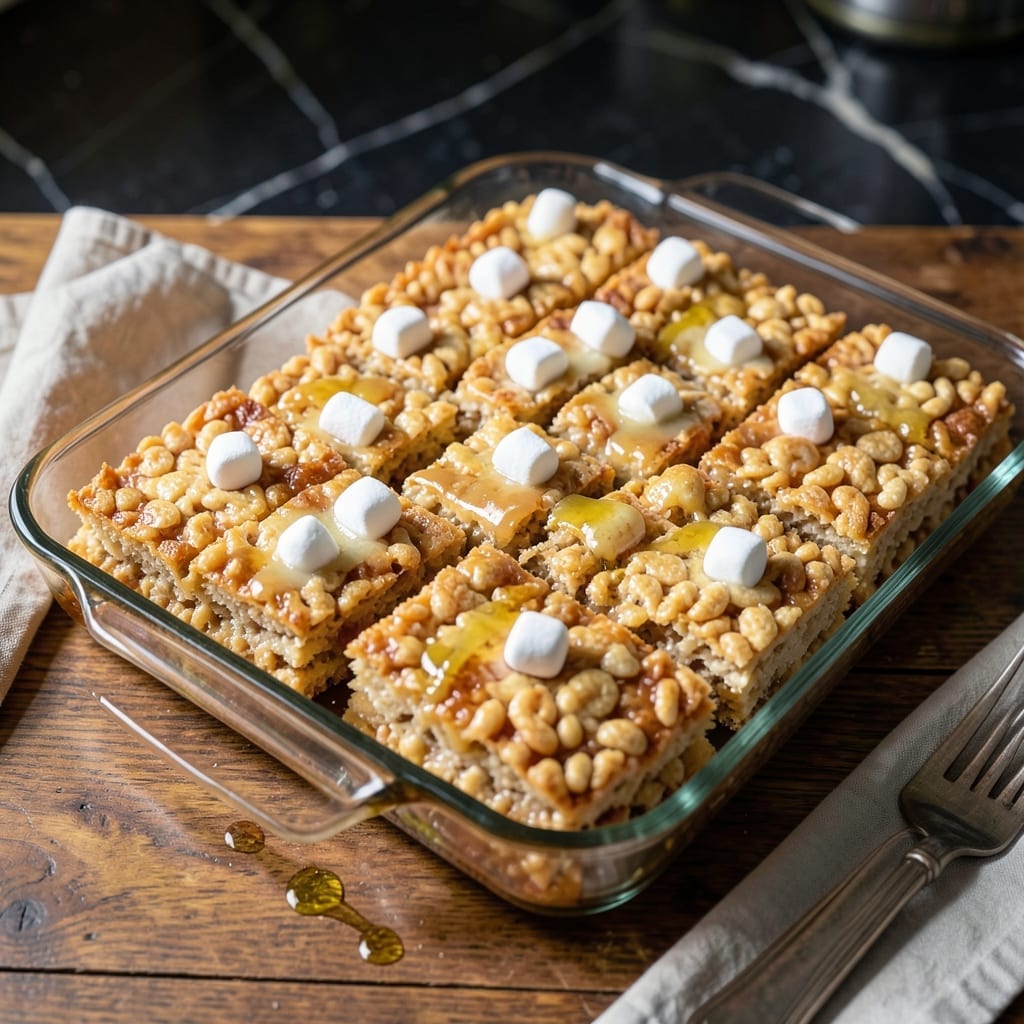
This timeless no-bake treat brings nostalgic crunch to any occasion. The combination of melted marshmallows and crispy cereal creates a texture that’s impossible to resist.
I’ve tested countless ratios to perfect the balance between gooey and firm. The key is melting the butter completely before adding marshmallows and working quickly once the cereal is mixed in.
What you’ll get is a batch of perfectly shaped squares with that signature classic snap. They’re ideal for lunchboxes, potlucks, or a quick sweet fix.
Ready in under 15 minutes, this recipe proves simple ingredients can deliver extraordinary results.
Ingredients for Kellogg’s Rice Krispies
Six simple ingredients create that nostalgic crunch everyone loves in minutes.
| Ingredient | Amount | Notes |
|---|---|---|
| Kellogg's Rice Krispies Cereal 🥣 | 6 cups | Standard crispy rice cereal |
| Miniature Marshmallows ⚪ | 10 oz | Fresh for best melt |
| Unsalted Butter 🧈 | ¼ cup | Or salted, adjusted to taste |
| Vanilla Extract 🌿 | 1 tsp | Pure for best flavor |
| Salt 🧂 | ¼ tsp | Fine grain for even distribution |
| Light Corn Syrup 💧 | 1 tbsp | Optional for extra chewiness |
The cereal is non-negotiable—Kellogg’s Rice Krispies deliver the signature snap. Generic brands often lack the same crisp texture. For the marshmallows, Jet-Puffed or Kraft dissolve smoothly without grittiness. Use unsalted butter so you control the salt content precisely, though salted works if you omit the added salt. The vanilla should be pure extract, not imitation, for depth of flavor.
No corn syrup? Honey or agave substitutes well (though texture varies slightly). For a vegan version, Earth Balance butter and Dandies marshmallows work perfectly. The salt can be omitted if using salted butter. If doubling the recipe, use a larger pot—marshmallows expand significantly during melting. The cereal quantity can be adjusted by half a cup if you prefer chewier or crispier results.
Store in an airtight container at room temperature for up to 3 days. For longer storage, freeze individual portions wrapped in parchment for up to 6 weeks. Press the mixture firmly into the pan to prevent crumbling. Cut only after completely cooled for clean squares.
Why You’ll Love This Recipe
- No-Fuss Mixing: I melt the butter, toss in marshmallows, then stir in the cereal—one pot, zero stress.
- That Vanilla Magic: The vanilla extract turns the simple sweetness into something warm and irresistible.
- Party or Pajama Night: Honestly, it’s my go-to for birthday parties or a solo treat on the couch.
- Stays Fresh for Days: Leftovers? No problem. They keep perfectly in an airtight container for up to three days.
Step-by-Step Instructions for Kellogg’s Rice Krispies Treats
Master these fundamental steps to achieve perfectly chewy, crisp-edged treats with minimal effort.
Step 1: Melt Butter and Prepare Marshmallow Base
In a large, heavy-bottomed saucepan, melt the 0.25 cup Unsalted Butter over low heat. I prefer a light-colored pan so I can monitor the melting process and prevent browning. The butter should melt completely into a golden liquid without any foaming or separation.
Once melted, add the entire 10 oz Miniature Marshmallows package at once. Stir constantly with a silicone spatula or wooden spoon. The marshmallows will gradually soften and collapse into the butter. Continue stirring until the mixture becomes completely smooth with no visible marshmallow pieces—this takes about 5-7 minutes at low heat.
Real talk: if your heat is too high, the marshmallows will brown and develop a caramelized flavor, which changes the classic taste. The mixture should look like a glossy, thick liquid when finished. Remove from heat immediately once smooth.
Step 2: Incorporate Flavor Enhancers
Working quickly while the marshmallow mixture is still hot, stir in the 1 tsp Vanilla Extract, 0.25 tsp Salt, and 1 tbsp Light Corn Syrup. The vanilla adds depth, the salt balances sweetness, and the corn syrup enhances chewiness.
I’ve found that stirring for exactly 30 seconds ensures these ingredients distribute evenly without cooling the mixture too much. The corn syrup will make the mixture slightly shinier. Don’t be tempted to taste yet—the mixture is extremely hot and sticky.
Step 3: Combine with Cereal Off Heat
Place the 6 cups Kellogg’s Rice Krispies Cereal in a large mixing bowl. Pour the hot marshmallow mixture over the cereal. Using the same spatula, fold gently but thoroughly until every piece of cereal is evenly coated. This takes about 1-2 minutes of folding.
Here’s the thing—you want to work quickly before the mixture starts to set, but don’t rush so much that you crush the cereal. The Rice Krispies should maintain their distinct shape while being fully enrobed in the marshmallow mixture. The bowl will be very sticky, so I recommend coating your spatula with a light spray of oil beforehand.
Step 4: Press and Shape the Treats
Transfer the coated cereal to a 9×13-inch baking dish lined with parchment paper. Using the spatula or the back of a greased measuring cup, press the mixture evenly into the pan. Apply firm, consistent pressure to create a uniform layer—this ensures the treats hold together when cut.
I always press down for at least 30 seconds to compact the mixture well. The top should look smooth and slightly glossy. If the mixture sticks to your utensil, wet your fingers with cold water and press with your hands for better control. Leave a slight lip around the edges for easy slicing.
Step 5: Cool and Cut with Precision
Allow the treats to cool at room temperature for 30-45 minutes until completely set. You’ll know they’re ready when the top is firm to the touch and no longer tacky. Resist the urge to refrigerate—they’ll set too hard and lose that perfect chewy texture.
Using a sharp knife, cut into 12 equal squares while still slightly warm for cleaner cuts. Wipe the knife between cuts to prevent sticking. Each piece should hold its shape perfectly with crisp edges and a slightly shiny surface that indicates proper marshmallow distribution.
Pro Tips For Making Kellogg’S Rice Krispies
- Melt Butter Low: Use low heat when melting the butter to prevent browning—burnt butter will make your treats taste bitter. I learned this the hard way after ruining a batch with over-eager heat.
- Fresh Marshmallows Only: Skip the stale mini marshmallows; they won’t melt smoothly. Fresh ones blend seamlessly with the butter and cereal for that perfect gooey texture.
- Press Lightly: Resist the urge to pack the mixture too tightly into the pan—this makes the treats dense and hard. A gentle press keeps them airy and crisp.
- Butter Your Hands: Rub a little butter on your hands before shaping the mixture—it stops sticking and makes the process way less messy. Sounds weird, but it works.
Essential Equipment for This Recipe
Essential Cookware
Start with a large, heavy-bottomed saucepan—I use my 3-quart Cuisinart for even heat distribution. A light-colored interior helps monitor melting progress and prevent scorching. Avoid nonstick pans as the marshmallow mixture can damage the coating over time. 🔥
Mixing Tools
A silicone spatula is non-negotiable for stirring melting marshmallows and folding in cereal. The heat-resistant silicone won’t melt and cleans easily. I also keep a wooden spoon as backup for the initial butter melting stage.
Baking Dish
A 9×13-inch baking dish creates the perfect thickness for 12 squares. Line it with parchment paper for easy removal and cleanup. For firmer treats, use a slightly smaller 8×8-inch dish.
Prep Accessories
Keep cooking spray and a measuring cup handy. Lightly grease your spatula and measuring cup to prevent sticking during pressing. A sharp chef’s knife ensures clean cuts for professional-looking squares.
Optional Upgrades
For frequent batches, invest in a candy thermometer to monitor marshmallow temperature. A bench scraper helps divide the mixture evenly in the pan. These aren’t essential but make the process smoother.
Cleanup Helpers
Have hot soapy water ready—marshmallow residue hardens quickly. I soak my tools immediately after use. A damp cloth works well for wiping down counters during prep.
Nutrition Facts
Frequently Asked Questions
Can I use regular marshmallows instead of mini?
Yes, but cut them into smaller pieces first for even melting. Mini marshmallows dissolve faster and more uniformly, but 10 oz of regular ones work fine with extra stirring.
Why did my treats turn out hard?
Overcooking the marshmallow mixture is the usual culprit. Keep heat at low and remove from stove as soon as it’s smooth. Pressing too firmly can also make them dense.
How do I make them extra chewy?
Add 1-2 tbsp extra corn syrup or replace 1 cup cereal with golden grahams. Let them cool for only 20 minutes before cutting.
Can I add chocolate chips?
Fold in 1 cup of chips after mixing cereal, or melt chocolate to drizzle on top. Use mini chips to avoid sinking.

- Mujadara Rice and Lentils Recipe: Earthy Spiced Lentils With Caramelized Onions - November 1, 2026
- Naija Fried Rice Recipe: Street-Style Spice With Veggie Crunch - November 1, 2026
- Mushy Rice Recipe: Fluffy Grains Transformed in Minutes - November 1, 2026