
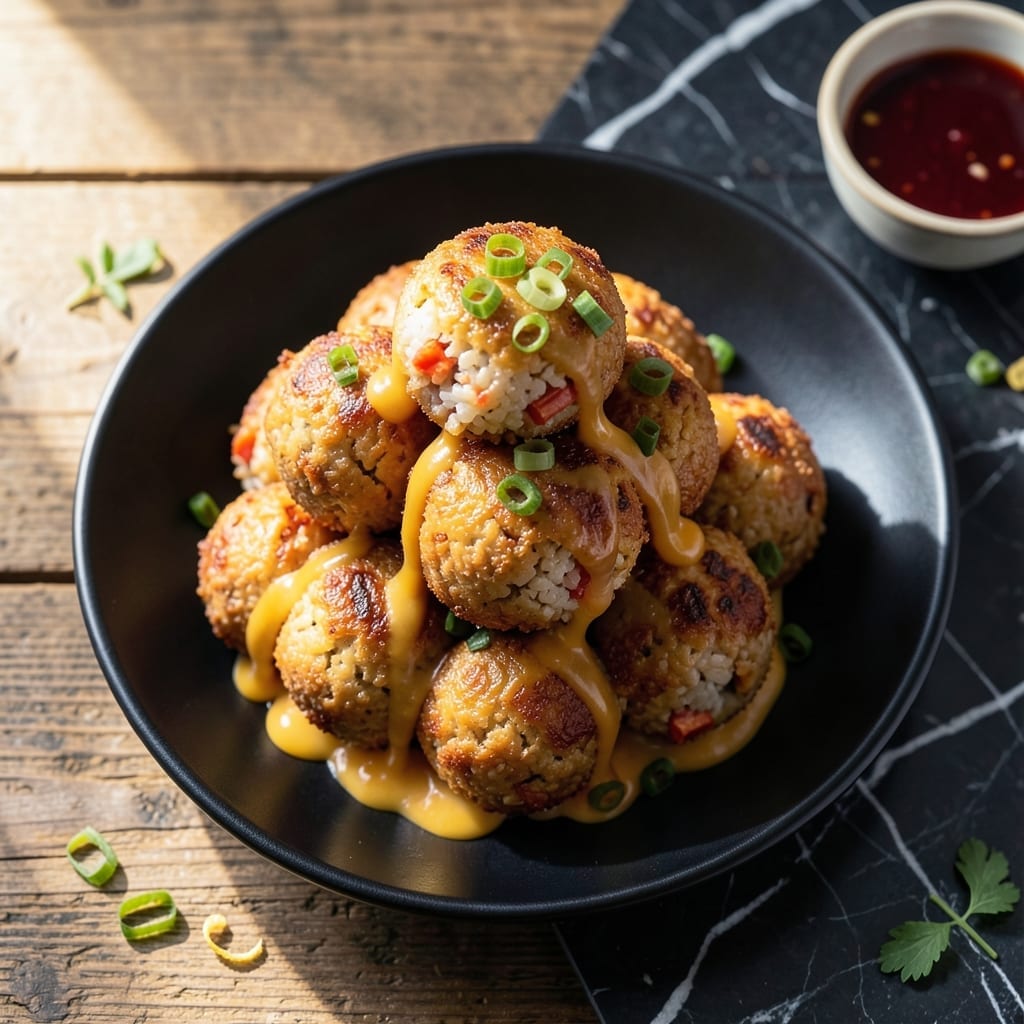
These golden rice balls deliver a perfect fusion of Korean spice and creamy comfort in every bite. The crispy exterior gives way to a molten cheese center, balanced by kimchi’s signature tangy heat.
I developed this recipe after discovering how well kimchi’s fermented complexity pairs with gooey cheese. The key is using cold, day-old rice that binds better and fries up extra crispy.
The process is straightforward: mix, shape, bread, and fry. Each step builds texture and flavor, ensuring the filling stays intact while achieving that ideal crunch.
Serve these as a bold appetizer or satisfying snack. Their addictive contrast of textures and flavors will make them disappear quickly.
Ingredients for Kimchi Cheese Rice Balls
Cold rice, tangy kimchi, and melty cheese make these crispy bites irresistible. Just pantry staples and a few extras.
| Ingredient | Amount | Notes |
|---|---|---|
| Cooked White Rice 🍚 | 3 cups | Day-old, cold, well-chilled |
| Kimchi 🥬 | 1 cup | Finely chopped, well-fermented |
| Cheddar Cheese 🧀 | 1 cup | Block, cut into small cubes |
| Mozzarella Cheese 🧀 | ½ cup | Low-moisture, shredded |
| All-Purpose Flour 🌾 | ½ cup | For initial coating |
| Large Eggs 🥚 | 2 whole | Beaten for breading |
| Panko Breadcrumbs 🍞 | 1 ½ cups | For crispy exterior |
| Vegetable Oil 🫒 | 2 cups | For deep frying |
| Green Onions 🧅 | ¼ cup | Thinly sliced, for garnish |
| Sesame Seeds 🌿 | 1 tbsp | Toasted, for garnish |
| Kimchi Juice 💧 | 2 tbsp | Reserved from kimchi |
| Cornstarch 🌾 | 2 tbsp | For binding rice mixture |
| Garlic Powder 🧄 | ½ tsp | For added flavor in breading |
| Salt 🧂 | ½ tsp | To taste, for seasoning |
| Black Pepper 🌶️ | ¼ tsp | Freshly ground preferred |
The rice quality is non-negotiable here. Day-old jasmine or short-grain white rice binds best and fries up extra crispy—freshly cooked rice falls apart. Korean markets have the best kimchi selection, but most grocery stores carry it now (look for Nongshim or Sinto brands). The cheddar should be block cheese you cube yourself—pre-shredded has anti-caking agents that don’t melt as well.
No kimchi on hand? Sauerkraut with a pinch of gochugaru (Korean chili flakes) gets you close to that tangy heat. Swap mozzarella for Monterey Jack if you prefer a milder melt. For gluten-free, crushed rice cereal or gluten-free panko works for breading. The panko is key for crunch—regular breadcrumbs won’t give you that perfect crisp.
These keep best eaten fresh, but leftovers reheat well in an air fryer for 3-4 minutes. Store uncooked rice balls in the fridge for up to 24 hours before frying. Freeze cooked ones for up to 1 month—reheat from frozen in hot oil (no thawing).
Why You’ll Love This Recipe
- One Bowl Wonder: I just dump rice, chopped kimchi, and shredded cheddar into a bowl, mix, and roll—no fancy steps.
- Flavor Explosion: That tangy kimchi with melty mozzarella inside? Honestly, it’s the reason I make these every week.
- Party or Lunchbox: I pack these for picnics or serve them warm at gatherings—always a hit with kids and adults alike.
- Budget Stretch: A little cheese and kimchi go a long way, and leftover rice gets used up instead of wasted.
Step-by-Step Instructions for Kimchi Cheese Rice Balls
Here’s the method. Straightforward, tested, works every time.
Step 1: Combine Rice, Kimchi, Cheeses, and Binders
In a large mixing bowl, combine the 3 cups Cooked White Rice with the 1 cup Kimchi, 1 cup Cheddar Cheese, 0.5 cup Mozzarella Cheese, 2 tbsp Kimchi Juice, and 2 tbsp Cornstarch. The cold rice is essential—it holds its shape better than warm rice and prevents the mixture from becoming mushy.
Mix thoroughly until the cheese cubes are evenly distributed and the rice takes on a vibrant pink hue from the kimchi. I use my hands for this step to ensure everything is well incorporated. The mixture should hold together when pressed but not be overly sticky.
Step 2: Form into Balls and Apply Initial Coating
Using your hands, scoop about 2 tablespoons of the rice mixture and gently press it into a ball. You should get roughly 16 balls from the 3 cups Cooked White Rice. Place the formed balls on a plate and refrigerate for 15 minutes to firm up—this prevents them from falling apart during breading.
Set up a breading station with three shallow bowls. In the first, place the 0.5 cup All-Purpose Flour mixed with 0.5 tsp Salt and 0.25 tsp Black Pepper. Roll each chilled rice ball in the flour mixture, pressing gently to adhere. Shake off any excess.
Step 3: Dip in Egg and Coat with Panko
In the second bowl, beat the 2 whole Large Eggs with 0.5 tsp Garlic Powder. Dip each floured rice ball into the egg mixture, ensuring it’s fully coated. Let any excess egg drip off before moving to the final bowl.
In the third bowl, place the 1.5 cups Panko Breadcrumbs. Roll each egg-coated ball in the panko, pressing gently to create a thick, even layer. The panko’s coarse texture is what delivers that promised crispy exterior. Return the breaded balls to the plate and refrigerate for another 10 minutes to set the coating.
Step 4: Fry Until Golden and Crisp
Heat the 2 cups Vegetable Oil in a deep, heavy-bottomed pot over medium-high heat until it reaches 350°F. Use a thermometer for accuracy—oil that’s too cool will make the balls greasy, while oil that’s too hot will burn the outside before the inside warms through.
Carefully lower 3-4 breaded balls into the hot oil at a time, avoiding overcrowding. Fry for 3-4 minutes, turning occasionally, until they’re golden brown and crispy on all sides. The cheese inside should be fully melted and gooey. Transfer to a paper towel-lined plate to drain excess oil.
Step 5: Garnish and Serve Immediately
While still hot, sprinkle the fried rice balls with 0.25 cup Green Onions and 1 tbsp Sesame Seeds. The contrast of the crispy exterior, melty cheese, and tangy kimchi inside is best enjoyed fresh out of the fryer. Serve with extra kimchi juice for dipping if desired.
Real talk: these are at their peak when the cheese is still stretching with every bite. Don’t let them sit too long—they’re meant to be devoured immediately.
Pro Tips For Making Kimchi Cheese Rice Balls
- Chill the rice: Use day-old, refrigerated rice—it’s drier and sticks together better than fresh, so your balls won’t fall apart when frying. I learned this the hard way after my first batch turned into kimchi cheese pancakes.
- Drain the kimchi: Squeeze out as much liquid as possible from the kimchi before mixing it in, or the filling will be soggy and leak out during cooking.
- Seal the cheese: Completely enclose the cheese in the rice mixture when forming the balls, or it’ll ooze out too early and burn in the oil—yes, even if you’re impatient like me.
- Double coat for crunch: Roll the balls in flour first, then dip in beaten egg, and coat again in flour for a crispier exterior that holds up to the gooey center.
Creative Variations of This Dish
Spicy Sriracha Boost
Add 1 tbsp sriracha to the rice mixture for extra heat. This pairs perfectly with the kimchi’s tang while complementing the melty cheese. I also mix ½ tsp sriracha powder into the panko for a spicy, crispy coating. 🌶️
Bacon Lovers Twist
Cook 4 strips bacon until crispy, crumble into the rice mixture, and replace cheddar with smoked gouda. The smoky depth elevates the dish. Use reserved bacon fat for frying to amplify the flavor.
Vegetarian Delight
Swap cheddar for pepper jack cheese and add ¼ cup finely diced bell peppers to the rice mix. This version keeps the spice level high while adding freshness. Serve with a side of spicy mayo for dipping.
Gluten-Free Option
Replace all-purpose flour with cornstarch and use gluten-free panko for breading. The texture remains crispy, and the flavor stays intact. I find Kikkoman gluten-free panko works best for this swap.
Sweet and Spicy
Add 1 tbsp honey to the rice mixture for a touch of sweetness. Balance it with ½ tsp gochugaru (Korean chili flakes) for heat. This variation creates a complex flavor profile that’s surprisingly addictive.
Air Fryer Version
Spray breaded balls with cooking oil and air fry at 375°F for 8-10 minutes, shaking halfway. The result is slightly less crispy but just as delicious with less oil. Perfect for a lighter take on this dish. 💡
Nutrition Facts
Frequently Asked Questions
Can I use fresh rice instead of day-old?
No, fresh rice is too moist and sticky. Day-old, cold rice holds its shape better and creates that perfect crispy texture when fried.
How do I prevent the cheese from leaking out?
Make sure your cheese cubes are completely enclosed in the rice mixture. Chill the balls for 15 minutes before frying to help them hold together.
What’s the best oil for frying?
Use a neutral oil with a high smoke point like vegetable, peanut, or canola oil. Avoid olive oil as it can burn at 350°F.
Can I bake these instead of frying?
Yes! Bake at 400°F for 15-20 minutes on a wire rack for even browning. They’ll be less crispy but still delicious.

- Mujadara Rice and Lentils Recipe: Earthy Spiced Lentils With Caramelized Onions - November 1, 2026
- Naija Fried Rice Recipe: Street-Style Spice With Veggie Crunch - November 1, 2026
- Mushy Rice Recipe: Fluffy Grains Transformed in Minutes - November 1, 2026