
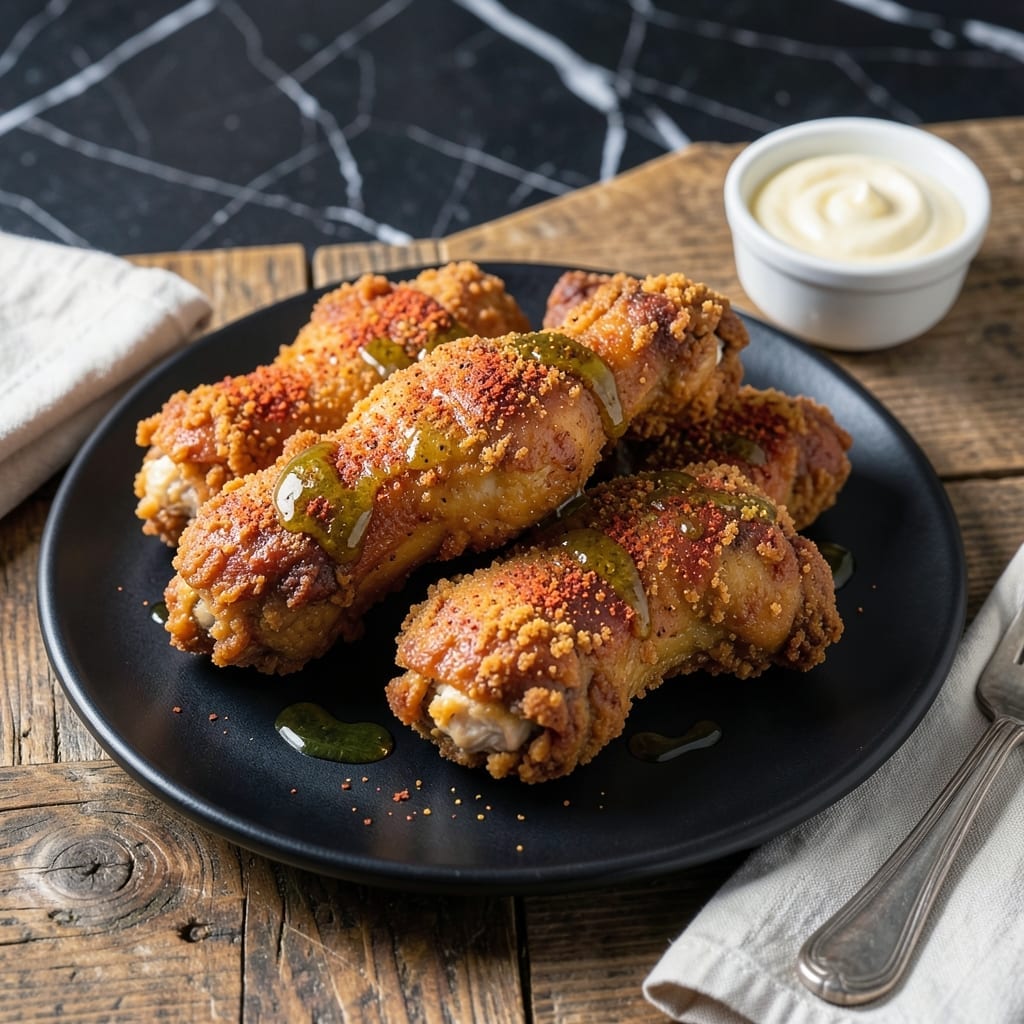
This fried chicken recipe delivers a crispy coating that shatters at first bite, revealing juicy meat underneath. The secret lies in a carefully balanced spice blend and precise cooking technique.
I developed this method after years of testing different approaches. The key is maintaining the right oil temperature and using a double-dipping process for maximum crunch.
Each piece emerges with a golden brown crust that stays crispy long after frying. The spice blend adds depth without overpowering the natural chicken flavor.
Serve immediately for the best texture. This technique works for both bone-in pieces and tenders with equally impressive results.
Ingredients for 5 Star Fried Chicken
Quality ingredients ensure that perfect crunch and juicy interior every single time.
| Ingredient | Amount | Notes |
|---|---|---|
| Chicken Thighs and Drumsticks 🍗 | 3 ½ lb | Bone-in, skin-on for best texture |
| Buttermilk 🥛 | 2 cups | Full-fat for maximum tenderness |
| All-Purpose Flour 🌾 | 3 cups | Divided for double-dipping process |
| Cornstarch 🌽 | ½ cup | For extra crispiness |
| Paprika 🌶️ | 2 tbsp | Sweet or smoked for depth |
| Garlic Powder 🧄 | 1 tbsp | Freshly ground if possible |
| Onion Powder 🧅 | 1 tbsp | Balances the spice blend |
| Salt 🧂 | 1 tbsp | Diamond Crystal kosher preferred |
| Black Pepper 🌶️ | 1 tsp | Freshly ground for best flavor |
| Cayenne Pepper 🔥 | ½ tsp | Adjust for desired heat level |
| Dried Thyme 🍃 | 1 tsp | Crushed between fingers to release oils |
| Dried Oregano 🌿 | 1 tsp | Mediterranean variety preferred |
| Vegetable Oil 🫒 | 8 cups | Peanut oil works best for high heat |
| Large Eggs 🥚 | 2 whole | Whisked into buttermilk for binding |
The chicken is critical—opt for bone-in, skin-on thighs and drumsticks for optimal texture and flavor. ButcherBox offers excellent quality, but standard grocery store options work well if fresh. The buttermilk must be full-fat; low-fat versions lack the acidity and richness needed for proper tenderizing. For the flour, King Arthur all-purpose is the gold standard for consistent results.
No buttermilk? Whole milk with 1 tbsp vinegar per cup works in a pinch. For gluten-free, swap all-purpose flour for 1:1 gluten-free blend plus 1 tsp xanthan gum. Adjust cayenne to taste—omit entirely for mild heat or double for extra kick. The cornstarch can be replaced with arrowroot powder if needed, though texture may vary slightly.
Marinate chicken in buttermilk mixture for 12-24 hours for maximum tenderness. Store raw chicken in the coldest part of your fridge—use within 2 days. Fried chicken is best eaten immediately but can be kept warm in a 200°F oven for up to 1 hour.
Why You’ll Love This Recipe
- One Bowl Wonder: I toss everything in one bowl—no fancy prep, just buttermilk, flour, and that paprika kick doing all the work.
- Crispy Perfection: The cornstarch in the mix gives it that shatteringly crisp crust while the buttermilk keeps the meat insane juicy.
- Crowd Pleaser: I’ve served this at picnics, Sunday dinners, and even a last-minute birthday—always disappears first.
- Budget Hero: Chicken thighs and drumsticks stretch far, and honestly, leftovers taste just as good cold the next day.
Step-by-Step Instructions for 5 Star Fried Chicken
Master the technique for restaurant-quality results with this precise, professional method.
Step 1: Brine and Marinate the Chicken
Pat the 3.5 lb Chicken Thighs and Drumsticks completely dry with paper towels. This critical step removes surface moisture that would interfere with the coating’s adhesion and crispiness.
In a large bowl, whisk together the 2 cups Buttermilk and 2 whole Large Eggs until fully combined. Submerge the chicken pieces in this mixture, ensuring they are completely coated. Cover and refrigerate for at least 4 hours, or preferably overnight. This extended marination tenderizes the meat and allows the buttermilk to penetrate deeply, resulting in exceptionally juicy chicken.
Step 2: Prepare the Seasoned Flour Dredge
In a large, shallow dish, combine 3 cups All-Purpose Flour, 0.5 cup Cornstarch, 2 tbsp Paprika, 1 tbsp Garlic Powder, 1 tbsp Onion Powder, 1 tbsp Salt, 1 tsp Black Pepper, 0.5 tsp Cayenne Pepper, 1 tsp Dried Thyme, and 1 tsp Dried Oregano.
Whisk thoroughly until all ingredients are evenly distributed and no streaks of spice remain visible. The cornstarch is essential for achieving that ultra-crispy texture, while the blend of spices creates the signature flavor profile. I recommend crushing the dried thyme between your fingers as you add it to release its aromatic oils.
Step 3: Double-Dredge for Maximum Crunch
Remove the chicken from the buttermilk mixture, allowing any excess to drip off. Dredge each piece thoroughly in the seasoned flour mixture, pressing firmly to ensure the coating adheres completely to all surfaces. Shake off any excess flour.
Return the floured chicken to the buttermilk mixture for a second dip, then dredge in the flour mixture once more. This double-dipping process creates a thicker, more robust crust that will crisp up beautifully. Place the coated pieces on a wire rack set over a baking sheet and let them rest for 15 minutes to allow the coating to set.
Step 4: Fry to Golden Perfection
In a large, heavy-bottomed pot or Dutch oven, heat the 8 cups Vegetable Oil to 350°F. Use a deep-fry thermometer to monitor the temperature precisely, as maintaining the correct oil temperature is crucial for even cooking and optimal crispiness.
Working in batches to avoid crowding the pot, carefully lower the chicken pieces into the hot oil. Fry for 12-15 minutes, turning occasionally, until the coating is deep golden brown and the internal temperature reaches 165°F. The chicken should float freely when fully cooked.
Drain the fried chicken on a wire rack set over a baking sheet to maintain crispiness. Avoid draining on paper towels, as this can create steam that makes the coating soggy. Let the chicken rest for 5 minutes before serving to allow the juices to redistribute and the coating to set fully.
Pro Tips For Making 5 Star Fried Chicken
- Double-Dredge the Chicken: Dip each piece in buttermilk, then flour, then buttermilk again, then flour again—this builds a shatteringly crisp crust that actually stays put.
- Rest Before Frying: Let the dredged chicken sit for 10-15 minutes on a wire rack before frying; the coating sets better and you’ll get fewer crumbs floating in your oil.
- Use a Thermometer: I learned this the hard way—oil at 350°F is non-negotiable for even cooking, and dark meat needs to hit 175°F inside to be both safe and juicy.
- Swap Half the Flour: Replace about ¼ of the all-purpose flour with cornstarch—it makes the crust lighter and extra crispy without changing the flavor.
Pro Cooking Tips for 5 star fried chicken
Oil Temperature Control
Use a deep-fry thermometer to maintain 350°F oil temperature. I swear by ThermoPro for accuracy. If oil drops below 340°F, your crust will absorb grease instead of crisping. Adjust heat between batches to compensate for temperature loss. 🌡️
Double-Dip Technique
The second dredge creates that signature crunch. Press firmly when coating—don’t be shy! Let the floured pieces rest 15 minutes before frying. This sets the coating so it won’t slide off during cooking. I use a wire rack to prevent soggy bottoms.
Batch Frying Strategy
Never crowd the pot—fry in batches with 2 inches between pieces. Overcrowding lowers oil temperature and leads to uneven cooking. A 5-6 quart Dutch oven works perfectly for home frying. Turn pieces halfway through for even browning.
Draining and Resting
Drain on a wire rack, not paper towels, to maintain crispiness. Paper towels trap steam, creating a soggy coating. Rest 5 minutes before serving—this lets juices redistribute and the crust set fully. The wait is worth it for that perfect crunch. 🔥
Thermometer Check
Always verify internal temperature reaches 165°F. Use an instant-read thermometer—ThermoWorks is my go-to. Check thickest pieces first, as they take longest to cook. Dark meat can handle slightly higher temps without drying out.
Oil Selection
For best results, use peanut oil—it has a high smoke point and neutral flavor. Vegetable or canola oil work too. Avoid olive oil, as its low smoke point can lead to burning. Change oil after 3-4 uses to prevent off-flavors.
Nutrition Facts
Frequently Asked Questions
Can I use chicken breasts instead of thighs?
Yes, but adjust cooking time to 10-12 minutes since breasts cook faster. They may be slightly less juicy than dark meat. For best results, brine them first to prevent dryness.
Why is the oil temperature so important?
Too low (340°F) and chicken absorbs oil, becoming greasy. Too high and the outside burns before the inside cooks. 350°F is the sweet spot for crispy outside and juicy inside.
How do I keep the coating crispy longer?
Drain on a wire rack, not paper towels. Keep finished pieces warm in a 200°F oven while frying batches. Avoid covering, as steam will soften the crust.
Can I make this gluten-free?
Yes! Substitute all-purpose flour with a 1:1 gluten-free blend and add 1 tsp xanthan gum. The texture may vary slightly but will still be crispy.

- Chuy’s Green Chili Rice Copycat Recipe: Spicy Southwest Flavor in Every Bite - September 25, 2026
- Beaten Rice Recipe: Fluffy Grains With Nutty Depth - September 25, 2026
- Machboos Rice Recipe: Bahraini Spiced One-Pot Tradition - September 25, 2026