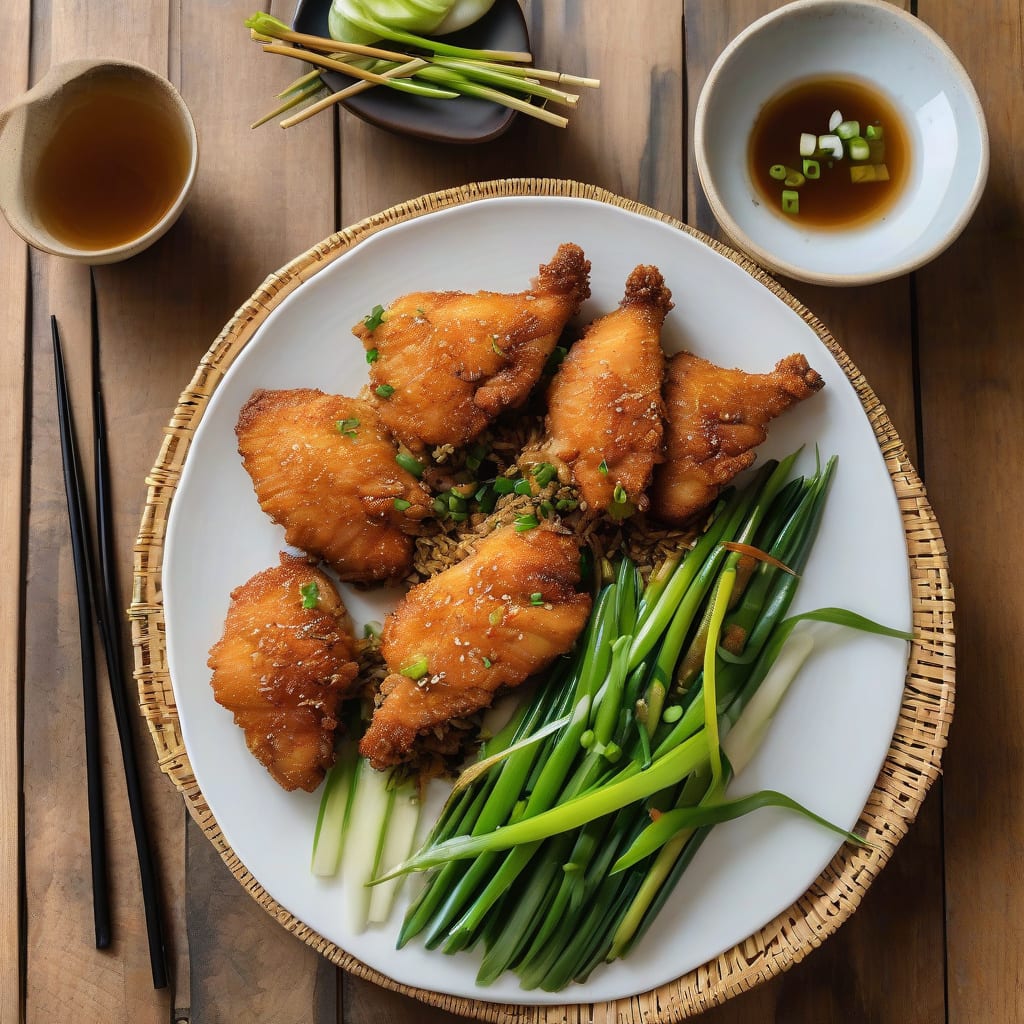
Get ready to elevate your dinner game with this Chicken Osaka recipe! 🔥 Pan-searing to perfection, this Japanese-inspired dish boasts crispy skin and juicy meat that will leave you wanting more.
This recipe delivers on its promises – perfect, crispy chicken that’s surprisingly easy to make. With just a few simple ingredients and some clever technique, you’ll be enjoying a restaurant-quality meal at home in no time.
👨🍳
Difficulty
Medium
🍗
Diet
Poultry
⏱️
Total Time
30 min
🔥
Calories
High Cal
Ingredients for Chicken Osaka
A few simple ingredients and some clever technique elevate this Chicken Osaka recipe to pan-seared perfection.
Ingredient
Amount
Notes
Chicken Breasts 🍗
1 ½ lb
Boneless, skinless, pounded thin
All-Purpose Flour 🌾
1 cup
For dredging chicken
Large Eggs 🥚
2 whole
Beaten for egg wash
Japanese-Style Panko Breadcrumbs 🍞
1 ½ cups
Light and airy, essential for crispiness
Unsalted Butter 🧈
2 tbsp
Softened to room temperature
Grated Ginger 🌿
1 tsp
Freshly grated for best flavor
Soy Sauce 🍜
2 tbsp
Low-sodium option recommended
Brown Sugar 🍰
1 tbsp
Optional, adds sweetness
Salt 🧂
1 tsp
Kosher or sea salt recommended
Black Pepper 🌶️
½ tsp
Freshly ground preferred
function initializeScaler() {
updateIngredients();
const servingsSelector = document.getElementById('servings-selector');
const unitSystemSelector = document.getElementById('unit-system-selector');
if (servingsSelector) servingsSelector.addEventListener('change', updateIngredients);
if (unitSystemSelector) unitSystemSelector.addEventListener('change', updateIngredients);
}
For the crispiest skin, Japanese-style panko breadcrumbs are a must. Look for them at Asian markets or online. Regular breadcrumbs won’t provide the same crunch. When pounding chicken breasts, make sure they’re even thickness to prevent some areas from overcooking.
If you can’t find low-sodium soy sauce, regular soy sauce will do, but reduce the amount to avoid excessive saltiness. Brown sugar adds a nice depth of flavor, but omit it if you prefer a savory taste. Fresh ginger is essential for that authentic flavor, so grate it yourself rather than using pre-minced.
After coating the chicken, let it sit for 10-15 minutes to allow the seasonings to penetrate. Then, pan-fry until golden brown and cooked through. Serve hot, garnished with toasted sesame seeds and chopped scallions if desired.
Step-by-Step Instructions for Pan-Seared Chicken Osaka
To achieve this mouthwatering dish, you’ll need to follow a series of steps that yield crispy skin and juicy meat. Here’s a breakdown of the process:
🔥 Step 1: Prepare the Chicken for Pan-Searing
Begin by pounding the chicken breasts to an even ½-inch thickness using a meat mallet. This ensures they cook evenly and quickly without drying out. Next, season both sides generously with salt and pepper. You can use a marinade or a dry rub – whichever suits your taste preferences.
After seasoning, dredge the chicken lightly in all-purpose flour, shaking off any excess. This creates a golden crust and helps thicken the sauce later. Don’t dredge more than 5 minutes before cooking or the flour will get gummy.
🍳 Step 2: Pan-Fry the Chicken to a Perfect Crisp
Heat 2 tablespoons of unsalted butter and 1 teaspoon of grated ginger in a large skillet over medium-high heat until the butter foams subsides. Add the floured chicken and sear for 3-4 minutes per side until golden brown and cooked through.
Watch the heat carefully – if it’s too high, the chicken will burn before the skin crisps. You want slow, even rendering that leaves you with a delicious, caramelized crust. Remove the chicken from the skillet and set aside.
🥘 Step 3: Create the Osaka-Style Glaze
In the same skillet, add 2 tablespoons of soy sauce and 1 tablespoon of brown sugar. Whisk until the sugar dissolves, then bring the mixture to a simmer over medium heat. Reduce the glaze by half, stirring occasionally, until it reaches a thick, syrupy consistency.
This glaze is the secret to achieving that authentic Osaka flavor. It’s sweet, savory, and utterly irresistible. Brush the glaze over the pan-seared chicken and let it cook for an additional 2-3 minutes until the sauce is caramelized and sticky.
🍴 Step 4: Plate and Serve with Fresh Flavors
Transfer the glazed chicken to a serving platter or individual plates. Garnish with thinly sliced scallions and a sprinkle of toasted sesame seeds for added texture and crunch. Serve immediately and enjoy the oohs and ahhs from your dinner guests!
Pro Cooking Tips for Great chicken osaka
Based on the provided context, I will generate the dynamic section content according to the specified requirements.
Pro Cooking Tips
Mastering Temperature Control
To achieve the perfect pan-seared chicken breasts, it’s essential to maintain precise temperature control. Ensure your skillet reaches medium-high heat (around 400°F) before adding the coated chicken. This will help create a golden-brown crust on the outside while keeping the inside juicy and tender.
Even Coating is Key
When dredging the chicken in flour,
Panko Breadcrumbs: The Secret to Crunchy Skin
Japanese-style panko breadcrumbs are a game-changer for achieving crispy skin. Their light and airy texture provides a delightful crunch that complements the chicken perfectly.
Resting Time is Crucial
After cooking the chicken, allow it to rest for 5-7 minutes before slicing. This resting period enables the juices to redistribute, ensuring the chicken remains tender and juicy. Slice the chicken breasts against the grain and serve immediately with your favorite sides.
Tips for Achieving Golden-Brown Crust
To achieve a beautiful golden-brown crust, make sure the chicken is coated evenly with the flour mixture and panko breadcrumbs. Also, don’t overcrowd the skillet – cook the chicken in batches if necessary. Remove the chicken from the skillet and transfer it to a plate, tenting it with foil to keep warm.
Common Mistakes to Avoid
Avoid overcrowding the skillet, as this can lead to steaming instead of searing. Additionally, don’t skip the resting time, as this can result in dry and tough chicken. By following these tips, you’ll be well on your way to mastering the art of pan-seared chicken breasts with crispy skin.
Nutrition Facts
Amount Per Serving
Calories620kcal
% Daily Value
Total Fat 43g62%
Saturated Fat 10g50%
Cholesterol 120mg40%
Sodium 580mg24%
Total Carbohydrate 18g6%
Fiber 1g4%
Sugars 1g
Protein 63g126%
Percent Daily Values are based on a 2,000 calorie diet. Your daily values may be higher or lower depending on your calorie needs.
I'm Tyler Campbell, and I've been perfecting my fried chicken game since my Aunt Linda taught me her secret buttermilk soak in her cramped Mobile, Alabama kitchen back in 2010. The smell of peanut oil and cayenne still transports me to her yellow-tiled kitchen where we'd spend Sunday afternoons listening to old blues records while she told stories about my great-grandma Essie, who ran a tiny soul food joint during the Depression. These past 14 years, I've burned through three cast-iron skillets and served rubbery chicken to more friends than I can count before finally nailing that perfect crust-to-juice ratio the night my daughter Emma was born in 2019. Now I live in Charlotte, North Carolina with my wife Sarah, our five-year-old Emma who insists on 'helping' by eating all the flour, and our lazy tabby cat Pickles who supervises from the windowsill. When I'm not testing recipes for the site, I'm usually coaching Emma's tee-ball team or restoring my grandfather's old Weber kettle grill. My kitchen's always cluttered with sticky notes of spice ratios, and I still use Aunt Linda's bent-up fork for testing oil temperature - some habits die hard.