
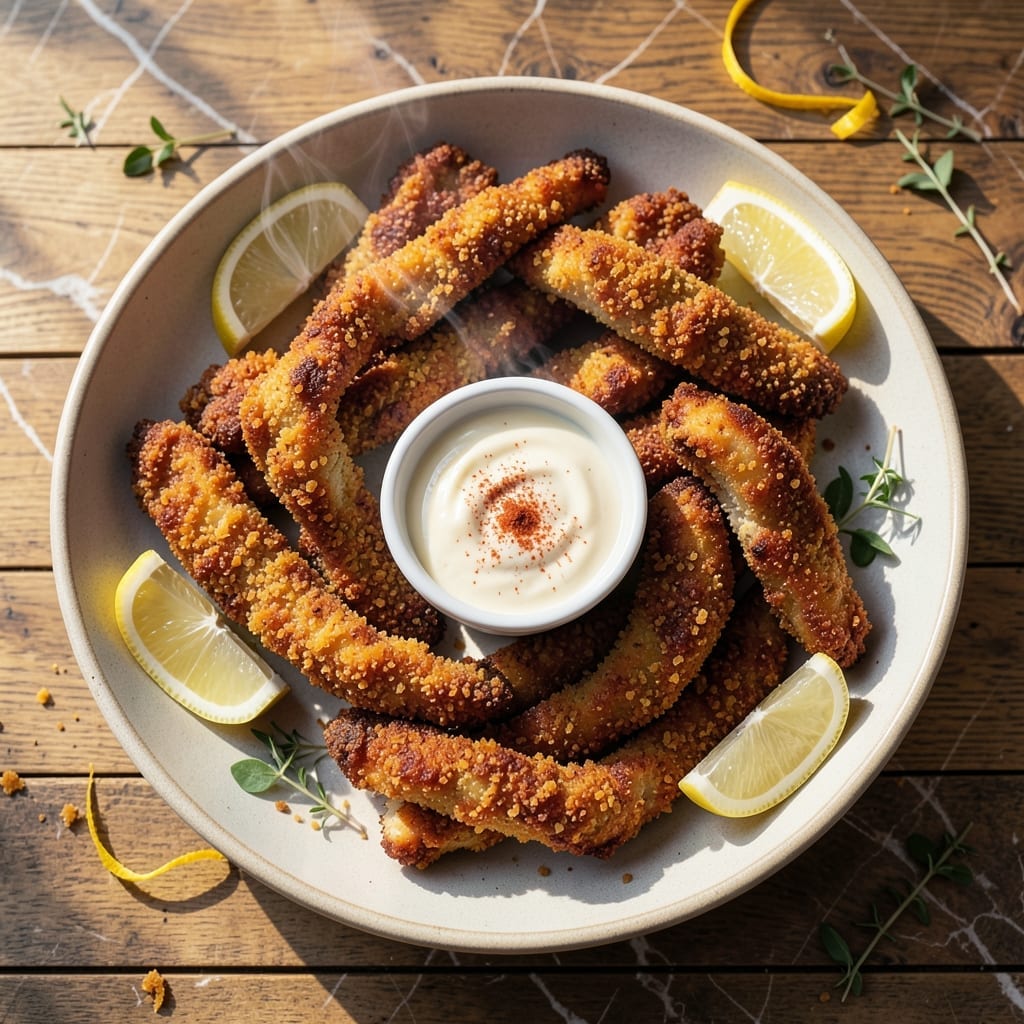
Achieving the ideal balance between a crispy coating and tender centers is simpler than you think with this proven method.
I developed this technique through years of testing to ensure every bite delivers that perfect texture contrast. The secret lies in a two-step breading process and precise cooking temperature.
The result is consistently golden-brown tenders with an audible crunch that gives way to juicy, perfectly cooked chicken. This method works whether you’re frying or baking.
Serve hot with your favorite dipping sauces for a meal that satisfies every time. Here’s how to make them right.
Ingredients for Basic Chicken Tenders
Simple ingredients for that perfect crunch and juicy center every time.
| Ingredient | Amount | Notes |
|---|---|---|
| Chicken Breast 🍗 | 1 ½ lb | Boneless, skinless, cut into strips |
| All-Purpose Flour 🌾 | 1 cup | For initial dredging |
| Large Eggs 🥚 | 2 whole | Beaten for egg wash |
| Panko Breadcrumbs 🍞 | 2 cups | For crispy texture |
| Cornstarch 🌾 | 2 tbsp | Mixed with flour for extra crisp |
| Garlic Powder 🧄 | 1 tsp | For seasoning the breading |
| Onion Powder 🧅 | 1 tsp | For seasoning the breading |
| Paprika 🌶️ | 1 tsp | Sweet or smoked variety |
| Salt 🧂 | 1 tsp | Kosher or sea salt |
| Black Pepper 🌶️ | ½ tsp | Freshly ground preferred |
| Vegetable Oil 🫒 | 2 cups | For frying or baking |
| Buttermilk 🥛 | ½ cup | For marinating chicken |
The chicken is key here. Boneless, skinless breasts work best—thighs stay too moist and don’t crisp as well. I grab mine from Costco (cheaper in bulk) or the butcher counter at Whole Foods. Look for even thickness so they cook uniformly. If you’re short on time, pre-cut tenders from the grocery store work fine (just pat them dry first).
No buttermilk? Thin plain yogurt with a splash of milk or use milk with a teaspoon of vinegar. Panko is non-negotiable for that extra-crispy coating—regular breadcrumbs just don’t compare. Out of paprika? Cayenne for heat or skip it entirely. The cornstarch in the flour mix is the secret to that golden-brown crust (don’t skip it).
Prep the chicken right before cooking—it doesn’t like sitting in buttermilk too long. Leftovers? They’ll keep in the fridge for 3-4 days, but they’re best fresh. Reheat in the oven or air fryer to restore the crunch.
Why You’ll Love This Recipe
- One Pan Magic: I mix the flour, eggs, and panko right on a plate—no extra bowls, no mess.
- Crispy Outside, Juicy Inside: The cornstarch in the breading gives that perfect crunch while keeping the chicken tender.
- Kid-Approved Dinner: Honestly, it’s the only meal my picky nephew cleans his plate for without complaints.
- Budget Stretcher: A pound of chicken breast turns into four servings, and leftovers reheat like a dream.
Step-by-Step Instructions for Chicken Tenders
Here’s the method that guarantees a crispy exterior with juicy meat inside every time.
Step 1: Marinate and Season the Chicken
Cut the 1.5 lb Chicken Breast into uniform strips about 1 inch wide. Pat them completely dry with paper towels—this is crucial for the breading to stick properly. Place the strips in a bowl with the 0.5 cup Buttermilk, 1 tsp Salt, 0.5 tsp Black Pepper, 1 tsp Garlic Powder, 1 tsp Onion Powder, and 1 tsp Paprika.
Mix gently to ensure all pieces are coated, then let them marinate for 15-20 minutes. This step tenderizes the chicken and infuses it with flavor, so don’t skip it. The buttermilk also helps the breading adhere better when you fry.
Step 2: Set Up Your Breading Station
In a shallow dish, combine the 1 cup All-Purpose Flour and 2 tbsp Cornstarch. The cornstarch adds an extra crispy texture to the final coating. In a second dish, beat the 2 whole Large Eggs until smooth. In a third dish, place the 2 cups Panko Breadcrumbs.
I like to set these up in an assembly line order: flour, egg, panko. This keeps the process organized and prevents cross-contamination between wet and dry ingredients. Make sure each dish is wide enough to comfortably fit a chicken strip for easy dredging.
Step 3: Bread the Chicken Tenders
Working with one piece at a time, remove a strip from the buttermilk mixture and let any excess drip off. Dredge it in the flour mixture, pressing gently to adhere, then shake off any excess. Next, dip it in the beaten eggs, making sure it’s fully coated.
Finally, press the strip into the panko breadcrumbs, turning to coat all sides completely. The panko should stick in an even, thick layer. Place the breaded tenders on a wire rack set over a baking sheet. This setup allows air to circulate around each piece, keeping the breading crisp while you finish coating the rest.
Step 4: Fry to Golden Perfection
Heat the 2 cups Vegetable Oil in a deep, heavy skillet over medium-high heat until it reaches 350°F. Use a thermometer for accuracy—oil that’s too cool will make the tenders greasy, while oil that’s too hot can burn the breading before the chicken cooks through.
Fry the tenders in batches to avoid overcrowding the pan, which would lower the oil temperature. Cook for 3-4 minutes per side until the coating is deep golden brown and the internal temperature reaches 165°F. Transfer the cooked tenders to a wire rack or paper towel-lined plate to drain excess oil.
Step 5: Rest and Serve
Let the tenders rest for 2-3 minutes before serving. This brief rest allows the juices to redistribute, keeping the chicken moist inside its crispy shell. The breading should stay crunchy for several minutes after frying if you’ve drained them properly.
Serve immediately while hot and crispy. These tenders are perfect with your favorite dipping sauces or alongside a simple salad. The contrast between the crunchy exterior and tender interior is what makes this recipe a winner every time.
Pro Tips For Making Basic Chicken Tenders
- Pound the Breasts: Use a rolling pin or meat mallet to even out the chicken to ½-inch thickness—I learned this the hard way after too many dry, overcooked ends.
- Double Dredge: Dip in flour, then egg, then panko, and repeat the egg and panko for a crust that actually stays put and crunches like it should.
- Rest Before Frying: Let the breaded tenders sit for 10 minutes before hitting the oil—this keeps the coating from sliding right off in the pan.
- Mix in Cornstarch: Swap ¼ cup of the flour for cornstarch in your dredge; it makes the crust lighter and crispier without extra effort.
Pro Cooking Tips for basic chicken tenders
Double Dredging
For extra-crispy tenders, try a double dredge: after the initial flour coating, dip back in the buttermilk, then flour again before the egg wash. This creates a thicker, craggier crust that fries up ultra-crunchy. I learned this trick from a Southern fried chicken recipe. 🔥
Oil Temperature Control
Maintaining 350°F oil temperature is critical. Use a candy thermometer clipped to the pan—oil cools when you add food, so adjust heat between batches. Too low and you’ll get soggy breading; too high and it’ll burn before the chicken cooks.
Uniform Thickness
Pound thicker chicken strips to ½-inch thickness with a meat mallet before cutting. This ensures even cooking so all tenders finish at the same time. I use a OXO meat tenderizer for this—it has a flat and textured side.
Resting Rack Trick
Always drain fried tenders on a wire rack, never paper towels. The rack allows air circulation, keeping the breading crisp on all sides. Paper towels trap steam, which makes the coating soggy. This small step makes a huge difference.
Oven Baking Option
For a healthier approach, bake at 400°F on a wire rack set over a baking sheet. Brush tenders with 1 tbsp oil before baking and flip halfway through. Bake for 15-20 minutes until golden and internal temp hits 165°F. 💡
Breading Station Setup
Use one hand for wet ingredients (buttermilk, egg) and one for dry (flour, panko) to keep things clean. I place a trash bowl between stations for easy disposal of drippy hands. This method prevents cross-contamination and messy counters.
Nutrition Facts
Frequently Asked Questions
Can I use chicken thighs instead of breasts?
Yes, but they’ll taste different. Thighs stay juicier but don’t get as crisp because of their higher fat content. Stick to boneless, skinless pieces and pat them very dry for best results.
How do I keep the breading from falling off?
Pat the chicken completely dry first, then let it marinate in buttermilk for 15-20 minutes. This helps the flour stick. Also, let breaded tenders rest for 10 minutes before frying.
Can I bake instead of fry?
Bake at 400°F on a wire rack for 15-20 minutes, flipping halfway. Brush with 1 tbsp oil first for extra crispiness. The texture won’t be identical, but it’s a great lighter option.

- Rice A Roni Pork Fried Rice Recipe: Quick Wok-Style Meal with Savory Bites - September 25, 2026
- Mandhi Rice Recipe: Yemeni Spiced Lamb and Rice Feast - September 25, 2026
- Chuy’s Green Chili Rice Copycat Recipe: Spicy Southwest Flavor in Every Bite - September 25, 2026