
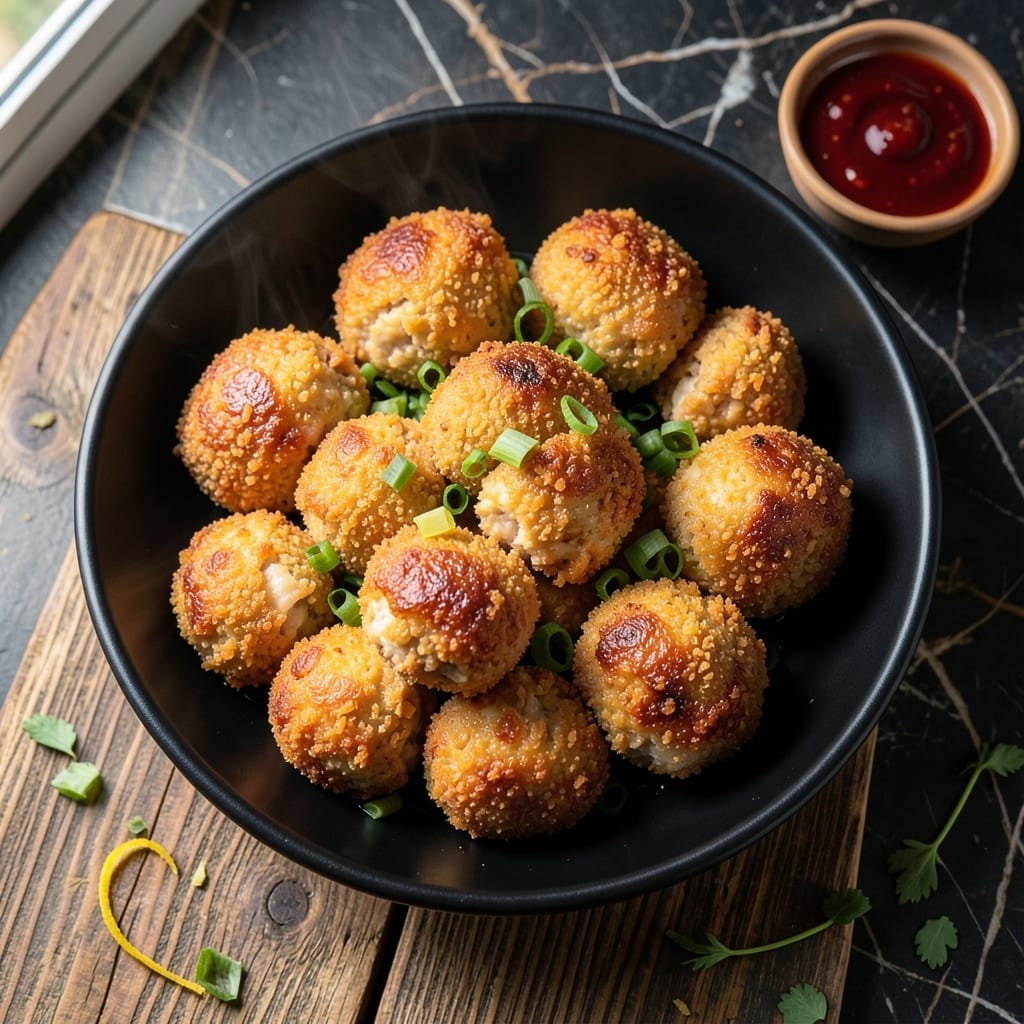
These golden chicken balls deliver the perfect balance of crispy exterior and juicy center every time. The secret lies in a two-step frying process that ensures maximum crunch without drying out the meat.
Ground chicken is combined with simple seasonings and binders, then rolled into balls and coated for extra texture. The key is maintaining oil temperature at 350°F to achieve even cooking and that signature golden-brown finish.
Each bite reveals tender, flavorful chicken encased in a shatteringly crispy shell. Serve them hot with your favorite dipping sauce for a crowd-pleasing appetizer or main course.
This method guarantees consistent results with minimal effort. The contrast between the outer crunch and inner moisture makes these irresistible.
Ingredients for Chicken Balls
Pantry raid plus a quick stop at the butcher. Nothing fancy, just crispy, juicy perfection.
| Ingredient | Amount | Notes |
|---|---|---|
| Ground Chicken 🍗 | 1 ½ lb | Dark meat preferred for juiciness |
| All-Purpose Flour 🌾 | ½ cup | For initial coating |
| Large Eggs 🥚 | 2 whole | Beaten, for binding |
| Panko Breadcrumbs 🍞 | 1 ½ cups | For ultra-crispy texture |
| Garlic Powder 🧄 | 1 tsp | Freshly opened for potency |
| Onion Powder 🧅 | 1 tsp | Enhances savory depth |
| Paprika 🌶️ | 1 tsp | Sweet or smoked variety |
| Salt 🧂 | 1 tsp | Diamond Crystal kosher preferred |
| Black Pepper 🌶️ | ½ tsp | Freshly ground for best flavor |
| Vegetable Oil 🫒 | 4 cups | For frying, neutral high-smoke point |
| Green Onions 🧅 | ½ cup | Finely chopped, for garnish |
| Sweet Chili Sauce 🍯 | ½ cup | For dipping, optional |
| Soy Sauce 🫙 | 2 tbsp | Low-sodium for balance |
| Sesame Oil 🫒 | 1 tsp | Toasted variety for aroma |
Ground chicken is the foundation here. Dark meat stays juicier than white—look for thigh meat labeled as ground at Whole Foods or ask your butcher to grind it fresh. The Panko is non-negotiable for that shatteringly crispy exterior (Kikkoman brand is my go-to). For the oil, peanut or vegetable has the high smoke point you need without breaking the bank.
No Panko? Regular breadcrumbs in a pinch, but you’ll lose some crunch. Out of garlic powder? Fresh minced garlic at double the amount works, but the texture changes slightly. Need a gluten-free version? Crushed cornflakes or almond flour make decent coatings. The soy sauce can be swapped for tamari if you’re avoiding gluten, or coconut aminos for a milder flavor.
These keep warm for about 20 minutes in a low oven, but they’re best fresh out of the fryer. Leftovers? Reheat in the air fryer at 375°F for 3-4 minutes to revive the crispiness. Freeze uncooked balls on a tray first, then transfer to a bag—they’ll keep for 1 month.
Why You’ll Love This Recipe
- Minimal Effort: I mix, roll, and bake—no fancy techniques, just simple steps with panko and eggs.
- Garlic Punch: That garlic powder in the ground chicken gives every bite a warm, savory kick.
- Party Favorite: Honestly, they disappear faster than I can make them at gatherings.
- Budget Stretcher: Ground chicken and pantry staples keep costs low while feeding a crowd.
Step-by-Step Instructions for Chicken Balls
Here’s my tested method for achieving that perfect crispy exterior with juicy centers every time.
Step 1: Season and Mix the Chicken Base
In a large bowl, combine the 1.5 lb ground chicken with 1 tsp garlic powder, 1 tsp onion powder, 1 tsp paprika, 1 tsp salt, and 0.5 tsp black pepper. I use my hands for this—it’s the best way to evenly distribute the seasonings without compacting the meat too much.
Next, add the 2 whole large eggs and 2 tbsp soy sauce. Mix just until combined. You want the mixture to hold together when shaped but not be overworked—that would make the texture tough. The soy sauce adds umami depth that balances the richness of the chicken.
Finally, stir in 1 tsp sesame oil. This small amount adds incredible aroma. The mixture should look evenly colored with no dry spots. Let it rest for 5 minutes while you prepare the coating station.
Step 2: Set Up the Breading Station
Place the 0.5 cup all-purpose flour in a shallow dish. In another dish, beat the remaining egg if needed—wait, no, you’ve already used both eggs in the mixture. Simply portion the 1.5 cups panko breadcrumbs into a third shallow dish.
I like to add a pinch of salt and pepper to the flour for extra seasoning. The panko is your secret weapon here—its larger, flakier texture creates that ultra-crispy coating we’re after. Don’t substitute regular breadcrumbs; the texture won’t be the same.
Shape the chicken mixture into 1.5-inch balls (you should get about 20). Roll each ball in the flour first, shaking off excess, then roll in the panko, pressing gently to adhere. Place on a plate and let them rest for 10 minutes—this helps the coating set.
Step 3: Fry to Golden Perfection
Heat the 4 cups vegetable oil in a deep, heavy pot to 350°F. Use a thermometer—this temperature is critical. Too low and the balls will absorb oil and be greasy; too high and they’ll brown before cooking through.
Working in batches (don’t overcrowd or the oil temperature drops), carefully lower 4-5 chicken balls into the oil. Fry for 4-5 minutes, turning occasionally, until they’re deep golden brown all over. You’ll see the panko transform from pale to crispy.
Remove with a slotted spoon and drain on a wire rack set over a baking sheet. This setup lets excess oil drip away without making the coating soggy. Keep the finished batches warm in a 200°F oven while you fry the rest.
Step 4: Garnish and Serve Immediately
Finely chop the 0.5 cup green onions while the last batch fries. Transfer the chicken balls to a serving platter and sprinkle with the green onions while still hot. The heat from the chicken will soften the onions slightly and release their aroma.
Serve with the 0.5 cup sweet chili sauce on the side for dipping—its sweet-spicy contrast is perfect with the savory chicken. These are best eaten immediately while the exterior is still shatteringly crisp and the interior remains juicy.
Real talk: if you need to hold them, keep them on the rack in the 200°F oven for up to 15 minutes, but they lose some crispness. For the ultimate experience, serve straight from the fryer.
Pro Tips For Making Chicken Balls
- Chill Before Frying: After rolling the chicken balls in panko, refrigerate them for 15-20 minutes. I learned this the hard way—cold balls hold their shape and crisp up better than room-temp ones.
- Double-Crumb the Balls: Dip each chicken ball in egg, then flour, then egg again, then panko. Sounds tedious, but it actually changes the outcome—extra crunch and a coating that doesn’t fall off mid-fry.
- Skip Overcrowding: Fry in small batches with at least an inch between each ball. After burning a few batches, I finally figured out that crowded pans steam instead of crisp.
- Use Cold Ground Chicken: Work with chilled ground chicken straight from the fridge. My grandmother swore by this, and she was right: it’s easier to shape and stays juicier during frying.
Essential Equipment for This Recipe
Deep Fryer Setup
For consistent results, I recommend a 5-6 quart Dutch oven or a dedicated deep fryer. The Cuisinart CDF-200 has precise temperature control and a 1700-watt heating element that recovers heat quickly between batches. A heavy-bottomed pot distributes heat evenly.
Thermometer Essentials
Never guess your oil temperature. I use the ThermoWorks Candy Thermometer with its 6-inch probe and 0.1°F accuracy. Clip it to the pot side for constant monitoring. 350°F is your magic number for perfect frying. 🌡️
Breading Station Tools
Set up three shallow dishes for your breading station. I prefer stainless steel mixing bowls from OXO—they’re durable and the right depth. Have a slotted spoon and tongs ready for handling the hot chicken balls safely.
Draining and Keeping Warm
A wire rack set over a baking sheet is ideal for draining. I use the Nordic Ware cooling rack with its fine mesh. Keep finished batches warm in a 200°F oven while frying the rest. This prevents sogginess while maintaining crispness.
Safety Gear
Hot oil requires caution. Keep silicone oven mitts and a fire extinguisher rated for grease fires nearby. I also use a splatter screen to prevent oil burns. Never leave hot oil unattended. 💡
Optional Air Fryer Method
For a lighter version, use an air fryer like the Ninja AF101. Preheat to 375°F and cook in batches for 10-12 minutes, shaking halfway. Spray with oil for extra crispiness.
Nutrition Facts
Frequently Asked Questions
Can I bake these instead of frying?
Yes, for a lighter option. Bake at 400°F for 18-20 minutes, flipping halfway. Spray with oil first for extra crispiness. They won’t be as crunchy as fried, but still delicious.
Why did my chicken balls fall apart?
This usually happens if the mixture is too wet or not chilled. Ensure you’ve used the correct egg-to-meat ratio and let the shaped balls rest for 10 minutes before frying.
What dipping sauces pair well?
Sweet chili sauce is classic, but try honey mustard, sriracha mayo, or teriyaki. For a tangy twist, mix soy sauce with lime juice and a touch of honey.
Can I make these ahead of time?
Shape and bread the balls, then refrigerate for up to 24 hours or freeze for 1 month. Fry from frozen, adding 1-2 minutes to cooking time.

- Chuy’s Green Chili Rice Copycat Recipe: Spicy Southwest Flavor in Every Bite - September 25, 2026
- Beaten Rice Recipe: Fluffy Grains With Nutty Depth - September 25, 2026
- Machboos Rice Recipe: Bahraini Spiced One-Pot Tradition - September 25, 2026