
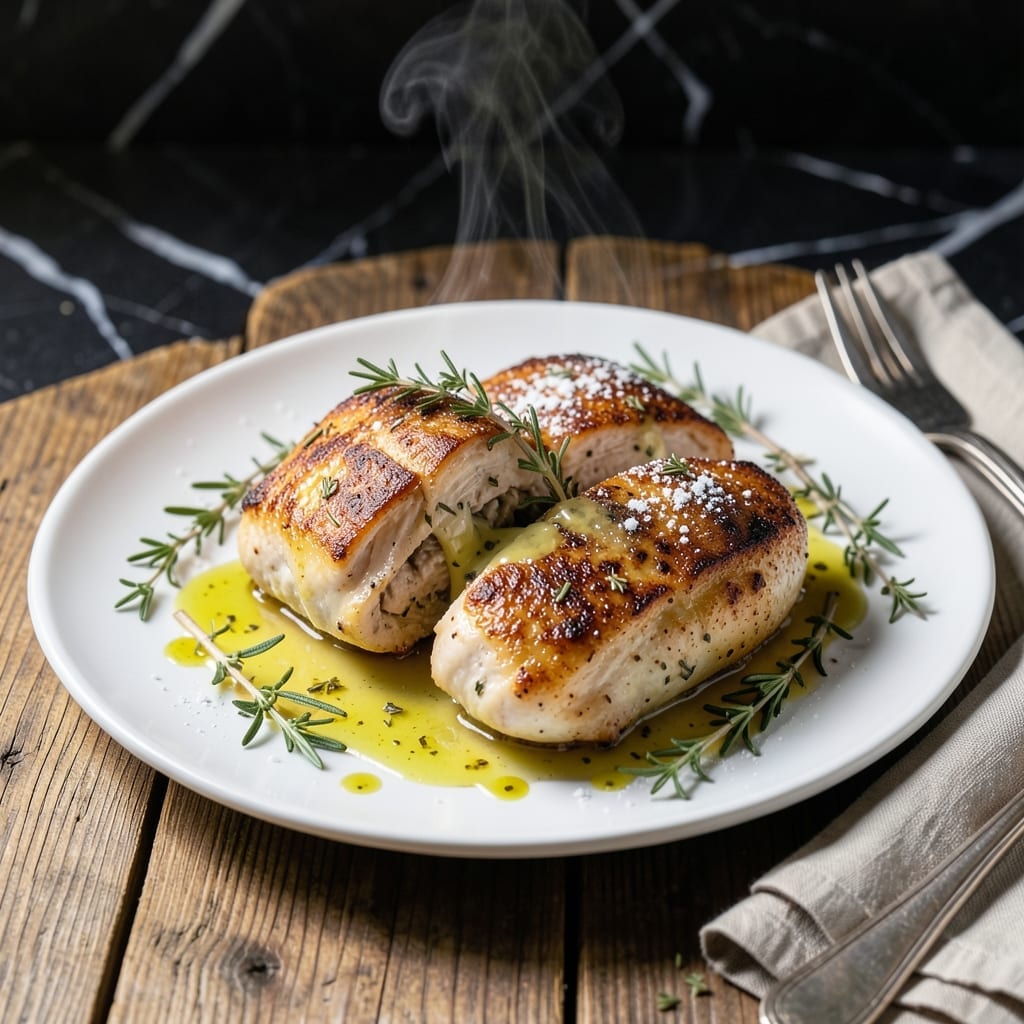
I’ve burned through more chicken recipes than I care to admit, but this one finally nailed it. Simple ingredients, 15 minutes of cooking, and a flavor that’ll make you forget takeout exists.
Here’s the thing—the garlic butter isn’t just a topping, it’s the star. It creates a golden-brown crust that locks in juices while adding layers of savory goodness.
You’ll get tender, juicy chicken with crispy edges and a sauce so rich you’ll want to drink it. The aroma alone will have everyone gathered around the stove.
No fancy techniques, no special equipment. Just straightforward cooking that delivers restaurant-quality results at home.
Ingredients for Delicious Chicken
Quality ingredients for chicken that tastes better than any restaurant version.
| Ingredient | Amount | Notes |
|---|---|---|
| Boneless Skinless Chicken Breasts 🍗 | 1 ½ lb | Pounded to even thickness |
| Unsalted Butter 🧈 | 6 tbsp | Divided for cooking and sauce |
| Garlic Cloves 🧄 | 6 cloves | Minced for maximum flavor |
| Fresh Thyme Sprigs 🌿 | 4 sprigs | Leaves stripped from stems |
| Fresh Rosemary Sprigs 🍃 | 2 sprigs | Finely chopped, stems discarded |
| All-Purpose Flour 🌾 | ¼ cup | For light dredging |
| Kosher Salt 🧂 | 1 ½ tsp | Diamond Crystal preferred |
| Freshly Ground Black Pepper 🌶️ | 1 tsp | Coarse grind for texture |
| Chicken Stock 💧 | ½ cup | Low-sodium preferred |
| Heavy Cream 🥛 | ¼ cup | For rich, velvety sauce |
| Lemon 🍋 | 1 whole | Zested and juiced |
| Extra-Virgin Olive Oil 🫒 | 2 tbsp | For initial searing |
| Fresh Parsley 🌿 | ¼ cup | Chopped, for garnish |
The chicken is the foundation—look for evenly sized breasts (about 6 oz each) so they cook at the same rate. I grab mine from Whole Foods or Costco; their organic options have consistent thickness. The butter should be European-style for that extra richness (Plugrá or Kerrygold are my go-tos). Fresh herbs make a difference here; skip the dried ones for this recipe (the aroma alone is worth it).
No fresh thyme or rosemary? Dried at one-third the amount works, but the flavor won’t be as bright. Out of chicken stock? Vegetable stock with a pinch of poultry seasoning gets close. If you’re avoiding dairy, swap the heavy cream for full-fat coconut milk—it’ll thicken the sauce nicely. The flour dredge can be skipped, but it helps create that golden-brown crust mentioned in the intro.
Leftovers keep beautifully for 3-4 days in the fridge. Reheat gently in a skillet to keep the chicken juicy. The sauce thickens as it cools, so thin it with a splash of stock when reheating. Freezes well too—up to 3 months if stored properly (I use airtight containers).
Why You’ll Love This Recipe
- One Pan Wonder: I toss everything in a single skillet—chicken, butter, garlic, and herbs—then let the oven do the work.
- Buttery Herb Magic: The rosemary and thyme steep in that melted butter, coating every bite in rich, aromatic flavor.
- Weeknight Hero: Between us, this is my Tuesday night lifesaver when I need dinner on the table fast.
- Leftovers Win: Honestly, it tastes even better the next day—perfect for lunch or a quick reheat.
Step-by-Step Instructions for Garlic-Butter Pan-Seared Chicken
Here’s the method I rely on for tender, flavorful chicken with a silky garlic-butter sauce every time.
Step 1: Prep and Season the Chicken Breasts
Start by pounding the 1.5 lb Boneless Skinless Chicken Breasts to an even ½-inch thickness using a meat mallet. This ensures even cooking and prevents dry, overdone edges. Pat them completely dry with paper towels—this is crucial for achieving that perfect golden sear.
Season both sides generously with the 1.5 tsp Kosher Salt and 1 tsp Freshly Ground Black Pepper. Then, lightly dredge each breast in the 0.25 cup All-Purpose Flour, shaking off any excess. The flour creates a delicate crust and helps thicken the sauce later.
Step 2: Sear the Chicken Until Golden
Heat the 2 tbsp Extra-Virgin Olive Oil in a large skillet over medium-high heat until it shimmers. Add the chicken breasts and cook undisturbed for 5-6 minutes per side until they develop a deep golden-brown crust and release easily from the pan.
Don’t be tempted to move them around—patience ensures a proper sear. Transfer the chicken to a plate and tent loosely with foil to keep warm. The residual heat will continue cooking the chicken slightly while you build the sauce.
Step 3: Build the Garlic-Butter Sauce
Reduce the heat to medium and add 2 tbsp Unsalted Butter to the same skillet. Once melted, add the 6 cloves Garlic Cloves (minced), stripped leaves from the 4 sprigs Fresh Thyme Sprigs, and finely chopped 2 sprigs Fresh Rosemary Sprigs. Sauté for 1-2 minutes until the garlic is fragrant but not browned.
Pour in the 0.5 cup Chicken Stock and scrape up any browned bits from the bottom of the pan—this is where the depth of flavor comes from. Simmer for 2-3 minutes until the liquid reduces by half. Then, stir in the remaining 4 tbsp Unsalted Butter, the 0.25 cup Heavy Cream, and the zest and juice of the 1 whole Lemon.
Step 4: Finish and Serve
Return the chicken to the skillet, spooning the sauce over the top. Simmer for 2-3 minutes until the chicken is cooked through and the sauce has thickened slightly. The internal temperature should reach 165°F.
Garnish with the 0.25 cup Fresh Parsley (chopped) and serve immediately. The sauce should cling to the chicken, rich and velvety with a bright citrus note. Pair with roasted vegetables or crusty bread to soak up every last drop.
Pro Tips For Making Delicious Chicken
- Pound the Breasts: Use a rolling pin or heavy pan to gently pound the chicken breasts to an even ¾-inch thickness—this guarantees they cook through without drying out the thinner edges.
- Brown the Butter First: Melt the unsalted butter over medium heat until it turns golden and smells nutty, then add the garlic and herbs—this builds a deeper, toastier flavor base before the chicken even hits the pan.
- Skip the Cold Chicken: Let the pounded breasts sit at room temperature for 15-20 minutes before cooking. I learned this the hard way—cold chicken seizes up and cooks unevenly, no matter how hot your pan is.
- Use the Sprigs Twice: After browning the chicken, toss those thyme and rosemary sprigs into the pan with the butter and garlic, then baste the chicken with the infused fat—waste not, flavor a lot.
Storing and Reheating delicious chicken
Refrigerator Storage
Let the chicken cool for no more than 2 hours before transferring to airtight containers. I use glass containers with snap-tight lids. Store at 40°F or below for up to 3-4 days. The flavors deepen as they rest. ❄️
Freezer Storage
For longer storage, freeze in quart-sized freezer bags with excess air removed. Lay flat to save space. This dish keeps well for up to 3 months without texture changes. Label with the date to track freshness.
Stovetop Reheating
My preferred method: warm in a skillet over medium-low heat with a splash of chicken stock. Cover for 5-7 minutes, stirring occasionally. The sauce will re-emulsify beautifully, and the chicken stays juicy.
Microwave Reheating
For quick meals, microwave individual portions covered with a damp paper towel. Use 50% power for 2-3 minutes, then check. Add a splash of water if the sauce looks dry. 🔥
Sauce Revival Tip
If the sauce separates after storage, whisk in 1-2 tbsp heavy cream while reheating. This brings back the velvety texture. The lemon zest and juice will brighten the flavors again.
Serving After Reheating
Garnish with fresh parsley after reheating to add color and freshness. Serve immediately while hot—the sauce is best enjoyed warm and creamy, just like the first day.
Nutrition Facts
Frequently Asked Questions
What if my chicken breasts are thick and uneven?
Pound them to an even ½-inch thickness before cooking. This prevents dry, overcooked edges while the center finishes. A meat mallet or rolling pin works perfectly for this.
Can I use chicken thighs instead of breasts?
Bone-in thighs work well but increase cooking time to 7-8 minutes per side. They’ll stay juicier due to higher fat content. Adjust 165°F internal temp remains the same.
How can I make the sauce thicker?
Simmer the sauce for an extra 2-3 minutes after adding the cream. For faster results, mix 1 tsp cornstarch with water and stir in while simmering. The sauce will thicken as it cools.
What sides pair best with this dish?
Try roasted asparagus, mashed potatoes, or crusty bread to soak up the sauce. A simple green salad with lemon vinaigrette complements the rich garlic-butter flavors perfectly.

- Soupy Rice Recipe: Broth-Soaked Grains With Rustic Depth - September 25, 2026
- Rice Paper Pancakes Recipe: Crispy Vietnamese Breakfast Delight - September 25, 2026
- Rice A Roni Pork Fried Rice Recipe: Quick Wok-Style Meal with Savory Bites - September 25, 2026