
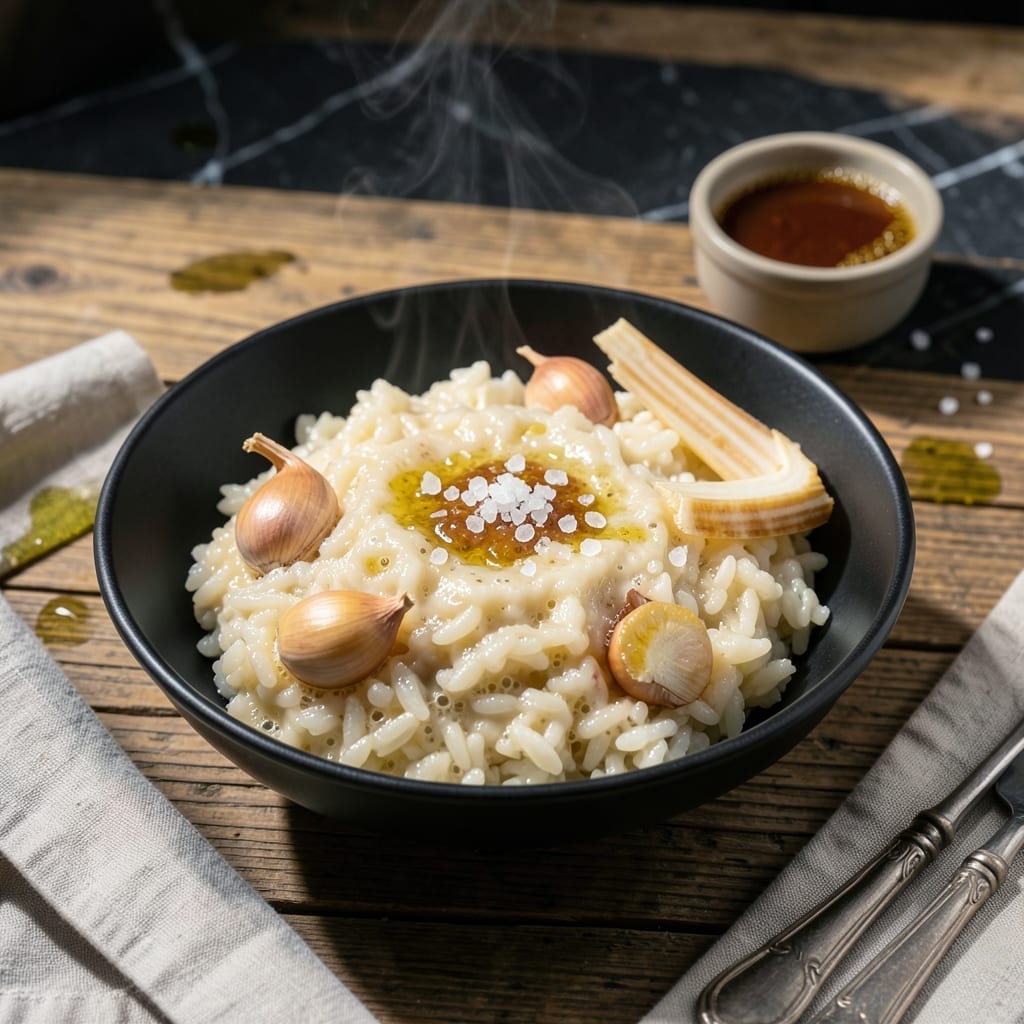
Fermenting rice transforms simple grains into a dish with remarkable depth and complexity. This method unlocks tangy, nutty flavors that elevate any meal.
I’ve perfected this process to ensure consistent results every time. The key is patience—allowing the rice to ferment fully develops its signature taste and texture.
The outcome is a versatile base that works in both traditional and modern dishes. Its unique profile enhances soups, salads, or even as a standalone side.
With careful timing and attention to detail, you’ll achieve a fermented rice that’s rich, aromatic, and deeply satisfying.
Ingredients for Ferment Rice
Transform simple grains into a complex fermented dish with these carefully selected ingredients.
| Ingredient | Amount | Notes |
|---|---|---|
| White Rice 🍚 | 2 cups | Short-grain or jasmine preferred |
| Water 💧 | 4 cups | Filtered for best results |
| Sea Salt 🧂 | 1 tsp | Fine grain for dissolution |
| Starter Culture 🧫 | 2 tbsp | Whey-free vegan starter or kombucha |
| Sugar 🍚 | 1 tsp | Organic cane sugar preferred |
| Garlic Cloves 🧄 | 3 cloves | Peeled, lightly crushed |
| Fresh Ginger 🌿 | 1 tbsp | Grated for even distribution |
| Turmeric Powder 🌶️ | ½ tsp | Ground for color and earthiness |
| Scallions 🧅 | 4 whole | Thinly sliced for garnish |
| Sesame Oil 🫒 | 1 tbsp | Toasted variety for aroma |
| Rice Vinegar 🍶 | 1 tbsp | Unseasoned for fermentation balance |
| Cilantro Leaves 🌿 | ¼ cup | Fresh, roughly chopped |
The rice choice is critical here. Short-grain or jasmine varieties ferment most reliably due to their starch content. Filtered water prevents chlorine from inhibiting fermentation (tap water can kill your starter). For the culture, vegan starters from Cultures for Health work perfectly, or use a splash of plain kombucha. The salt should be non-iodized—Diamond Crystal or fine sea salt are ideal for precision.
No vegan starter? Sauerkraut juice at 1:4 ratio makes a decent substitute. Sugar can be swapped for maple syrup or agave (use slightly less). Fresh ginger is best, but ground ginger at half the amount works in a pinch. The turmeric is optional but adds depth—skip if you dislike its earthiness. Scallions can be replaced with chives or red onion for a sharper bite.
Fermented rice keeps refrigerated for 1 week in a sealed container. The flavor deepens over time, so taste before using. For longer storage, freeze portions for up to 3 months (thaw before serving). Always use clean utensils when handling to prevent contamination.
Why You’ll Love This Recipe
- Five-Minute Prep: I just mix rice, water, and a pinch of sugar with my starter culture—no fancy steps, no stress.
- Tangy Umami Bomb: The fermentation turns plain rice into this rich, slightly sour base that makes everything from soup to stir-fry taste deeper.
- Meal Prep Hero: I cook a big batch Sunday and use it all week in bowls, pancakes, or even as a porridge—so versatile.
- Penny-Pincher’s Dream: I stretch a cheap bag of white rice into something special with just salt, sugar, and time. Honestly, it’s my favorite budget hack.
Step-by-Step Instructions for Fermented Rice
Master this precise fermentation process to unlock complex, tangy flavors in your grains.
Step 1: Prepare and Rinse the Rice
Place the 2 cups White Rice in a fine-mesh strainer and rinse under cold water until the water runs clear. This removes excess starch that could inhibit fermentation and create an off texture. I prefer short-grain or jasmine for this application due to their ability to absorb liquid and develop nuanced flavor.
After rinsing, drain thoroughly, shaking the strainer gently to remove all excess water. The grains should appear separate and dry to the touch. This preparation ensures the starter culture can properly colonize the rice without competing with residual starch or moisture.
Step 2: Create the Fermentation Mixture
In a large, clean glass or ceramic bowl, combine the rinsed rice with the 4 cups Water, 1 tsp Sea Salt, 1 tsp Sugar, 2 tbsp Starter Culture, and 0.5 tsp Turmeric Powder. The sugar provides immediate food for the microorganisms, while the turmeric adds earthiness and helps monitor fermentation progress through color change.
Whisk the mixture vigorously for 1-2 minutes until the salt and sugar fully dissolve and the turmeric creates a uniform golden hue. The water should appear slightly cloudy with no visible granules. I use fine grain sea salt here as it dissolves more readily than coarser varieties.
Step 3: Incorporate Aromatics and Begin Fermentation
Add the 3 cloves Garlic Cloves (peeled and lightly crushed) and 1 tbsp Fresh Ginger (grated) to the rice mixture. These aromatics not only infuse flavor but also possess natural antimicrobial properties that help guide the fermentation in the desired direction.
Stir well to distribute the garlic and ginger evenly throughout the mixture. Cover the bowl with a clean kitchen towel or cheesecloth secured with a rubber band. This allows airflow while protecting the mixture from dust and insects. Place the bowl in a warm location, ideally between 70-75°F, for 12-24 hours to begin the fermentation process.
Step 4: Monitor and Complete Fermentation
After the initial 12 hours, check the mixture for small bubbles forming at the surface and a slightly sour aroma—these are signs that fermentation has begun. Stir the mixture gently and recover. Continue fermenting for another 12-24 hours, stirring every 12 hours to prevent mold growth on the surface.
The fermentation is complete when the mixture develops a tangy smell and the rice has softened but still retains some bite. The liquid should appear slightly effervescent with a golden-yellow color from the turmeric. The total fermentation time typically ranges between 24-48 hours depending on temperature and desired tanginess.
Step 5: Finish and Store the Fermented Rice
Once fermentation is complete, stir in the 1 tbsp Rice Vinegar to halt the fermentation process and add a bright, clean acidity. The vinegar also acts as a preservative, extending the shelf life of your creation.
Transfer the fermented rice to airtight containers. For serving, garnish individual portions with the 4 whole Scallions (thinly sliced), 1 tbsp Sesame Oil, and 0.25 cup Cilantro Leaves (roughly chopped). Store the remaining fermented rice in the refrigerator for up to 5 days, where the flavors will continue to develop and deepen over time.
Pro Tips For Making Ferment Rice
- Use Filtered Water: Tap water can introduce chlorine or other chemicals that inhibit fermentation, so I always use filtered or spring water for consistent results.
- Rinse the Rice: Give the white rice a quick rinse to remove excess starch, which helps the starter culture work more efficiently—no need to scrub, just a gentle swirl and drain.
- Keep It Warm: I learned this the hard way—fermentation stalls if it gets too cold, so maintain a steady 75-85°F (24-29°C) environment, like an oven with the light on or a warm corner of the kitchen.
- Skip Metal Utensils: Metal can react with the acidic fermentation process, so I stick to wooden or plastic spoons when mixing or tasting to avoid any off flavors.
Perfect Pairings for These Flavors
Beverage Pairings
This tangy creation pairs beautifully with green tea—its subtle bitterness balances the fermented notes. Iced or hot, the tea’s clean finish complements the rice’s depth. For a bolder choice, try jasmine tea to enhance the floral undertones. 🍵
Fresh Side Dishes
A crisp cucumber salad with rice vinegar and sesame seeds lightens the dish’s richness. Thinly slice 1 English cucumber and toss with 1 tbsp sesame oil for contrast. The cool crunch contrasts perfectly with the warm, fermented grains.
Protein Partners
Grilled tofu marinated in soy sauce and garlic absorbs the rice’s flavors beautifully. Press 1 block firm tofu for 30 minutes before grilling to achieve the best texture. The umami of the tofu pairs seamlessly with the tangy rice.
Dessert Complements
Serve with a light mango sorbet to cleanse the palate. The sorbet’s sweetness contrasts the rice’s acidity. Alternatively, fresh pineapple chunks with a sprinkle of Tajín offer a refreshing finish. 💛
Garnish Ideas
Enhance the dish with toasted sesame seeds for crunch. Sprinkle 1 tsp over each serving just before eating. A drizzle of chili oil adds warmth for those who enjoy a little heat.
Nutrition Facts
Frequently Asked Questions
How long does the fermentation process take?
Typically 24-48 hours at 70-75°F. The exact time depends on your desired tanginess and ambient temperature. Check for bubbles and a sour aroma to confirm it’s ready.
Can I use brown rice instead of white?
Yes, but expect a longer fermentation time. Brown rice’s outer bran slows microbial activity, so add 12-24 extra hours. The flavor will be nuttier but slightly less tangy.
What if I don’t have a starter culture?
Use 2 tbsp sauerkraut juice or 1/4 cup kombucha as substitutes. These contain similar beneficial bacteria to kickstart fermentation. Avoid vinegar-based starters.
How do I know if it’s gone bad?
Discard if you see mold (fuzzy spots) or smell rotten odors. Proper fermentation should only smell tangy, not foul. Always use clean utensils to prevent contamination.

- Fresh Turmeric Rice Recipe: Golden Grains with Earthy Warmth - October 7, 2026
- French Onion Brown Rice Recipe: Umami-Rich Grains With Caramelized Depth - October 7, 2026
- Rice Noodle Soup Recipe: Aromatic Broth with Silky Strands - October 7, 2026