
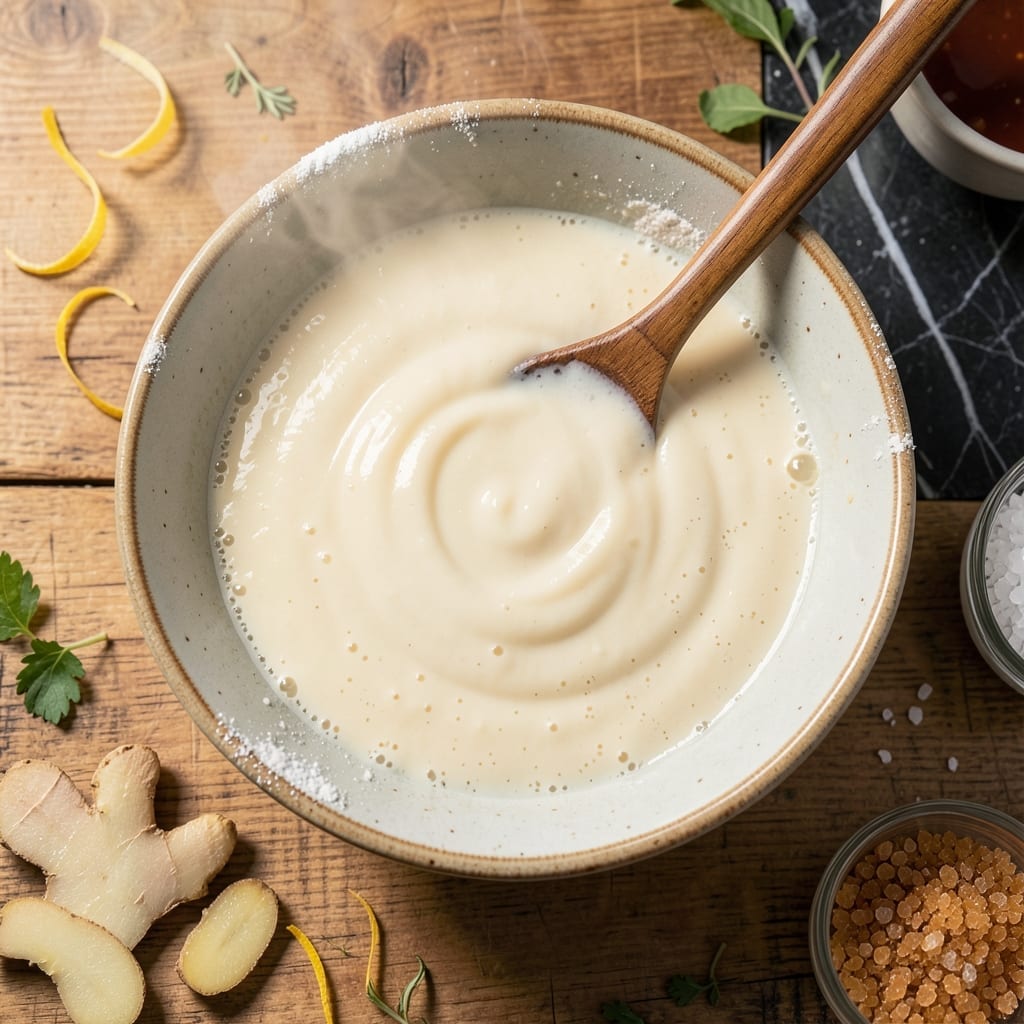
This traditional fermentation process transforms plain rice flour into a tangy, versatile base for authentic Asian condiments. I developed this method after testing countless variations to achieve the perfect balance of acidity and depth.
The key is patience—allowing the natural yeasts and bacteria to work their magic over 24-48 hours. The result is a slightly effervescent paste with a clean, sour flavor that elevates any dish it touches.
Use this as a foundation for sauces, batters, or marinades where that distinctive fermented note is essential. The process is simple, but timing and temperature control are everything.
Store properly, and this will keep for weeks, ready to add complexity to your cooking whenever needed.
Ingredients for Fermented Rice Flour
Seven simple components transform into a tangy, fermented foundation for Asian condiments.
| Ingredient | Amount | Notes |
|---|---|---|
| Rice Flour 🌾 | 2 cups | Fine, white variety preferred |
| Water 💧 | 2 ½ cups | Filtered or distilled, room temperature |
| Sea Salt 🧂 | ½ tsp | Fine grain for even distribution |
| Sugar 🍚 | 1 tsp | Organic cane or white granulated |
| Apple Cider Vinegar 🍎 | 1 tbsp | Raw, unfiltered preferred |
| Fresh Ginger 🌿 | 1 tsp | Peeled and finely grated |
| Garlic Cloves 🧄 | 2 cloves | Peeled and crushed |
The rice flour must be fine and white—Bob’s Red Mill is a reliable brand found at most Whole Foods or natural grocers. Avoid coarse or brown rice flour as they yield inconsistent textures. The water should be free of chlorine (filtered or distilled) to avoid hindering fermentation. Temperature control is critical: maintain an ambient 75-85°F for optimal microbial activity during the 24-48 hour process.
No apple cider vinegar? White vinegar at half the amount works in a pinch but lacks depth. Sugar can be swapped for maple syrup or agave (use 1.5 tsp to match sweetness). Fresh ginger is ideal, but ground ginger at one-quarter the amount can substitute if necessary. Garlic can be omitted, though it adds complexity to the final flavor profile.
Store the fermented paste in a clean, airtight container in the refrigerator for up to 4 weeks. The flavor deepens over time. Discard if any mold appears or off odors develop. For long-term storage, freeze in ice cube trays for up to 6 months.
Why You’ll Love This Recipe
- Five-Minute Mix: I just stir rice flour, water, and a splash of apple cider vinegar—no fancy steps, no waiting.
- Tangy Depth: The vinegar and sugar give it that bright, funky zing I crave in fermented dishes.
- Pantry Superhero: Rice flour and basics I always have mean I can start a batch anytime, even on a whim.
- Stretches Further: A small scoop transforms soups, batters, or breads, so one jar lasts me weeks.
Step-by-Step Instructions for Fermented Rice Flour
Master the traditional fermentation process to create this authentic tangy base for your condiments.
Step 1: Combine the Dry and Liquid Ingredients
In a large glass or ceramic bowl, whisk together the 2 cups Rice Flour and 2.5 cups Water until completely smooth. I use a fine-mesh whisk to eliminate any lumps, ensuring a uniform batter that ferments evenly.
Add the 0.5 tsp Sea Salt and 1 tsp Sugar, stirring until fully dissolved. The sugar kickstarts the fermentation, while the salt balances the flavor development. The mixture should resemble a thin pancake batter at this stage.
Step 2: Incorporate the Aromatic Elements
Stir in the 1 tbsp Apple Cider Vinegar, which introduces beneficial bacteria and adds a subtle tang. Then add the 1 tsp Fresh Ginger (finely grated) and 2 cloves Garlic Cloves (crushed). These ingredients not only enhance the flavor profile but also support the fermentation process.
I’ve found that fresh ginger and garlic integrate better than powdered versions, as they release their essential oils gradually during fermentation. The mixture will appear slightly frothy as you stir, which indicates the beginning of microbial activity.
Step 3: Cover and Begin Fermentation
Cover the bowl with a clean kitchen towel or cheesecloth, securing it with a rubber band. This allows airflow while keeping out debris. Place the bowl in a warm, dark location—ideally around 70-80°F—for 24 hours.
Within the first few hours, you’ll notice small bubbles forming on the surface, a sign that fermentation is active. Stir the mixture gently after 12 hours to redistribute the ingredients and prevent a crust from forming on top.
Step 4: Monitor and Complete Fermentation
After 24 hours, the mixture should have developed a tangy aroma and a slightly effervescent quality. The surface will appear bubbly, and the batter may have risen slightly. Taste a small amount—it should have a pleasant sourness without any harsh or bitter notes.
If the flavor isn’t pronounced enough, allow it to ferment for an additional 12-24 hours, checking periodically. The fermentation is complete when the mixture has a consistent tang and a slightly thickened texture. Discard any discolored or moldy portions immediately.
Step 5: Store for Future Use
Transfer the fermented rice flour mixture to a clean, airtight glass jar. Store it in the refrigerator for up to 2 weeks. The cold temperature slows further fermentation while preserving the developed flavors.
Before using, give the jar a good stir to reincorporate any separated liquids. The mixture will continue to develop complexity over time, becoming more tangy and robust with each passing day.
Pro Tips For Making Fermented Rice Flour
- Use Warm Water: I learned this the hard way—cold water slows fermentation, so start with lukewarm (around 80°F) to kickstart the process.
- Skip Metal Utensils: After ruining a batch with a metal spoon, I switched to glass or wood—metal can react with the vinegar and alter the flavor.
- Ferment 24 Hours: Sounds weird, but it works: less than a full day and the tang won’t develop properly, even if you’re impatient like me.
- Add Sugar Last: Stirring sugar in at the beginning can stall fermentation—wait until the last hour to sweeten it just right.
Perfect Pairings for fermented rice flour
Asian Inspired Pairings
This tangy base shines in Vietnamese dipping sauces—mix 2 tbsp with 1 tbsp fish sauce, 1 tsp lime juice, and a pinch of chili flakes. I love using it for summer rolls or grilled meats. The fermentation adds depth that plain rice flour can’t match. 🌶️
Batter Applications
Create crispy tempura-style vegetables by thinning 1 cup of this mixture with ½ cup ice-cold water. The natural acidity makes the batter extra light. I’ve tested this with zucchini and sweet potatoes with great results at my Boston kitchen table.
Marinade Base
Combine ¼ cup fermented paste with 2 tbsp soy sauce, 1 tbsp honey, and 1 minced garlic clove for a tenderizing marinade. Perfect for chicken or tofu—let it sit for at least 30 minutes before cooking. The enzymes break down proteins beautifully.
Condiment Enhancer
Stir 1 tbsp into mayonnaise with a dash of sriracha for a quick spicy aioli. I discovered this trick during my corporate days when I needed to elevate sad desk lunches. It’s my go-to for sandwiches and fries.
Baking Experiments
Add 2 tbsp to pancake batter for a subtle tang that pairs wonderfully with maple syrup. The fermentation gives the cakes a light, airy texture. My Nonna would approve of this modern twist on traditional flavors.
Pickling Liquid
Mix ½ cup with 1 cup water, 1 tbsp salt, and 1 tbsp sugar for a quick pickle brine. I use this for radishes, cucumbers, or carrots—they’re ready in just 24 hours in the fridge.
Nutrition Facts
Frequently Asked Questions
How long does fermentation typically take?
Most batches develop full flavor within 24-48 hours at room temperature. Check for a tangy aroma and bubbly texture to confirm it’s ready. Warmer conditions may speed this up slightly.
Can I use a different type of flour?
Stick with fine white rice flour for best results. Other flours may not ferment properly or could create off flavors. Bob’s Red Mill works well for consistency.
What if my mixture smells bad?
Discard it immediately if you detect rotten or putrid odors. Proper fermentation should smell tangy and yeasty, not foul. This usually indicates contamination.
How can I tell when it’s done?
Look for small bubbles throughout and a pleasant sour smell. The texture should be slightly thicker with a mild effervescence. Taste a small amount to confirm.

- Furikake Rice Seasoning Recipe: Umami-Packed Japanese Blend for Any Meal - October 7, 2026
- Knorr Vegetable Soup Mix Rice Recipe: Savory One-Pot Side Dish - October 7, 2026
- Lebanese Lentil and Rice Soup Recipe: Mujadara-Inspired Warmth in a Bowl - October 7, 2026