
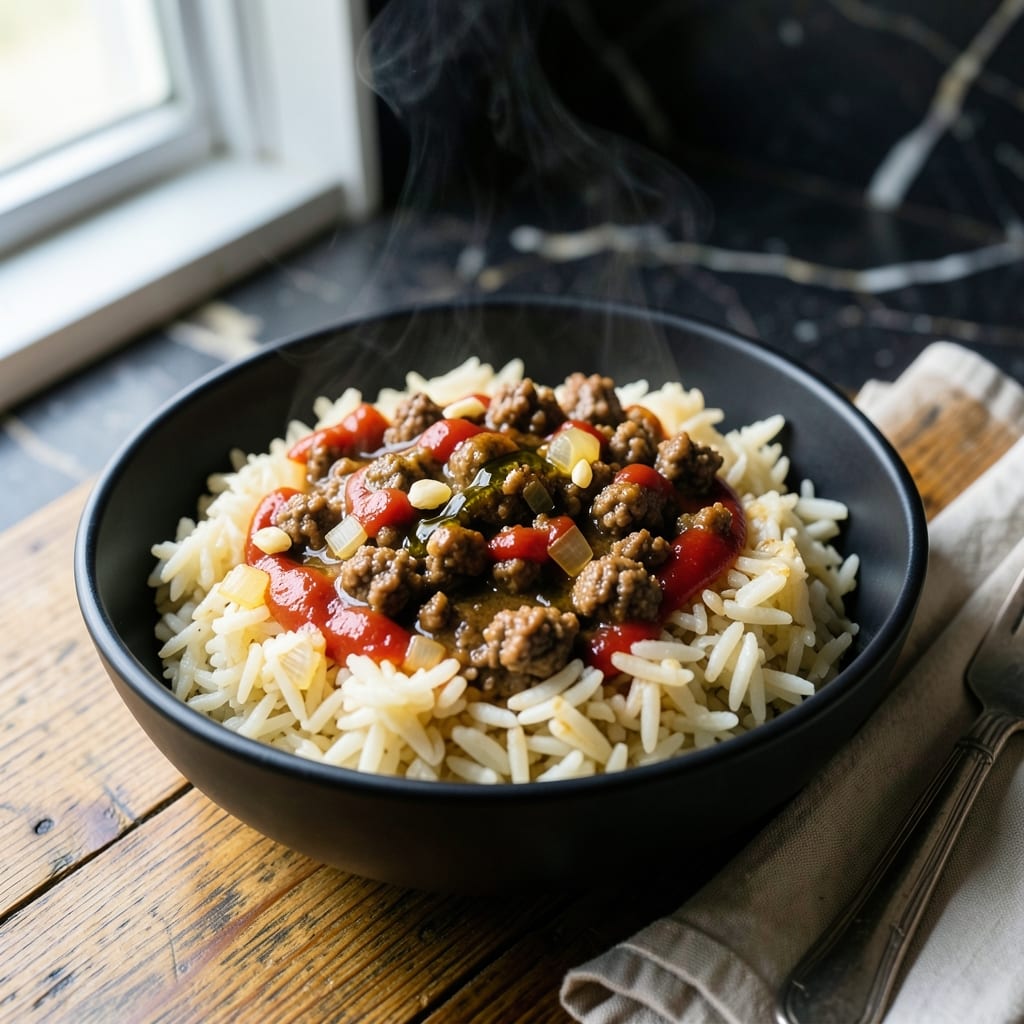
This Instant Pot dinner delivers restaurant-quality results with minimal effort. I developed this method to solve the weeknight dinner rush, and it’s become a family favorite.
The beauty lies in its simplicity: brown the beef, add rice and liquid, then let the pressure cooker do the work. In under 30 minutes, you’ll have tender beef, fluffy rice, and a meal that tastes like it simmered for hours.
What you’ll get is perfectly cooked rice infused with savory beef flavor, all in one pot. The hands-off process means more time with family and less time at the stove.
Versatile and customizable, this dish adapts to whatever vegetables or seasonings you have on hand. Here’s how to make it.
Ingredients for Ground Beef Rice Instant Pot
Pantry staples plus ground beef make this one-pot wonder come alive.
| Ingredient | Amount | Notes |
|---|---|---|
| Ground Beef 🥩 | 1 lb | 80/20 lean-to-fat ratio preferred |
| Long-Grain White Rice 🍚 | 1 ½ cups | Uncooked, rinsed before use |
| Beef Broth 🥣 | 2 ½ cups | Low-sodium recommended |
| Yellow Onion 🧅 | 1 whole | Medium-sized, finely diced |
| Garlic Cloves 🧄 | 3 cloves | Minced for best flavor |
| Tomato Paste 🍅 | 2 tbsp | For depth of flavor |
| Worcestershire Sauce 🫒 | 1 tbsp | Adds umami richness |
| Dried Thyme 🌿 | 1 tsp | Crushed between fingers |
| Dried Oregano 🍃 | 1 tsp | Mediterranean variety preferred |
| Bay Leaf 🌿 | 1 whole | Remove before serving |
| Salt 🧂 | 1 tsp | Adjust to taste after cooking |
| Black Pepper 🌶️ | ½ tsp | Freshly ground preferred |
| Olive Oil 🫒 | 1 tbsp | For browning beef |
| Frozen Peas 🌱 | 1 cup | Optional, added at end |
The beef is the foundation here. 80/20 ground chuck gives you the best flavor and juiciness—leaner blends can dry out. I grab mine from Costco for bulk savings, but any grocery store works. The rice? Long-grain white absorbs liquid perfectly (jasmine or basmati add nice aroma). Don’t skip rinsing it—removes excess starch for fluffier results.
No beef broth? Chicken broth with a dash of soy sauce works in a pinch. Short on tomato paste? Ketchup at half the amount adds similar depth. The Worcestershire can be swapped for coconut aminos if needed. For herbs, dried is fine, but fresh thyme and oregano (double the amount) take it up a notch.
Leftovers keep 4-5 days in the fridge, reheat with a splash of water. Freeze for 3 months in airtight containers. Add the peas last minute to keep them bright green (frozen works in a pinch).
Why You’ll Love This Recipe
- Set It and Forget: I toss everything in the Instant Pot, press a button, and walk away—no babysitting required.
- Savory Depth: The beef broth and garlic infuse every grain of rice with rich, meaty flavor that’s way better than plain rice.
- Feeds Everyone: From picky kids to hungry adults, this one-pot wonder works for weeknights, potlucks, or Sunday dinner.
- Stretches Far: One batch makes enough for leftovers, and honestly, it tastes even better the next day.
Step-by-Step Instructions for Ground Beef Rice Instant Pot
Here’s how to make this meal with minimal effort and maximum flavor.
Step 1: Sauté Aromatics and Brown the Beef
Set your Instant Pot to the Sauté function on Normal heat. Add the 1 tbsp olive oil and let it heat for 1 minute. Then add the finely diced yellow onion and cook for 3-4 minutes until it becomes translucent and just starts to turn light golden brown.
Add the 1 lb ground beef and cook, breaking it up with a wooden spoon, for 5-6 minutes until no longer pink. Drain excess fat if there’s more than 1 tbsp left, but a little fat adds flavor. Stir in the minced garlic cloves and cook for 30 seconds until fragrant.
Step 2: Build Flavor with Sauces and Spices
Stir in the 2 tbsp tomato paste and cook for 1 minute to deepen its flavor. Then add the 1 tbsp Worcestershire sauce, 1 tsp dried thyme, 1 tsp dried oregano, 1 tsp salt, and 0.5 tsp black pepper. Mix well to coat the beef evenly with these seasonings.
This step is where the magic happens—the tomato paste caramelizes slightly, and the spices bloom in the heat. You’ll notice the mixture becomes thicker and more aromatic. Make sure to scrape the bottom of the pot well to prevent any sticking.
Step 3: Add Rice, Broth, and Pressure Cook
Pour in the 1.5 cups long-grain white rice and stir to combine with the beef mixture. Then add the 2.5 cups beef broth and the 1 whole bay leaf. Stir once more to ensure everything is evenly distributed.
Secure the Instant Pot lid and set the valve to Sealing. Cook on High Pressure for 5 minutes. The pot will take about 10 minutes to come to pressure before the cooking time begins. You’ll know it’s working when you hear the pot hissing and the float valve pops up.
Step 4: Release Pressure and Finish with Peas
Once the cooking time is complete, let the pressure release naturally for 5 minutes, then carefully switch the valve to Venting to release any remaining pressure. Remove the lid once the float valve drops.
Stir in the 1 cup frozen peas—they’ll thaw and heat through in the residual heat. Let the mixture sit for 2-3 minutes to allow the peas to warm. Remove the bay leaf before serving. The rice should be tender and the liquid fully absorbed, creating a creamy, flavorful one-pot meal.
Pro Tips For Making Ground Beef Rice Instant Pot
- Deglaze Thoroughly: After browning the ground beef, pour in a splash of beef broth and scrape the bottom hard—those browned bits are pure flavor, and skipping this is how you end up with a bland pot of rice.
- Rinse the Rice: I learned this the hard way—give the long-grain white rice a quick rinse before adding it to remove excess starch, or you’ll get a gummy, sticky mess instead of fluffy grains.
- Skip Overcrowding: Brown the ground beef in batches if needed; dumping it all in at once steams it instead of searing, and nobody wants gray, soggy beef in their rice.
- Use Cold Broth: Sounds weird, but it works: adding cold beef broth after sautéing helps release the fond from the pot faster and prevents the rice from sticking before the pressure builds.
Perfect Pairings for This Dish
Side Dish Ideas
A fresh garden salad with balsamic vinaigrette cuts through the richness. I toss 4 cups mixed greens with 2 tbsp olive oil and 1 tbsp balsamic vinegar. The crispness balances the hearty dish perfectly. 🥗
Roasted Vegetables
Green beans or broccoli roasted with 1 tbsp olive oil and a pinch of garlic powder at 400°F for 15 minutes add a nutty depth. I often use frozen veggies for convenience—they roast up just as nicely.
Bread Options
A warm slice of crusty French bread or garlic bread soaks up every last bite. I like to toast mine with a sprinkle of Parmesan cheese for extra flavor. It’s an easy way to elevate the meal.
Drink Pairings
A cold iced tea or lemonade complements the savory flavors. For beer lovers, a light lager like Bud Light keeps the meal light and refreshing. I always keep a pitcher of tea ready in my fridge. 🍹
Nutrition Facts
Frequently Asked Questions
Can I use brown rice instead?
Yes, but increase the broth to 3 cups and cook for 22 minutes on high pressure. Brown rice needs more liquid and time to soften.
Why did my rice turn out mushy?
This usually happens from too much liquid or stirring after pressure cooking. Use exactly 2.5 cups broth and avoid stirring until fully depressurized.
Can I add other vegetables?
Add diced carrots or bell peppers when browning the beef. For frozen veggies, stir them in with the peas at the end.

- Jamaican Jollof Rice Recipe: Island Spice in Every Bite - October 18, 2026
- Hamburger Rice Hot Dish Recipe: Midwest Comfort in One Pan - October 18, 2026
- Iranian Cabbage Rice Recipe: Aromatic Herbs and Spiced Layers - October 18, 2026