
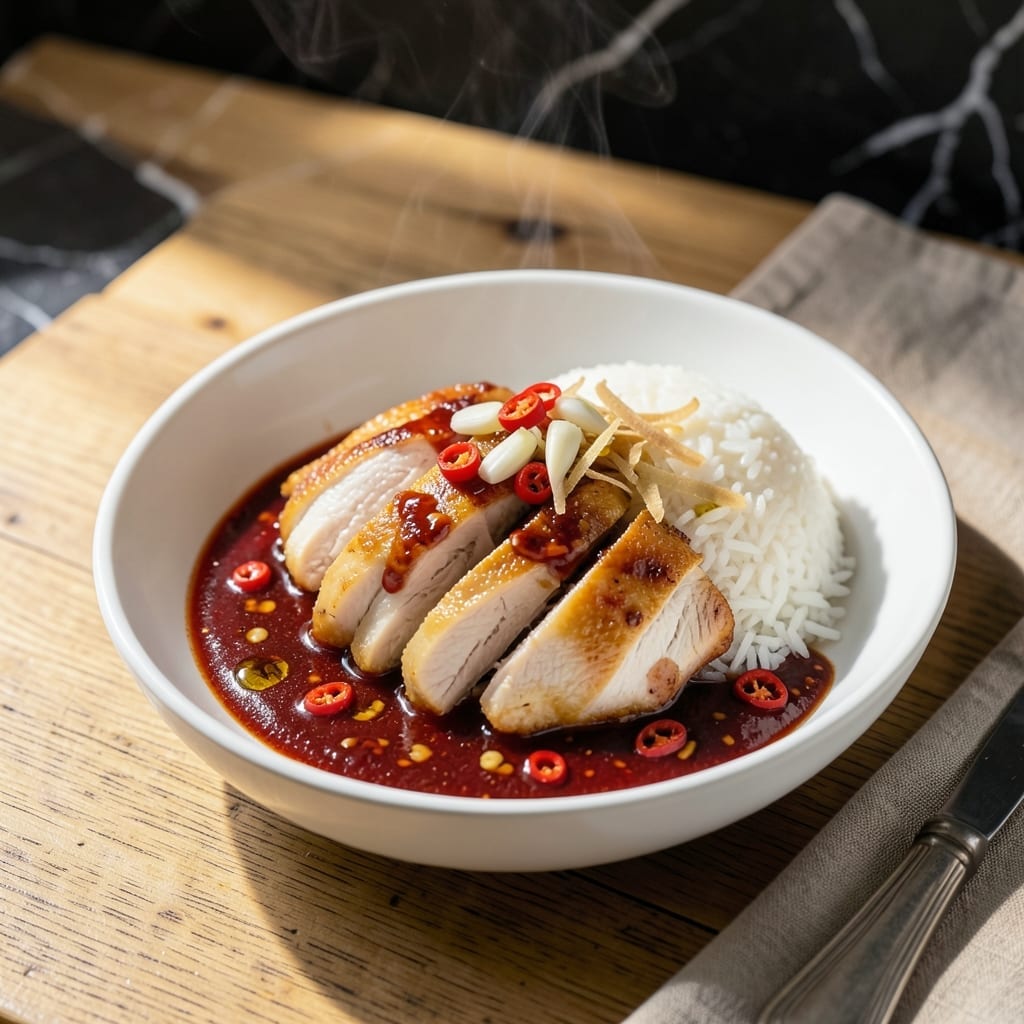
This fiery chilli sauce transforms Hainanese chicken rice from great to unforgettable. A perfect balance of heat, tang, and aromatic depth comes from fresh red chillies, garlic, and ginger.
The secret lies in blooming these aromatics in hot oil before blending, creating a smooth paste that delivers authentic Singaporean flavor. Ready in 10 minutes, this sauce keeps the dish true to its roots.
Ingredients for Hainanese Chicken Rice Chilli Sauce
Nine ingredients create this bold, aromatic Singaporean condiment for Hainanese chicken rice.
| Ingredient | Amount | Notes |
|---|---|---|
| Fresh Red Chillies 🌶️ | 10 whole | Stems removed, roughly chopped |
| Garlic Cloves 🧄 | 8 cloves | Peeled, minced |
| Fresh Ginger 🌿 | 2 tbsp | Peeled, finely grated |
| Vegetable Oil 🫒 | ½ cup | Neutral flavor, for blooming |
| Rice Vinegar 💧 | 2 tbsp | For tangy balance |
| Soy Sauce 🫙 | 2 tbsp | Light or all-purpose |
| Sugar 🍚 | 1 tbsp | Granulated for sweetness |
| Lime Juice 🍈 | 1 tbsp | Freshly squeezed preferred |
| Salt 🧂 | ½ tsp | To taste, after blending |
The chillies define this sauce—hunt for bright red, firm Thai bird’s eye or serrano peppers at Asian markets for authentic heat. H Mart or 99 Ranch usually have the best selection. Fresh is non-negotiable; dried won’t deliver the same vibrant, fruity punch. The ginger and garlic should be fresh too (no jars), with smooth, unblemished skin for the cleanest flavor.
Short on Thai chillies? Serrano or jalapeño work in a pinch but reduce quantity by half—they’re milder. No rice vinegar? Apple cider vinegar at the same amount gets you close. For a deeper umami hit, swap 1 tbsp of soy sauce for fish sauce (if dietary restrictions allow). The sugar can be palm sugar or honey for a more complex sweetness.
This sauce keeps 1 week refrigerated in a sealed jar. The flavors meld and deepen over 24-48 hours. For longer storage, freeze in ice cube trays—thaw only what you need. Always bloom the aromatics in hot oil first; it’s worth the extra minute.
Why You’ll Love This Recipe
- Blender Friendly: I just toss the chillies, garlic and ginger in—no fancy knife skills needed.
- Fiery & Bright: The rice vinegar cuts through the heat with this tangy kick that’s pure addiction.
- Pairs With Everything: I drizzle it on rice, noodles, even grilled veggies—honestly, it’s my new condiment.
- Stays Fresh: A jar lasts me a week in the fridge, so I make a batch and forget about it.
Step-by-Step Instructions for Hainanese Chicken Rice Chilli Sauce
This method ensures maximum flavor extraction with perfect balance of heat, tang, and sweetness.
Step 1: Bloom Aromatics in Hot Oil
Heat the 0.5 cup vegetable oil in a small saucepan over medium-low heat until it shimmers but doesn’t smoke. Add the 10 whole fresh red chillies (stems removed and roughly chopped), 8 cloves garlic cloves (peeled and minced), and 2 tbsp fresh ginger (peeled and finely grated).
Cook for 8-10 minutes, stirring frequently, until the mixture turns deep golden brown and the garlic edges are lightly crisped. The oil should become fragrant and infused with the aromatics. Remove from heat immediately if the garlic starts to darken too quickly—it burns easily.
Step 2: Cool and Blend to Smooth Consistency
Allow the hot oil and aromatics mixture to cool for 10 minutes at room temperature. This step prevents the liquid ingredients from separating or the sauce from becoming too thin when blended while hot. Transfer the cooled mixture to a blender or food processor.
Add the 2 tbsp rice vinegar, 2 tbsp soy sauce, 1 tbsp sugar, and 1 tbsp lime juice. Pulse until the mixture reaches your desired consistency—smooth for a refined sauce or slightly textured for rustic appeal. Scrape down the sides as needed to ensure even blending.
Step 3: Season and Adjust to Taste
Transfer the blended sauce to a bowl and stir in the 0.5 tsp salt. Taste and adjust the seasoning carefully. The flavors should balance heat from the chillies, tang from the vinegar and lime, umami from the soy sauce, and sweetness from the sugar.
If the sauce is too thick, thin it with a splash of water, 1 tsp at a time, until it reaches a pourable consistency. If it’s too sharp, balance with an additional pinch of sugar. The sauce should be vibrant, aromatic, and slightly chunky from the blended aromatics.
Step 4: Rest and Serve
Let the sauce rest for 15-20 minutes before serving to allow the flavors to meld fully. The resting period softens the raw edge of the vinegar and lime while deepening the garlic and ginger notes. The oil will separate slightly during this time—this is normal and adds to the sauce’s rich texture.
Give it a final stir before serving. The sauce should have a glossy, slightly oily sheen with visible flecks of chilli, garlic, and ginger. Serve at room temperature alongside Hainanese chicken rice or any dish needing a fiery, aromatic kick.
Pro Tips For Making Hainanese Chicken Rice Chilli Sauce
- Toast the Aromatics: Fry the garlic, ginger, and chillies in oil on medium-low until fragrant but not browned—about 3-4 minutes. I learned this the hard way after burning two batches; the bitterness ruins the sauce.
- Seed the Chillies: Remove the seeds and membranes from the red chillies if you want a milder heat. Sounds obvious, but I skipped this once and ended up with a sauce so spicy it overpowered the chicken.
- Cool Before Blending: Let the fried mixture cool for 5-10 minutes before blending. Hot liquids expand and can cause messy explosions—I’m speaking from experience here.
- Balance with Vinegar: Add the rice vinegar gradually while tasting. My grandmother swore by this, and she was right: too much upfront makes the sauce sharp instead of bright.
Essential Equipment for Great hainanese chicken rice chilli sauce
Blending Essentials
A high-powered blender or food processor is crucial for achieving that signature smooth consistency. I swear by my Vitamix 5200—it pulverizes the chillies and aromatics into a silky paste in seconds. For smaller batches, a Ninja mini prep works just as well. 💡
Saucepan for Blooming
Use a small, heavy-bottomed saucepan (like All-Clad stainless steel) for blooming the aromatics. The even heat distribution prevents hot spots that can burn your garlic. A 2-quart size gives you enough room to stir without spills.
Prep Tools
A sharp chef’s knife (I use Wüsthof 8-inch) makes quick work of chopping the chillies. A microplane is perfect for grating the ginger finely. These tools ensure uniform pieces that blend evenly into your sauce.
Storage Containers
For freshness, store your sauce in a clean glass jar with airtight lid. I love Ball mason jars—they’re durable and easy to find. A 16-ounce jar holds a double batch perfectly. ❄️
Measuring Tools
Precision matters here. Use a liquid measuring cup for the oil and measuring spoons for the vinegar, soy sauce, and sugar. I keep a set of OXO Good Grips measuring tools in my kitchen—they’re affordable and accurate.
Safety Gear
Working with hot oil and chillies requires care. Keep a pair of kitchen tongs handy for handling the hot saucepan. I also recommend nitrile gloves when handling the chillies to protect your hands from the capsaicin.
Nutrition Facts
Frequently Asked Questions
Can I make this sauce less spicy?
Yes! Reduce the chillies to 5 and remove all seeds before chopping. For mild heat, use 3-4 jalapeños instead of Thai bird’s eye. The garlic and ginger will still provide great flavor.
Why bloom the aromatics in oil first?
Blooming releases essential oils and deepens the flavors. Cooking them in hot oil for 8-10 minutes creates a rich base that makes the sauce more complex and aromatic.
How long does homemade chilli sauce last?
Stored in an airtight container in the fridge, it stays fresh for 1 week. For longer storage, freeze in ice cube trays for up to 3 months.
What if my sauce is too thick?
Thin it with water, 1 teaspoon at a time, until pourable. Avoid adding too much at once—it’s easier to add more than to fix a watery sauce.

- Jollof Rice Sauce Recipe: West African Tomato and Spice Infusion - September 25, 2026
- Japanese Rice Soup Recipe: Umami-Rich Comfort in a Bowl - September 25, 2026
- Homemade Cream Of Rice Recipe: Silk-Smooth Breakfast in Minutes - September 25, 2026