
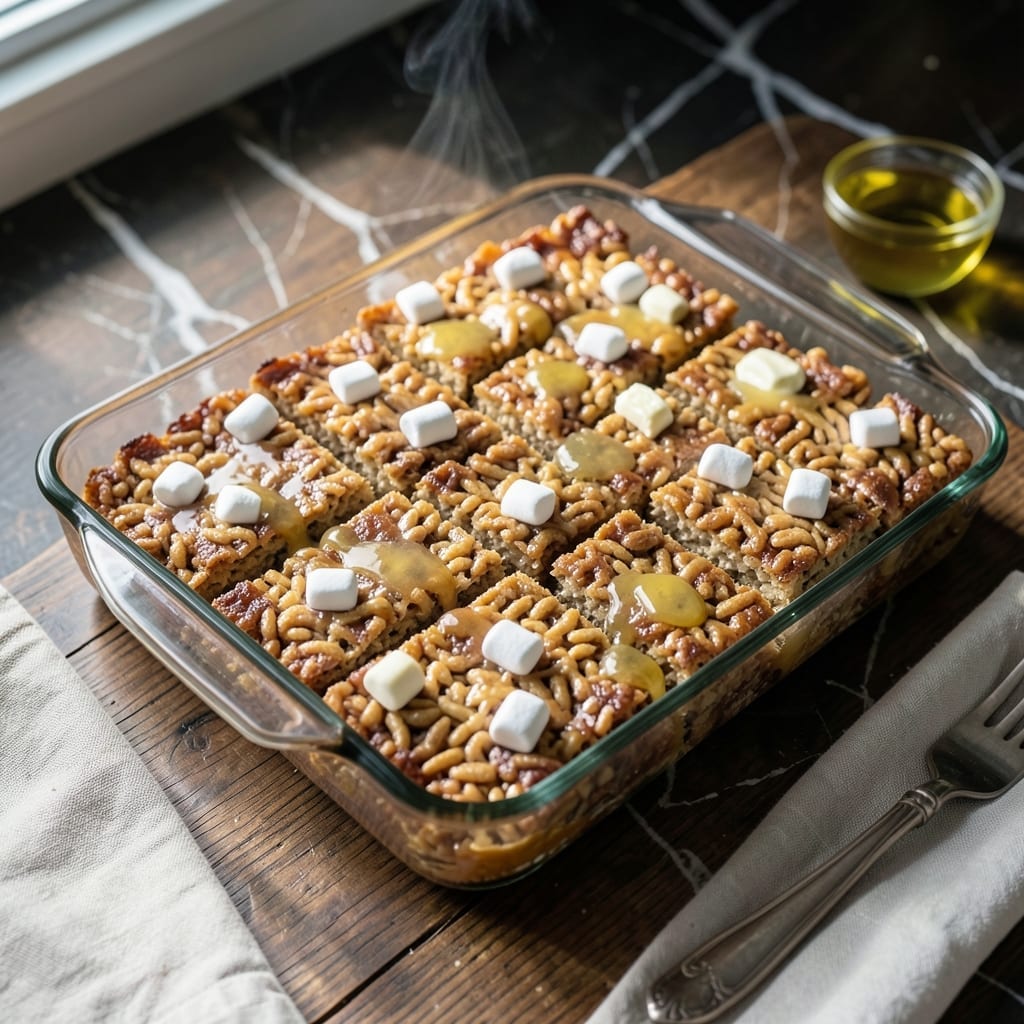
There’s something timeless about the perfect batch of no-bake squares that brings back childhood memories. This classic treat comes together with just a few pantry staples and 10 minutes of active time.
The secret to achieving that ideal balance of chewy and crisp lies in proper melting and mixing techniques. I’ve refined this method to ensure every batch turns out consistently delicious without any baking required.
What you’ll get are golden-brown squares with that signature snap when broken, yet perfectly gooey in the center. The buttery marshmallow mixture binds the cereal just enough to hold shape while maintaining that nostalgic texture.
These keep beautifully at room temperature and travel well for parties or lunchboxes. They’re the ultimate homemade comfort treat.
Ingredients for Homemade Rice Krispie Treats
Six ingredients, ten minutes, endless nostalgia with these no-bake squares.
| Ingredient | Amount | Notes |
|---|---|---|
| Rice Krispies Cereal 🥣 | 6 cups | Fresh for best snap |
| Mini Marshmallows 🍬 | 10 oz | About 4 cups unpacked |
| Unsalted Butter 🧈 | ½ cup | 1 stick, for melting |
| Vanilla Extract 🌿 | 1 tsp | Pure for best flavor |
| Sea Salt 🧂 | ¼ tsp | Fine grain preferred |
| Light Corn Syrup 💧 | ¼ cup | Keeps treats soft |
The marshmallows are the make-or-break here. Jet-Puffed or Kraft mini marshmallows melt fastest and smoothest—skip the giant ones. Butter quality matters more than you’d think; Plugra or Kerrygold give that rich, golden base. I grab mine at Trader Joe’s when they’re stocked. The cereal should be fresh enough to have that loud snap, crackle, pop—old cereal makes sad, soggy treats.
No mini marshmallows? Regular marshmallows chopped in half work (just takes longer to melt). Out of corn syrup? Honey or agave at the same amount does the trick. Want extra crunch? Add 1/4 cup toasted nuts with the cereal. The vanilla is subtle but worth it—use the real stuff, not imitation. And yes, the salt is necessary (don’t skip it).
These are best the same day but keep covered at room temp for 2-3 days. Press them into a buttered 9×13 pan, let cool completely before cutting. They freeze surprisingly well (up to 6 weeks) if wrapped tight—perfect for sudden cravings.
Why You’ll Love This Recipe
- 20-Minute Magic: I can have a batch ready before the oven even preheats—just melt, mix, and press.
- Buttery Vanilla Bliss: The browned butter and vanilla make these taste like a gourmet dessert, not just a childhood snack.
- Party or Lunchbox: They’re my go-to for birthday parties, school events, or just tucking into a lunchbox for a sweet surprise.
- Budget-Friendly Batch: A box of cereal and a bag of marshmallows stretch into dozens of treats, and they keep for days. Honestly, it’s my cheapest crowd-pleaser.
Step-by-Step Instructions for Homemade Rice Krispie Treats
Here’s the method. Straightforward, tested, works every time.
Step 1: Melt and Combine the Wet Ingredients
In a large saucepan, melt the 0.5 cup Unsalted Butter over low heat. I always use a light-colored pan so I can see when the butter starts to brown slightly. Once melted, add the 10 oz Mini Marshmallows and stir constantly with a silicone spatula.
The marshmallows will start to melt and combine with the butter. Add the 0.25 cup Light Corn Syrup and continue stirring. This helps keep the treats soft and gooey. Watch for the mixture to become completely smooth with no visible marshmallow lumps—that’s your signal it’s ready for the next step.
Step 2: Flavor the Marshmallow Base
Remove the saucepan from heat and stir in the 1 tsp Vanilla Extract and 0.25 tsp Sea Salt. The vanilla adds depth of flavor, while the salt balances the sweetness. I’ve found that fine grain sea salt dissolves more evenly into the mixture.
Let the mixture sit for 1-2 minutes to cool slightly. This prevents the cereal from getting soggy when you add it. You’ll notice the mixture thickens a bit as it cools, which is exactly what you want for that perfect chewy texture.
Step 3: Incorporate the Cereal
Add all 6 cups Rice Krispies Cereal at once to the marshmallow mixture. Using the same spatula, fold the cereal into the marshmallow base with gentle but firm strokes. I press down slightly as I fold to ensure every piece gets coated.
You’ll know it’s fully mixed when you see no dry cereal left and the mixture glistens with that characteristic marshmallow sheen. Work quickly here—the mixture starts to set as it cools. If it becomes too stiff to stir, place it back over low heat for 30 seconds to soften.
Step 4: Press and Set the Treats
Transfer the mixture to a greased 9×13-inch baking pan. I use a piece of parchment paper lightly coated with cooking spray to press the mixture down evenly. Press firmly and uniformly—this ensures your treats hold together when cut.
For that classic look, press until the top is smooth and level. If you prefer thicker treats, use a smaller pan, but remember they’ll be richer. Let the mixture cool at room temperature for 30-45 minutes until completely set.
Step 5: Cut and Serve
Once fully cooled and set, use a sharp knife to cut into squares. I run the knife under hot water between cuts for cleaner edges. The treats should have that perfect balance of crispy cereal snap and chewy marshmallow binding.
Store in an airtight container at room temperature for up to 3 days, though I doubt they’ll last that long. For best texture, avoid refrigerating—this can make them too hard. Serve at room temperature for that perfect nostalgic bite.
Pro Tips For Making Homemade Rice Krispie Treats
- Melt Butter Low: Use medium-low heat when melting the butter to prevent browning—burnt butter makes the whole batch taste bitter. I learned this the hard way after ruining two pans.
- Use Fresh Marshmallows: Stale mini marshmallows won’t melt as smoothly, leaving your treats grainy instead of gooey. Check the bag’s date, especially if they’ve been sitting in your pantry for months.
- Press While Warm: Press the mixture into the pan while it’s still warm, but don’t overpack it—just enough to hold shape. Resist the urge to compress too hard, or your treats will turn dense and tough.
- Add Salt Last: Sprinkle the sea salt over the top right after pressing, not during melting. Sounds weird, but it works: the flakes stay intact for a perfect salty-sweet crunch in every bite.
Troubleshooting This Dish
Too Sticky to Handle
If your mixture sticks to your hands while pressing, wet your fingers with cold water or rub them with a bit of butter. This prevents the marshmallow from clinging. I keep a small bowl of ice water nearby for quick dips as I work. 💡
Soggy Cereal Problem
Soggy treats usually mean the marshmallow mixture was too hot when you added the cereal. Let it cool for 1-2 minutes off the heat after melting. Also, use fresh cereal—old Rice Krispies lose their crispness and turn mushy faster.
Not Setting Properly
If your treats won’t hold their shape, you may not have pressed firmly enough. Use a greased spatula or parchment paper to compress the mixture evenly in the pan. Also, ensure you’re using the full 10 oz of marshmallows—skimping affects binding.
Hard as a Rock
Overcooking the marshmallow mixture can make treats hard. Melt on low heat only and remove from heat as soon as it’s smooth. If they’ve already set too hard, warm individual squares in the microwave for 5-10 seconds to soften. 🔥
Uneven Texture
For consistent texture, stir the cereal into the marshmallow mixture until every piece is fully coated. I fold it gently but thoroughly for 30-45 seconds. If some spots are too crispy, you may have pressed too lightly in those areas.
Butter Separating
If you see butter pooling, your heat was too high. Start with low heat and melt slowly. If it happens, stir vigorously to reincorporate the butter before adding cereal. A light-colored pan helps you monitor the melting process better.
Nutrition Facts
Frequently Asked Questions
Can I use regular marshmallows instead of mini?
Yes, but chop them into smaller pieces first. Mini marshmallows melt faster and more evenly, creating a smoother texture. Regular ones work in a pinch but require extra stirring to prevent lumps.
How do I make them extra chewy?
Replace the corn syrup with honey or add an extra 1/2 cup of marshmallows. Press the mixture lightly in the pan—over-pressing makes them dense. Let them cool for only 30 minutes before cutting.
Why did my treats turn out hard?
This usually happens if the marshmallow mixture was overcooked. Always melt over low heat and remove from heat as soon as it’s smooth. If they’re already hard, microwave for 5-10 seconds to soften.
Can I add mix-ins like chocolate chips?
Stir in up to 1 cup of add-ins after mixing in the cereal. Try chocolate chips, sprinkles, or nuts. For best results, let the mixture cool slightly first so the chips don’t melt.

- Jollof Rice Sauce Recipe: West African Tomato and Spice Infusion - September 25, 2026
- Japanese Rice Soup Recipe: Umami-Rich Comfort in a Bowl - September 25, 2026
- Homemade Cream Of Rice Recipe: Silk-Smooth Breakfast in Minutes - September 25, 2026