
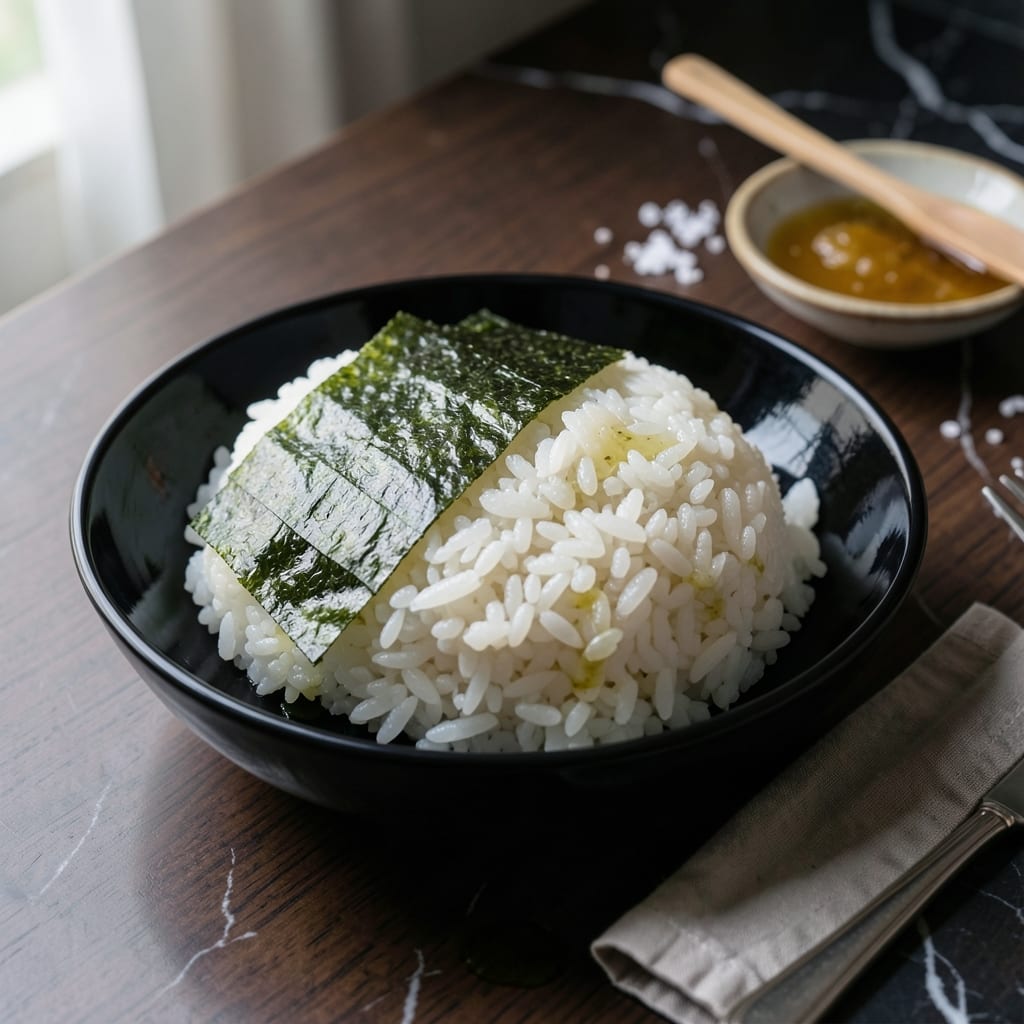
Mastering sushi rice at home transforms your kitchen into a Japanese restaurant. This method delivers the perfect balance of sticky texture and tangy sweetness that defines authentic sushi.
The process begins with thorough rinsing to remove excess starch, followed by precise cooking and seasoning. Each step builds the foundation for rice that holds together beautifully yet melts in your mouth.
What sets this apart is the vinegar mixture—sugar, salt, and rice vinegar—folded in while the rice is still warm. This creates that signature glossy finish and balanced flavor that makes all the difference.
Use this as the base for nigiri, rolls, or bowls. The results will rival your favorite sushi spot.
Ingredients for Homemade Sushi Rice
Short-grain rice plus a few pantry staples. That’s all you need for perfect sushi rice at home.
| Ingredient | Amount | Notes |
|---|---|---|
| Sushi Rice 🍚 | 2 cups | Short-grain Japanese variety preferred |
| Water 💧 | 2 ¼ cups | For rinsing and cooking |
| Rice Vinegar 🍯 | ½ cup | Seasoned or unseasoned |
| Granulated Sugar 🍬 | 2 tbsp | Dissolved in vinegar mixture |
| Sea Salt 🧂 | 1 tsp | Fine grain preferred |
| Nori Sheets 🌿 | 4 sheets | For serving or rolls |
| Wasabi Paste 🌶️ | 1 tbsp | Optional for serving |
| Pickled Ginger 🍯 | ¼ cup | Sliced thin, for serving |
| Soy Sauce 🥢 | ¼ cup | For dipping or seasoning |
| Sesame Seeds 🌰 | 1 tsp | Toasted, optional garnish |
| White Vinegar 🍶 | 1 tsp | For cleaning rice bowl |
The rice is non-negotiable—short-grain Japanese sushi rice is the only way to get that signature sticky texture. Look for brands like Koshihikari or Nishiki at Asian markets or the international aisle of larger supermarkets. Avoid jasmine or basmati; they’re too dry and won’t hold together. Rinse it thoroughly (3-4 times) until the water runs nearly clear—this removes excess starch and prevents gummy rice.
No rice vinegar? Apple cider vinegar with a pinch of sugar works in a pinch, but the flavor won’t be as clean. The sugar in the seasoning mixture is key for balancing the tang—don’t skip it. If you’re out of sea salt, kosher salt at half the amount will do. The nori, wasabi, and pickled ginger are for serving, so adjust amounts based on how you plan to use the rice (nigiri, rolls, or bowls).
Cooked rice stays fresh at room temperature for 4 hours (covered with a damp towel). Store leftovers in the fridge for up to 3 days—reheat gently with a splash of water to restore moisture. Freezing isn’t ideal, but if needed, spread cooked rice on a tray to freeze individually before bagging.
Why You’ll Love This Recipe
- 20-Minute Base: I can have this rice cooked and seasoned before the takeout guy even leaves the restaurant.
- Sweet-Tangy Magic: The rice vinegar and sugar hit that spot-on balance—bright, sticky, and just sweet enough to make you sneak a bite before it hits the nori.
- Party or Solo: Honestly, it’s my secret for both dinner-for-one sushi bowls and impressing friends at weekend gatherings.
- Pennywise Staple: A big bag of sushi rice costs less than a single roll at the store, and it keeps forever in the pantry.
Step-by-Step Instructions for Homemade Sushi Rice
Master these steps and you’ll have perfectly seasoned, restaurant-quality sushi rice every time.
Step 1: Rinse and Soak the Sushi Rice
Place the 2 cups sushi rice in a fine-mesh strainer and rinse under cold water, gently rubbing the grains between your fingers. Watch for the water to run completely clear—this removes excess starch that could make your rice gummy.
Once rinsed, transfer the rice to a bowl and cover with 2.25 cups water. I know it seems like a lot, but short-grain rice needs this hydration. Let it soak for 30 minutes. This step ensures even cooking and that signature sticky texture we’re after.
Step 2: Cook the Rice to Perfection
Drain the soaked rice thoroughly (no lingering water) and transfer it to your rice cooker or heavy-bottomed pot. Add fresh 2.25 cups water and cook according to your device’s instructions. For stovetop, bring to a boil, then reduce to low heat, cover, and simmer for 15 minutes.
Resist the urge to peek during cooking—releasing steam disrupts the process. When done, the grains should be tender with no chalky centers. Let it sit covered for 10 minutes off heat. This steam period is crucial for achieving uniformly cooked rice.
Step 3: Prepare the Seasoning Mixture
While the rice cooks, combine the 0.5 cup rice vinegar, 2 tbsp granulated sugar, and 1 tsp sea salt in a small saucepan. Heat over medium-low just until the sugar dissolves completely—about 2-3 minutes. Don’t let it boil.
This balance of sweet, salty, and tangy is what makes sushi rice special. The mixture should taste pleasantly sharp but not overwhelming. Remove from heat and let cool slightly—you don’t want to cook the rice further when you mix them together.
Step 4: Season the Rice with Care
Transfer the warm rice to a large wooden or glass bowl (avoid metal, which can react with the vinegar). Using a rice paddle or silicone spatula, gently fold in the vinegar mixture with a cutting motion. This technique prevents crushing the grains while ensuring even distribution.
I like to fan the rice slightly with a hand fan or piece of cardboard as I fold—this cools it quickly and gives it that characteristic gloss. Continue until the rice is room temperature and every grain glistens with seasoning. You’ll notice the texture becomes stickier as it cools.
Step 5: Serve with Traditional Accompaniments
Moisten your hands with a little 1 tsp white vinegar (this prevents sticking) and shape the rice as desired. For nigiri, form small oblong portions. For rolls, spread evenly over nori sheets.
Serve immediately with soy sauce for dipping, pickled ginger for cleansing your palate, and wasabi paste if you like heat. Sprinkle with sesame seeds for added texture and visual appeal. The rice should hold its shape but still be tender enough to melt in your mouth.
Pro Tips For Making Homemade Sushi Rice
- Rinse Thoroughly: Wash the sushi rice in 3-4 changes of cold water until it runs clear—this removes excess starch and prevents gummy rice. I learned this the hard way after my first few batches turned into a sticky mess.
- Use Rice Vinegar: Skip the apple cider or white vinegar; rice vinegar’s milder acidity balances the sugar and salt perfectly. After burning three batches with the wrong vinegar, I finally figured out why my rice tasted off.
- Season While Warm: Mix the vinegar, sugar, and salt into the rice while it’s still hot—it absorbs the flavors better and gives that classic glossy finish.
- Fan to Cool: Spread the rice on a tray and fan it gently as you fold in the seasoning. Sounds weird, but it works: this gives the rice that perfect sticky-yet-loose texture sushi needs.
Flavor Customization for These Flavors
Sweet Enhancements
For a sweeter profile, increase the granulated sugar to 3 tbsp in your vinegar mixture. This works beautifully for dessert-style sushi or when pairing with rich ingredients like tempura shrimp. The extra sweetness balances savory fillings perfectly.
Tangy Boost
Add an extra 2 tbsp rice vinegar to your seasoning mix for a sharper tang. This variation shines with salmon or tuna nigiri, cutting through the fish’s natural oils. I love this adjustment for hot summer days when I want a brighter flavor. 🌟
Umami Depth
Stir in 1 tsp soy sauce to your vinegar mixture before folding into the rice. This adds a subtle savory note that complements avocado or cucumber rolls. The color darkens slightly, giving your rice a more traditional sushi bar appearance.
Spicy Kick
Mix ½ tsp wasabi paste into your seasoning liquid for a subtle heat throughout. This works well for spicy tuna rolls or when you want consistent spice in every bite. Start with less—you can always add more to individual portions.
Citrus Twist
Add 1 tsp yuzu juice (or lime zest in a pinch) to your vinegar mixture. This brightens the flavor profile and pairs exceptionally well with scallop or crab sushi. The citrus aroma makes the dish feel lighter and more refreshing.
Herbal Note
Finely chop 1 tsp fresh shiso leaves and fold into the rice with your seasoning. This traditional Japanese herb adds a unique, slightly minty flavor that elevates vegetable sushi combinations. It’s a subtle change that impresses guests. 💫
Nutrition Facts
Frequently Asked Questions
Why do I need to rinse the rice so thoroughly?
Rinsing removes excess starch that would make your rice gummy instead of sticky. Aim for water that runs nearly clear—this typically takes 3-4 rinses with gentle rubbing.
Can I use a different type of vinegar?
Rice vinegar is ideal, but apple cider vinegar with extra sugar works in a pinch. Avoid balsamic or red wine vinegar—their strong flavors will overpower the rice.
How do I keep the rice from sticking to my hands?
Moisten your hands with a little white vinegar or water before handling. This creates a barrier so the rice doesn’t clump to your skin while shaping.
How long can I store leftover rice?
Keep it at room temperature for up to 4 hours (covered with a damp towel). Refrigerate for 3 days max—reheat gently with a splash of water to restore moisture.

- Jamaican Jollof Rice Recipe: Island Spice in Every Bite - October 18, 2026
- Hamburger Rice Hot Dish Recipe: Midwest Comfort in One Pan - October 18, 2026
- Iranian Cabbage Rice Recipe: Aromatic Herbs and Spiced Layers - October 18, 2026