
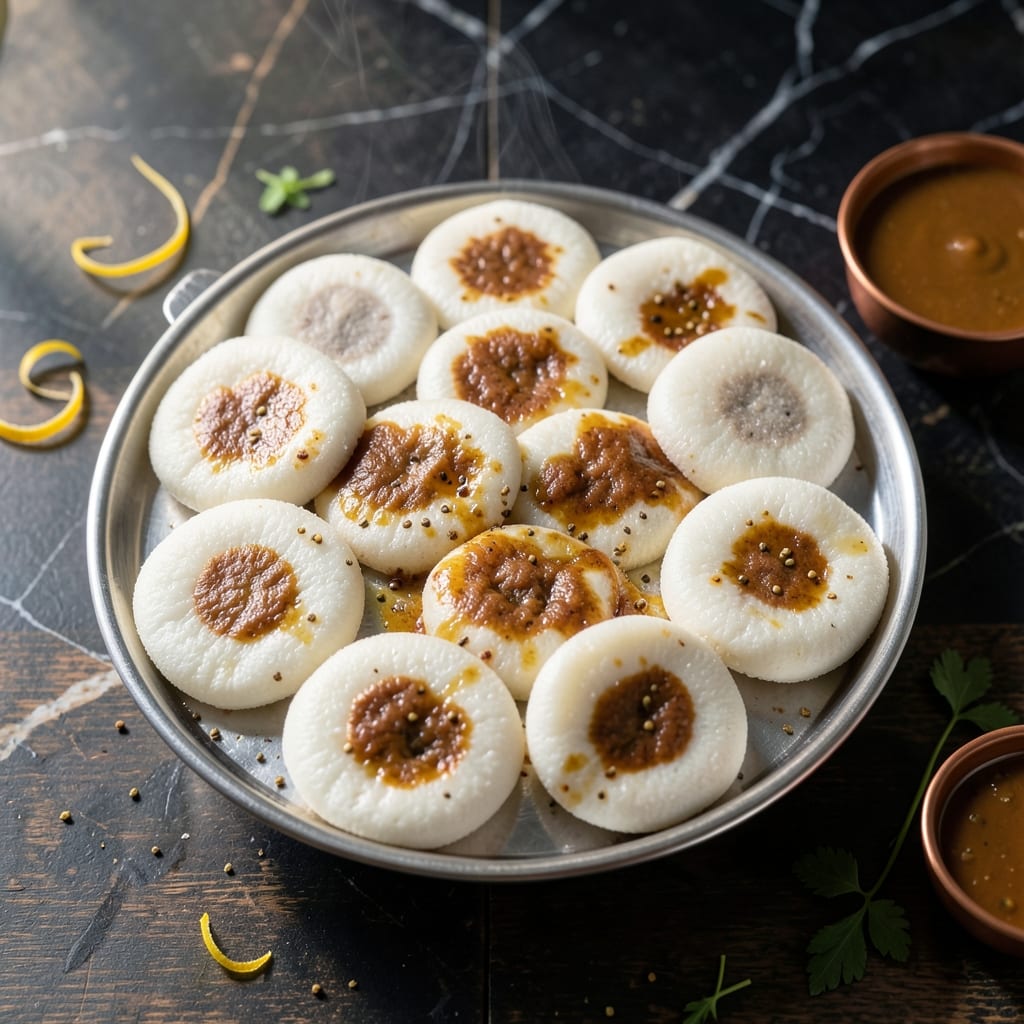
This rice flour idli delivers the classic South Indian experience with a simpler approach. The fermentation process creates that signature tangy flavor and airy texture.
Using rice flour instead of traditional batter reduces prep time while maintaining authenticity. The steaming method ensures these pillows stay light and fluffy, with just the right amount of sourness.
The result is soft, spongy idlis with a delicate crust from the steamer. They pair perfectly with coconut chutney or sambar for a complete meal.
This method works in any home kitchen, no special equipment required. The fermentation time is the only hands-off period in the process.
Ingredients for Idli Recipe Using Rice Flour
These traditional ingredients create authentic South Indian idlis with minimal effort using rice flour.
| Ingredient | Amount | Notes |
|---|---|---|
| Idli Rice Flour 🌾 | 2 cups | Fine, unroasted variety |
| Urad Dal Flour 🌱 | ½ cup | Black gram flour, essential |
| Fenugreek Seeds 🌿 | ½ tsp | Methi seeds, aids fermentation |
| Salt 🧂 | 1 ½ tsp | Adjust to taste after fermentation |
| Water 💧 | 2 ½ cups | Lukewarm, for batter consistency |
| Coconut Oil 🥥 | 1 tbsp | For greasing idli molds |
| Curry Leaves 🍃 | 10 pieces | Optional, for enhanced aroma |
| Green Chilies 🌶️ | 2 whole | Finely chopped, optional |
| Ginger 🌿 | 1 tbsp | Freshly grated for flavor |
| Cumin Seeds 🌿 | ½ tsp | For tempering, optional |
| Mustard Seeds 🌿 | ½ tsp | For tempering, optional |
| Asafoetida 🌿 | ¼ tsp | Hing, for authentic flavor |
The rice flour must be fine and unroasted to achieve the proper texture—look for brands like Bob’s Red Mill or Swarna at Indian grocery stores. Urad dal flour is non-negotiable; it provides the fermentation base and fluffiness. Check expiration dates on both flours, as stale ingredients won’t ferment properly. Fenugreek seeds (methi) are often sold in the spice aisle of Patel Brothers or H-Mart.
No urad dal flour? Soak whole urad dal overnight, then blend into a fine paste—this is the traditional method but adds prep time. Half the amount of baking soda can mimic fermentation in a pinch (though flavor suffers). Coconut oil can be swapped for any neutral oil, but it adds authentic South Indian flavor. Skip the tempering spices if unavailable, but they elevate the final dish significantly.
Store flours in airtight containers in a cool, dark place for up to 3 months. Fermented batter keeps in the fridge for 24 hours before steaming. Cooked idlis stay fresh for 2 days refrigerated or freeze for 1 month—reheat by steaming.
Why You’ll Love This Recipe
- No Soaking Needed: I skip the overnight soak entirely—just mix the rice flour, urad dal flour, and fenugreek seeds with water, and it’s ready to steam.
- Soft and Fluffy: The urad dal flour gives these idlis that perfect pillowy texture, while the fenugreek seeds add a subtle earthy note that’s just right.
- Breakfast or Dinner: I make a big batch on Sunday and reheat them for quick breakfasts or pair with chutney for a light dinner.
- Budget-Friendly Staple: Idli rice flour and urad dal flour are pantry staples that stretch far—honestly, this costs pennies per serving compared to takeout.
Step-by-Step Instructions for Idli Using Rice Flour
This method ensures light, fluffy steamed cakes with the characteristic fermented tang every time.
Step 1: Prepare the Batter Foundation
In a large mixing bowl, combine the 2 cups Idli Rice Flour and 0.5 cup Urad Dal Flour. These two components form the essential base for authentic texture and fermentation. Add the 0.5 tsp Fenugreek Seeds—this small but crucial amount provides the necessary bacteria for proper fermentation.
Gradually incorporate the 2.5 cups Water, using lukewarm liquid to activate the fermentation process. Whisk vigorously until you achieve a smooth, lump-free batter with a consistency similar to thick pancake batter. The mixture should pour easily but hold its shape momentarily when drizzled.
Cover the bowl with a clean kitchen towel and let it rest at room temperature for 4-6 hours. You’ll notice the batter beginning to rise and develop small bubbles across the surface, indicating the fermentation has started.
Step 2: Season and Complete Fermentation
After the initial fermentation period, add the 1.5 tsp Salt to the batter. The salt not only seasons the final product but also helps control the fermentation rate. Stir well to distribute evenly throughout the mixture.
Cover the bowl again and allow the batter to ferment for an additional 8-12 hours or overnight. The ideal fermentation is complete when the batter has roughly doubled in volume and exhibits a pleasant, slightly sour aroma. The surface should appear frothy with numerous bubbles, and the texture should be airy when stirred.
Step 3: Prepare the Steaming Apparatus
Fill a large pot or idli steamer with 2-3 inches of water and bring it to a rolling boil. While the water heats, lightly grease the idli molds with the 1 tbsp Coconut Oil. This prevents sticking and ensures easy removal of the steamed cakes.
For enhanced flavor, you can prepare a simple tempering. Heat a small pan and add the 0.5 tsp Mustard Seeds and 0.5 tsp Cumin Seeds. When they begin to sizzle, add the 10 pieces Curry Leaves, 2 whole Green Chilies (finely chopped), 1 tbsp Ginger (grated), and 0.25 tsp Asafoetida. Stir for 30 seconds until fragrant.
Step 4: Steam to Perfection
Give the fermented batter a final stir and pour it into the prepared idli molds, filling each cavity about ¾ full. The batter will expand during steaming, so avoid overfilling to prevent spillage or uneven cooking.
Carefully place the molds in the steamer, ensuring the lid fits tightly to trap steam. Steam over medium-high heat for 10-12 minutes. You’ll know they’re done when the idlis have risen slightly above the mold rims and a toothpick inserted in the center comes out clean. The surface should appear matte and slightly spongy to the touch.
Step 5: Rest and Serve
Turn off the heat and let the idlis rest in the steamer with the lid on for an additional 2-3 minutes. This final rest allows them to set completely and makes them easier to remove from the molds without breaking.
Use a spoon or damp cloth to gently loosen the edges if needed, then transfer the idlis to a serving plate. They should be uniformly white with a soft, pillowy texture throughout. Serve warm with coconut chutney or sambar for the complete experience. The fermented tang should be noticeable but balanced, with a light, airy crumb that melts in your mouth.
Pro Tips For Making Idli Recipe Using Rice Flour
- Soak Fenugreek First: I learned this the hard way—soak the fenugreek seeds in warm water for 15 minutes before grinding. It softens them just enough to blend smoothly with the urad dal flour.
- Use Warm Water: Always mix the rice flour and urad dal flour with warm water (about 105°F). Cold water makes the batter dense, and your idlis won’t rise properly.
- Ferment Overnight: Skip the rush—let the batter ferment for at least 8-10 hours in a warm spot. I once tried 4 hours, and the idlis turned out flat and sour.
- Steam on High: Crank the heat to high when steaming, but keep the lid slightly ajar for the first 2 minutes to prevent water droplets from ruining the texture.
Troubleshooting Perfect Results
Batter Not Rising
If your batter isn’t rising after 6 hours, check your fenugreek seeds first—they’re the fermentation catalyst. I once used old seeds from my pantry and got zero bubbles. Try adding ¼ tsp baking soda as a last resort, but the flavor won’t be as authentic. 💡
Dense Idli Texture
Overmixing the batter develops gluten, leading to tough idlis. Stir just until combined. Also, ensure your urad dal flour is fresh—stale flour loses its leavening power. I keep mine in the freezer to extend shelf life.
Sour Batter
Over-fermentation causes excessive sourness. If your batter smells too tangy, reduce fermentation time next batch or refrigerate after 8 hours. In a pinch, add 1 tsp baking soda to neutralize some acidity before steaming.
Sticking to Molds
Even with coconut oil, idlis can stick if the molds aren’t hot enough. Preheat your steamer for 5 minutes before adding batter. For stubborn cases, soak molds in warm water for 2 minutes before greasing. This creates a better non-stick surface.
Uneven Cooking
If tops are raw while bottoms are firm, your steamer may have hot spots. Rotate molds halfway through cooking. Also, ensure water level stays consistent—add boiling water if it drops below 1 inch during steaming.
Flat Idlis
This usually means insufficient fermentation or overfilling molds. Your batter should be bubbly and doubled before steaming. Fill molds only ¾ full to allow for expansion. I learned this the hard way with my first collapsed batch. 😅
Nutrition Facts
Frequently Asked Questions
Can I skip the fenugreek seeds?
Fenugreek is key for fermentation. Without it, your batter won’t rise properly. Add ¼ tsp baking soda as a last resort, but the flavor and texture won’t be authentic.
Why is my batter too thick?
Adjust with lukewarm water until it reaches pancake batter consistency. Too much flour makes dense idlis. The ratio should be about 2.5 cups water to 2 cups rice flour.
How long can I store the batter?
Fermented batter keeps in the fridge for 24 hours before steaming. For longer storage, freeze the batter for up to 1 month in an airtight container.
Can I use regular rice flour?
Only fine, unroasted idli rice flour works best. Regular rice flour may yield grainy or flat idlis. Check for brands like Bob’s Red Mill or Swarna.

- Mujadara Rice and Lentils Recipe: Earthy Spiced Lentils With Caramelized Onions - November 1, 2026
- Naija Fried Rice Recipe: Street-Style Spice With Veggie Crunch - November 1, 2026
- Mushy Rice Recipe: Fluffy Grains Transformed in Minutes - November 1, 2026