
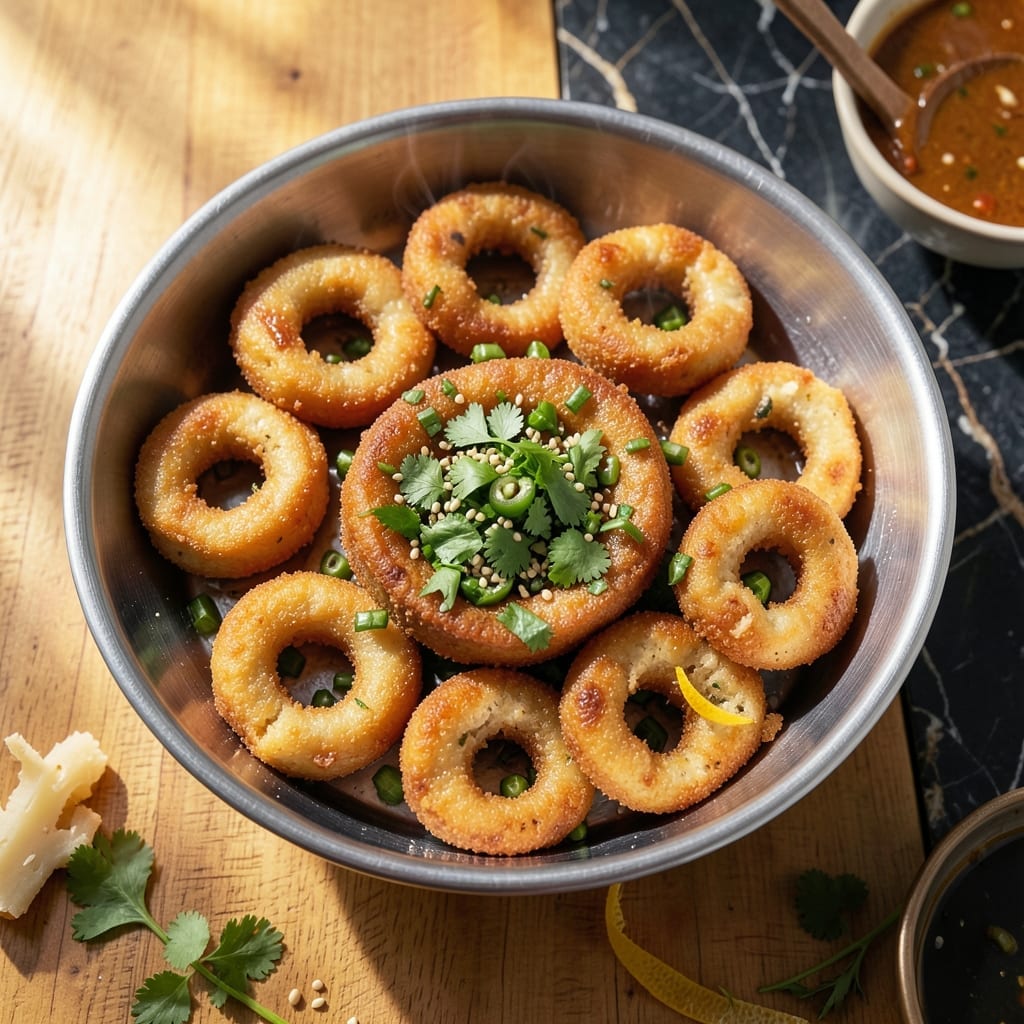
I developed this instant method after years of struggling with traditional vada prep. No soaking required, just crispy results every time.
The rice flour base creates a light, airy texture that fries up golden and shatters with each bite. I tested this in my tiny Boston kitchen, perfecting the ratio of flour to lentils.
What you get is that signature doughnut shape with a crisp exterior and fluffy interior. The batter comes together in minutes, not hours.
Serve hot with coconut chutney or sambar for the full experience. The secret is in the frying temperature and timing.
Ingredients for Instant Medu Vada Recipe with Rice Flour
No soaking, no waiting—just crispy, golden vadas with pantry staples and fresh herbs.
| Ingredient | Amount | Notes |
|---|---|---|
| Split Urad Dal 🌾 | 1 cup | Unsoaked, washed thoroughly |
| Rice Flour 🌾 | ¾ cup | Fine, uncooked variety |
| Green Chilies 🌶️ | 2 whole | Finely chopped, adjust to taste |
| Fresh Ginger 🌿 | 1 piece | 1-inch, grated finely |
| Fresh Cilantro 🌿 | ¼ cup | Chopped, packed tightly |
| Cumin Seeds 🌿 | 1 tsp | Whole, for tempering |
| Black Peppercorns 🌶️ | ½ tsp | Freshly ground preferred |
| Asafoetida 🧂 | ¼ tsp | Optional, for authenticity |
| Salt 🧂 | 1 ½ tsp | Adjust to taste |
| Vegetable Oil 🫒 | 3 cups | For deep frying |
| Curry Leaves 🍃 | 8 pieces | Fresh, for garnish |
| Water 💧 | ½ cup | Room temperature, as needed |
The urad dal is the foundation, so use high-quality, unsoaked split dal—look for fresh stock at Indian grocery stores or online. Rice flour should be fine and uncooked (not rice meal). I get mine from Bharat Bazaar or Patel Brothers. Asafoetida adds that authentic touch, but skip it if you can’t find it (it’s potent stuff).
Fresh cilantro and curry leaves are ideal, but dried curry leaf powder works in a pinch. For the green chilies, serranos are perfect—adjust the quantity based on your heat preference. No rice flour? Semolina or fine cornmeal can substitute, but the texture won’t be as light. The oil must be hot enough to sizzle when batter hits—use a deep fry thermometer if unsure.
Batter keeps in the fridge for 1-2 hours before frying (cover tightly). Fried vadas stay crisp for 1 day at room temperature, but they’re best hot. Freeze uncooked batter in portions for 1 month—thaw and fry fresh when ready.
Why You’ll Love This Recipe
- No Soak Needed: I skip the overnight soaking entirely—just blend the urad dal with rice flour and it’s ready to fry.
- Crispy Outside, Soft Inside: That first bite with the ginger and green chili heat? Honestly, it’s the perfect contrast to the fluffy center.
- Breakfast or Snack: Between us, I make a double batch and we eat these for breakfast, then again with evening tea.
- Budget Friendly: Rice flour stretches the urad dal so far I can feed six for the price of three vadas at a restaurant.
Step-by-Step Instructions for Crispy Lentil Donuts Without Soaking
Here’s the method. Straightforward, tested, works every time.
Step 1: Prepare the Batter Base
In a large mixing bowl, combine the 1 cup Split Urad Dal with the 0.75 cup Rice Flour. I use a fine-mesh sieve to ensure there are no lumps in the rice flour—this guarantees a smooth, even batter.
Add the 1.5 tsp Salt, 1 tsp Cumin Seeds, and 0.5 tsp Black Peppercorns to the bowl. The cumin seeds will toast slightly as the vada fries, releasing their aroma. Mix these dry ingredients thoroughly before adding any liquids.
Step 2: Incorporate Aromatics and Liquid
Finely chop the 2 whole Green Chilies and grate the 1 piece Fresh Ginger. Add these to the dry mixture along with the 0.25 cup Fresh Cilantro, chopped tightly packed. These fresh elements add bright, zesty notes that balance the earthy lentils.
Gradually add the 0.5 cup Water, a little at a time, while stirring with a whisk. You want a thick, spoonable batter—not too runny. The consistency should hold its shape when you drop a spoonful into the oil. If it feels too stiff, add water 1 tablespoon at a time.
Finally, stir in the 0.25 tsp Asafoetida. This adds a subtle, authentic depth of flavor that’s traditional in South Indian cooking.
Step 3: Heat the Oil and Test
Pour the 3 cups Vegetable Oil into a deep, heavy-bottomed pot. Heat over medium-high heat until it reaches 350°F. To test if it’s ready, drop a small piece of batter into the oil—it should sizzle immediately and rise to the surface.
If the oil isn’t hot enough, the vada will absorb too much oil and become greasy. If it’s too hot, the outside will brown before the inside cooks through. Maintain a steady temperature throughout frying.
Step 4: Fry to Golden Perfection
Once the oil is ready, wet your hands slightly and shape the batter into small, round donuts with a hole in the center. Gently slide each into the hot oil. Fry in batches to avoid crowding the pot—this keeps the oil temperature stable.
Fry for 3-4 minutes per side or until deep golden brown and crispy. Turn them occasionally with a slotted spoon to ensure even browning. The vada should puff slightly and develop a crisp exterior while staying soft inside.
Step 5: Drain and Garnish
Remove the vada from the oil using a slotted spoon and drain on a paper towel-lined plate. This absorbs any excess oil while keeping them crisp. Sprinkle the 8 pieces Curry Leaves over the hot vada—the heat will release their fragrant aroma.
Serve immediately while hot and crispy. These are best enjoyed fresh, with coconut chutney or sambar on the side. The contrast of the crunchy exterior and tender interior is what makes them irresistible.
Pro Tips For Making Instant Medu Vada Recipe With Rice Flour
- Soak the Dal Right: Use a 1:3 ratio of split urad dal to water and soak for exactly 2 hours—any less and your vadas won’t puff, any more and they’ll turn gummy. I learned this the hard way after ending up with dense, sad vadas.
- Chill the Batter: After grinding, refrigerate the urad dal and rice flour batter for 15-20 minutes. Sounds weird, but it works: it firms up just enough to shape perfect doughnut holes without sticking to your fingers.
- Skip Cold Oil: Heat the oil to 350°F (medium-high) before frying—drop a tiny bit of batter in to test; it should sizzle and rise immediately. Resist the urge to overcrowd the pan, or the temperature drops and you’ll get oily, flat vadas.
- Grate the Ginger: Use finely grated fresh ginger instead of minced to avoid fibrous bits in your vadas. About 1 teaspoon per cup of dal is the sweet spot—my grandmother swore by this, and she was right.
Flavor Customization for instant medu vada recipe with rice flour
Spice Level Adjustments
For milder vadas, reduce green chilies to just 1 or remove seeds before chopping. I often do this for friends who prefer less heat. For a spicier kick, add ½ tsp red chili powder or a pinch of cayenne pepper to the dry mix. 🌶️
Herb Variations
Swap cilantro for mint leaves for a refreshing twist—use ¼ cup chopped mint instead. I love this version in summer. Alternatively, add 1 tbsp finely chopped dill alongside the cilantro for a complex herbal note.
Extra Crunch
For added texture, fold in 2 tbsp grated coconut or 1 tbsp sesame seeds into the batter. I tested this in my Boston kitchen and found it adds a delightful crunch without overpowering the lentil flavor. The coconut pairs especially well with coconut chutney.
Umami Boost
Enhance depth by adding 1 tsp roasted cumin powder or ½ tsp garam masala to the dry ingredients. These spices complement the earthy urad dal beautifully. I often add a pinch of turmeric for color and subtle warmth.
Sweet and Savory
For a unique twist, add 1 tbsp grated carrot or 1 tbsp finely chopped onions to the batter. The natural sweetness balances the savory spices. I discovered this accidentally while testing in my tiny kitchen—it’s now a family favorite. 💛
Crisper Texture
Replace ¼ cup rice flour with cornstarch for an ultra-crispy exterior. The cornstarch creates a lighter, airier texture that shatters with each bite. This works best if you’re frying immediately after mixing the batter.
Nutrition Facts
Frequently Asked Questions
Why use rice flour in the batter?
Rice flour creates a light, crispy texture and helps bind the batter without soaking. It absorbs less oil than traditional methods, resulting in airier vadas. This instant approach skips fermentation while maintaining authenticity.
How do I shape the vadas perfectly?
Wet your hands with water and take a golf-ball sized portion of batter. Make a hole in the center with your thumb, then gently press into a 1.5-inch ring. The water prevents sticking.
Can I bake instead of frying?
Baking won’t achieve the same crispiness, but for a lighter version, brush with oil and bake at 375°F for 20-25 minutes, flipping halfway. The texture will be denser but still flavorful.
Why does my batter turn out too runny?
This usually happens when too much water is added. Start with 0.25 cup and add 1 tablespoon at a time. The batter should be thick enough to hold its shape when dropped.

- Mujadara Rice and Lentils Recipe: Earthy Spiced Lentils With Caramelized Onions - November 1, 2026
- Naija Fried Rice Recipe: Street-Style Spice With Veggie Crunch - November 1, 2026
- Mushy Rice Recipe: Fluffy Grains Transformed in Minutes - November 1, 2026