
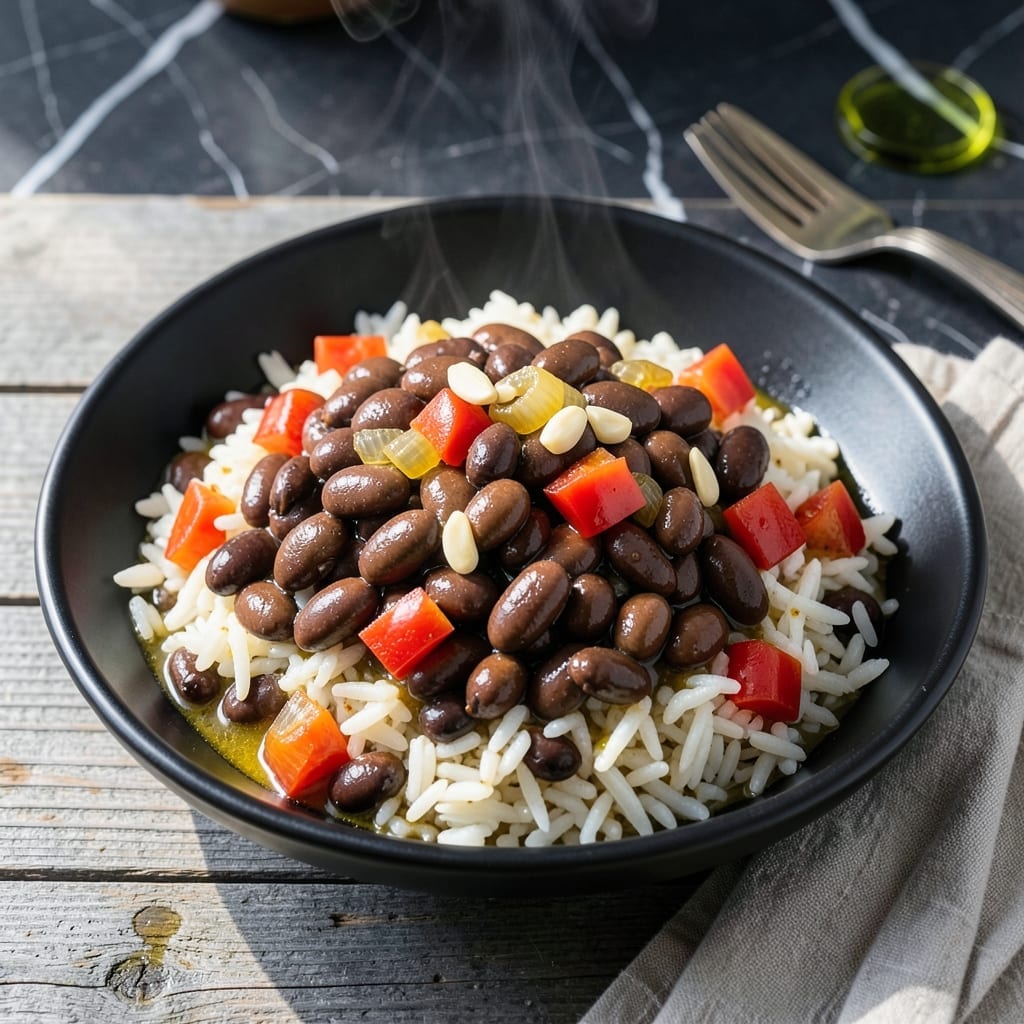
This one-pot dish transforms simple ingredients into a hearty, vegan meal with minimal effort. The Instant Pot handles everything, from infusing flavors to achieving the perfect texture without constant attention.
I’ve refined this method to ensure the rice stays fluffy and the beans tender, all while keeping prep under 10 minutes. The secret lies in the precise liquid ratio and timing, which the Instant Pot nails every time.
The result is a satisfying, protein-packed dish that’s as versatile as it is delicious. Customize with your favorite spices or vegetables to make it your own.
Ready to simplify dinner? This recipe delivers convenience and flavor in one hands-off process.
Ingredients for Instant Pot Rice and Beans
Pantry staples plus fresh veggies make this Instant Pot dish effortlessly delicious.
| Ingredient | Amount | Notes |
|---|---|---|
| Dried Black Beans 🫘 | 1 cup | Rinsed and picked over |
| Long-Grain White Rice 🍚 | 1 ½ cups | Rinsed until water runs clear |
| Vegetable Broth 🥣 | 3 ½ cups | Low-sodium preferred |
| Yellow Onion 🧅 | 1 whole | Medium, finely diced |
| Garlic Cloves 🧄 | 4 cloves | Minced for depth of flavor |
| Red Bell Pepper 🌶️ | 1 whole | Seeds removed, diced |
| Ground Cumin 🌿 | 1 ½ tsp | Toasted for warmth |
| Smoked Paprika 🌶️ | 1 tsp | Adds smoky depth |
| Bay Leaf 🍃 | 1 whole | Dried or fresh |
| Lime Juice 🍋 | 2 tbsp | Freshly squeezed |
| Cilantro 🌿 | ¼ cup | Chopped, for garnish |
| Olive Oil 🫒 | 2 tbsp | Extra-virgin for richness |
| Sea Salt 🧂 | 1 tsp | Adjust to taste |
| Black Pepper 🌶️ | ½ tsp | Freshly ground preferred |
The beans are the backbone here. Goya or Rancho Gordo dried black beans cook up creamy and hold their shape. I always grab mine from Whole Foods bulk section—cheaper and you can get exactly the amount you need. The rice should be long-grain white for that fluffy texture (brown rice needs more liquid and time). If using canned beans, drain and rinse well to avoid a metallic taste.
No smoked paprika? Regular paprika plus a pinch of cayenne gets you close. Fresh cilantro not on hand? Flat-leaf parsley works in a pinch. The bell pepper can be swapped for jalapeño if you like heat. Vegetable broth is key for that deep flavor—Better Than Bouillon makes a great paste version that’s easy to keep on hand. Skip the bay leaf if you must, but it really ties everything together.
Leftovers keep beautifully—honestly taste better the next day. Store in the fridge for up to 5 days or freeze for 3 months (the rice may soften a bit). I like to portion into containers for easy grab-and-go lunches. Reheats perfectly in the microwave (add a splash of water if it seems dry).
Why You’ll Love This Recipe
- Set and Forget: I toss everything in the Instant Pot, press a button, and walk away—no babysitting required.
- Deep, Rich Flavor: The garlic and onions simmer with the beans and rice in broth until every bite tastes like it cooked all day.
- Meal Prep MVP: I make a big batch on Sunday and it fuels my lunches for the entire week.
- Pennywise Comfort: Dried beans, rice, and pantry staples stretch into a hearty meal that costs pennies per serving.
Step-by-Step Instructions for Instant Pot Rice and Beans
This hands-off method delivers perfectly cooked rice and beans with minimal effort.
Step 1: Sauté the Aromatics
Set your Instant Pot to the Sauté function on Normal heat. Add the 2 tbsp Olive Oil and let it heat for 30 seconds. Add the finely diced Yellow Onion and cook for 3-4 minutes until translucent and just starting to brown at the edges.
Stir in the minced Garlic Cloves and diced Red Bell Pepper, cooking for another 2 minutes until fragrant. This builds a flavor base that infuses the entire dish. Watch carefully—the garlic should never brown or it will turn bitter.
Step 2: Toast the Spices and Add Remaining Ingredients
Sprinkle the 1.5 tsp Ground Cumin and 1 tsp Smoked Paprika over the vegetables. Toast for 30 seconds, stirring constantly, until you smell their warm, earthy aroma. This brief toasting deepens their flavor significantly.
Add the 1 cup Dried Black Beans, 1.5 cups Long-Grain White Rice, 3.5 cups Vegetable Broth, 1 tsp Sea Salt, 0.5 tsp Black Pepper, and 1 whole Bay Leaf. Stir well to combine, making sure nothing sticks to the bottom of the pot.
Step 3: Pressure Cook to Perfection
Secure the lid on your Instant Pot and set the valve to Sealing. Cook on High Pressure for 25 minutes. The pot will take about 10-15 minutes to come to pressure before the cooking time begins.
You’ll know the cooking cycle has started when the float valve pops up. The beans should be tender but not mushy, and the rice should have absorbed all the liquid. If you prefer softer beans, add 5 more minutes of pressure cooking time.
Step 4: Release Pressure and Finish
Let the pressure release naturally for 10 minutes, then carefully switch the valve to Venting to release any remaining pressure. This natural release prevents the beans from breaking apart or the rice from becoming mushy.
Once all pressure has released, open the lid and discard the Bay Leaf. Stir in the 2 tbsp Lime Juice to brighten the flavors. Taste and adjust seasoning with additional Sea Salt if needed.
Step 5: Rest and Garnish
Let the rice and beans sit for 5 minutes to allow the flavors to meld together. The rice will finish absorbing any remaining liquid during this time.
Fluff the mixture gently with a fork and garnish with the 0.25 cup Cilantro. Each serving should have a good mix of rice, beans, and vegetables with a vibrant, fresh finish from the cilantro and lime.
Pro Tips For Making Instant Pot Rice And Beans
- Soak the Beans: I learned this the hard way—dried black beans cook more evenly and digest easier after a 4-hour soak in warm water, even if you’re using the Instant Pot.
- Layer Rice on Top: After burning two batches, I finally figured out to add the rice in a separate layer above the beans with broth to prevent it from turning mushy at the bottom.
- Skip the Salt Early: Sounds weird, but it works: wait to season until after pressure cooking—adding salt too soon can make the beans tough.
- Use Fresh Garlic: My grandmother swore by this, and she was right: fresh minced garlic cloves add way more flavor than the jarred stuff, especially in this dish.
Dietary Considerations for This instant pot rice and beans
Naturally Vegan
This dish is inherently 100% plant-based, relying on beans as the primary protein source. Black beans provide about 15g of protein per cup, making this a satisfying meat-free meal. I love that it’s naturally free from animal products without any substitutions needed.
Gluten-Free Friendly
With no wheat, barley, or rye, this recipe is safe for those with gluten sensitivity or celiac disease. Just ensure your vegetable broth is certified gluten-free—Better Than Bouillon offers reliable options. The rice and beans create a complete protein together.
Low Sodium Options
Using low-sodium vegetable broth keeps the dish heart-healthy. You can further reduce sodium by omitting the added 1 tsp Sea Salt and relying on the natural flavors. I find the lime and spices provide plenty of taste without excess salt.
Allergen Information
This dish is free from the top 9 allergens (milk, eggs, fish, etc.). However, always check your spice blends for hidden ingredients. Cumin and paprika are typically safe, but cross-contamination can occur in processing facilities.
High Fiber Benefits
Each serving delivers a significant portion of your daily fiber needs—about 10-12g from the beans and rice combination. This supports digestive health and keeps you feeling full longer. I notice I stay satisfied for hours after eating this meal.
Nut-Free Preparation
There are no tree nuts or peanuts in this recipe, making it safe for most nut allergies. Just be mindful of garnishes—skip the cilantro if using pre-chopped versions that might have cross-contamination. 💪
Nutrition Facts
Frequently Asked Questions
Do I need to soak the beans first?
No soaking required! The Instant Pot cooks dried beans perfectly in 25 minutes without pre-soaking. Just rinse them well to remove any debris.
Can I use canned beans instead?
Yes, but adjust the liquid. Use 2 cans (drained), reduce broth to 2 cups, and cook for only 5 minutes. The texture will be softer.
Why is my rice mushy?
This usually happens with too much liquid or stirring after cooking. Stick to the 3.5 cups broth measurement and avoid overmixing. Let it rest 5 minutes before serving.
Can I make this with brown rice?
Yes, but increase liquid to 4.5 cups and cook time to 35 minutes. Brown rice needs more water and time to soften.

- Mujadara Rice and Lentils Recipe: Earthy Spiced Lentils With Caramelized Onions - November 1, 2026
- Naija Fried Rice Recipe: Street-Style Spice With Veggie Crunch - November 1, 2026
- Mushy Rice Recipe: Fluffy Grains Transformed in Minutes - November 1, 2026