
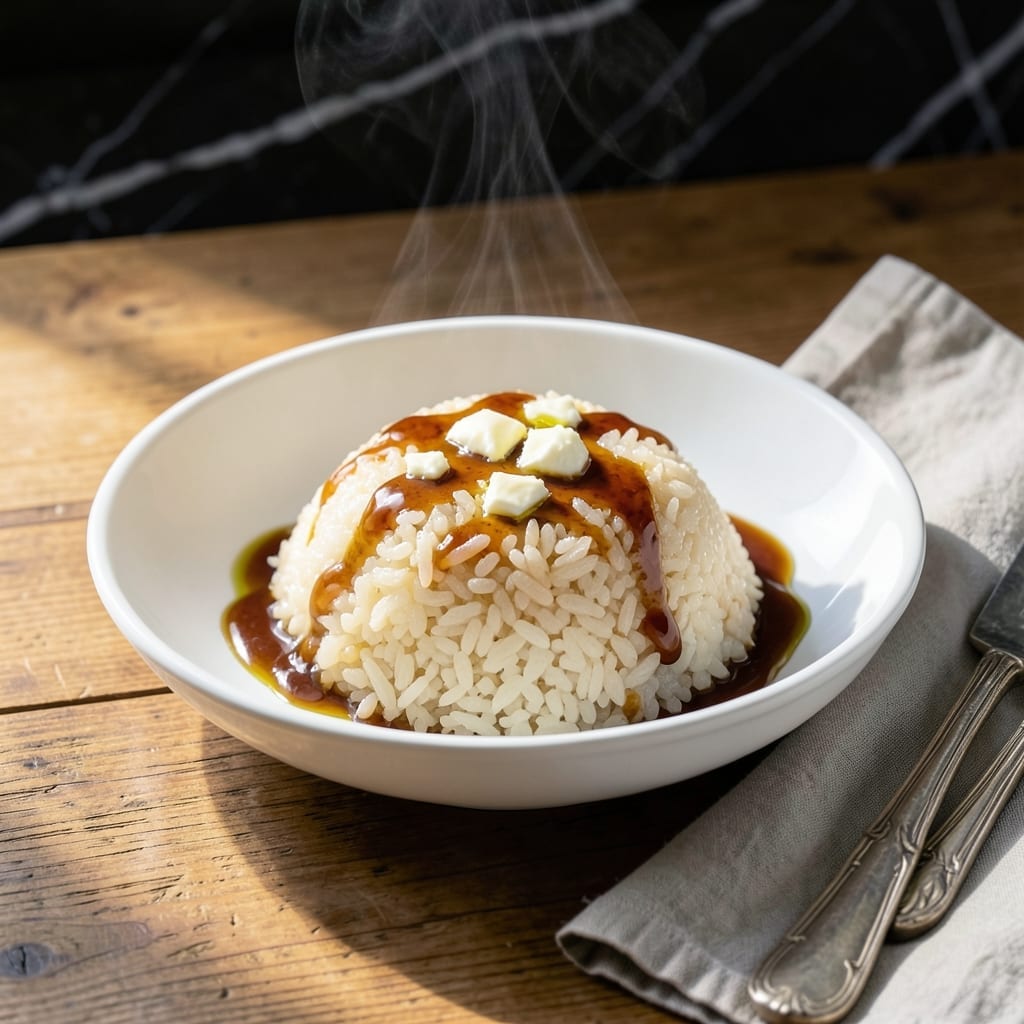
This dish delivers pure comfort in every buttery, savory bite. A simple yet elegant combination of rice, butter, and soy sauce creates a flavor profile that’s both rich and perfectly balanced.
The secret lies in cooking the rice just right, then finishing it with a touch of butter and soy for that signature umami depth. It’s a straightforward process with remarkable results.
What you get is a bowl of rice that’s tender, glossy, and packed with layers of flavor. The butter adds a luxurious creaminess, while the soy sauce brings a salty, savory note.
Perfect as a side or a main, this creation is quick to prepare but feels like a special treat. Here’s how to make it.
Ingredients for Japanese Butter Rice
Simple pantry ingredients transform into this luxurious, savory rice bowl everyone will love.
| Ingredient | Amount | Notes |
|---|---|---|
| Japanese Short-Grain Rice 🍚 | 2 cups | Rinsed until water runs clear |
| Water 💧 | 2 ½ cups | For cooking rice |
| Unsalted Butter 🧈 | 4 tbsp | Cut into small pieces |
| Soy Sauce 🫒 | 2 tbsp | Low-sodium preferred |
| Granulated Sugar 🍚 | 1 tsp | Balances soy sauce flavor |
| Rice Vinegar 🍶 | 1 tbsp | Adds subtle tang |
| Salt 🧂 | ½ tsp | Adjust to taste |
| Green Onions 🧅 | 3 whole | Thinly sliced for garnish |
| Sesame Seeds 🌰 | 1 tsp | Toasted for garnish |
| Large Eggs 🥚 | 2 whole | Optional, soft-boiled for topping |
The rice is non-negotiable here. Japanese short-grain (like Koshihikari from Asian markets or Trader Joe’s) gives that sticky, glossy texture. Rinsing removes excess starch—don’t skip this (worth the extra minute). Butter quality matters too; European-style unsalted has more fat, which means more richness. I always grab Plugrá if it’s on sale.
No Japanese rice? Sushi rice works perfectly. Out of soy sauce? Tamari is a great one-to-one swap. For a deeper umami kick, add a dash of fish-free Worcestershire (Annie’s brand is vegetarian). The sugar balances the saltiness—honey or maple syrup work if you’re out. Skip the eggs? It’s still delicious, but they add a nice protein boost.
This reheats like a dream—microwave with a splash of water to fluff it up. Keeps 4-5 days in the fridge, freezes for 3 months (though it’s best fresh). Make extra and pack for lunches; it tastes even better the next day once the flavors meld.
Why You’ll Love This Recipe
- One Pot Wonder: I just dump rice, water, butter, and a splash of soy in a pot—no fancy steps, no stress.
- Sweet-Savory Magic: That buttery richness with the salty-sweet soy and sugar combo? I keep sneaking bites straight from the pot.
- Pairs With Anything: Honestly, it’s my base for fried eggs, grilled chicken, or just a bowl by itself when I’m lazy.
- Budget Stretch: A pound of short-grain rice and a stick of butter feeds my family for days—leftovers taste even better.
Step-by-Step Instructions for Japanese Butter Rice
Here’s everything you need to create this comforting bowl with perfect texture and flavor.
Step 1: Cook the Japanese Short-Grain Rice
Rinse the 2 cups Japanese Short-Grain Rice under cold water until the water runs clear. This removes excess starch and prevents the rice from becoming gummy. I use a fine-mesh strainer for this—it makes the process quick and mess-free.
Combine the rinsed rice and 2.5 cups Water in a rice cooker or heavy-bottomed pot. Cook according to your rice cooker’s settings or bring to a boil, then reduce to a simmer, cover, and cook for 15-20 minutes until the water is absorbed and the rice is tender. Let it sit covered for 10 minutes off the heat—this steaming step ensures each grain is perfectly cooked.
Step 2: Prepare the Butter Sauce Mixture
While the rice cooks, melt the 4 tbsp Unsalted Butter in a small saucepan over low heat. Once melted, stir in the 2 tbsp Soy Sauce, 1 tsp Granulated Sugar, 1 tbsp Rice Vinegar, and 0.5 tsp Salt. Simmer for 2-3 minutes, stirring constantly, until the mixture is smooth and slightly thickened.
This sauce is the heart of the dish—sweet, salty, and tangy all at once. I always taste and adjust the seasoning here. If it needs a touch more sweetness or acidity, now’s the time to fix it. The goal is a balanced flavor that complements the richness of the butter.
Step 3: Combine Rice and Butter Sauce
Transfer the cooked rice to a large mixing bowl. Pour the warm butter sauce over the rice and use a rice paddle or spatula to fold everything together gently. You want to coat every grain evenly without mashing the rice—this keeps it fluffy and separate.
Let the rice absorb the sauce for 5 minutes before serving. This step ensures the flavors meld completely. The rice should glisten with the buttery sauce, and each bite should be rich and savory with a hint of sweetness.
Step 4: Garnish and Serve
Thinly slice the 3 whole Green Onions and sprinkle them over the rice. Toast the 1 tsp Sesame Seeds in a dry pan over medium heat for 1-2 minutes until fragrant, then sprinkle them on top as well. These garnishes add freshness and a nutty crunch that cuts through the richness.
For an extra layer of comfort, soft-boil the 2 whole Large Eggs for 6-7 minutes, then peel and place them on top of the rice. The creamy yolk pairs perfectly with the buttery rice. Serve immediately while the rice is hot and the toppings are fresh.
Pro Tips For Making Japanese Butter Rice
- Rinse the Rice: Wash the short-grain rice until the water runs clear—this removes excess starch and keeps the butter rice from turning gummy. I learned this the hard way after my first batch came out like paste.
- Brown the Butter: Cook the unsalted butter until it turns golden and nutty before adding it to the rice. It adds a deeper flavor that plain melted butter just can’t match.
- Skip the Overmixing: After combining the rice with the butter, soy sauce, and sugar, fold gently instead of stirring vigorously to avoid breaking the grains. Sounds minor, but it keeps the texture light.
- Use Hot Water: Start with hot water when cooking the rice—it cuts the cooking time and helps the grains absorb the butter and soy sauce more evenly. After burning a few batches, I finally figured out this simple fix.
Dietary Considerations for This japanese butter rice
Vegetarian Friendly
This creation is naturally vegetarian—no meat or fish required. The butter and soy sauce provide all the richness and umami depth you need. I love that it’s satisfying without any animal protein.
Gluten-Free Adaptation
To make it gluten-free, simply swap the soy sauce for certified gluten-free tamari. Brands like San-J work perfectly. The rice vinegar is naturally gluten-free, so no other changes are needed.
Dairy-Free Option
For a dairy-free version, replace the butter with vegan butter like Miyoko’s or Earth Balance. The flavor will be slightly different but still delicious. Coconut oil can also work in a pinch. 💪
Nut Allergy Note
This dish is nut-free as written. Just double-check your soy sauce and rice vinegar labels, as some brands process in facilities with nuts. Kikkoman soy sauce and Nakano rice vinegar are safe bets.
Low-Sodium Version
Use low-sodium soy sauce and reduce the added salt to ¼ tsp. You can boost flavor with 1 tsp fish-free Worcestershire (like Annie’s) or a dash of mushroom powder for extra umami without the salt. 💡
Egg-Free Variation
Skip the soft-boiled eggs entirely—the dish is still delicious without them. For extra protein, top with toasted nori strips or avocado slices. Both add richness and complement the buttery rice beautifully.
Nutrition Facts
Frequently Asked Questions
Can I use long-grain rice instead?
Short-grain is ideal for its sticky texture. Long-grain will work but yields drier, separate grains. For best results, stick with Japanese short-grain like Koshihikari.
Why add sugar to a savory dish?
The 1 tsp balances the soy sauce’s saltiness and enhances the butter’s richness. It creates that signature sweet-savory flavor profile.
How do I prevent the rice from turning mushy?
Rinse until water runs clear and avoid overmixing after cooking. Let it rest 10 minutes covered to steam perfectly.
Can I make this ahead of time?
Yes! Store in an airtight container for 4-5 days. Reheat with a splash of water and fluff with a fork.

- Mujadara Rice and Lentils Recipe: Earthy Spiced Lentils With Caramelized Onions - November 1, 2026
- Naija Fried Rice Recipe: Street-Style Spice With Veggie Crunch - November 1, 2026
- Mushy Rice Recipe: Fluffy Grains Transformed in Minutes - November 1, 2026