
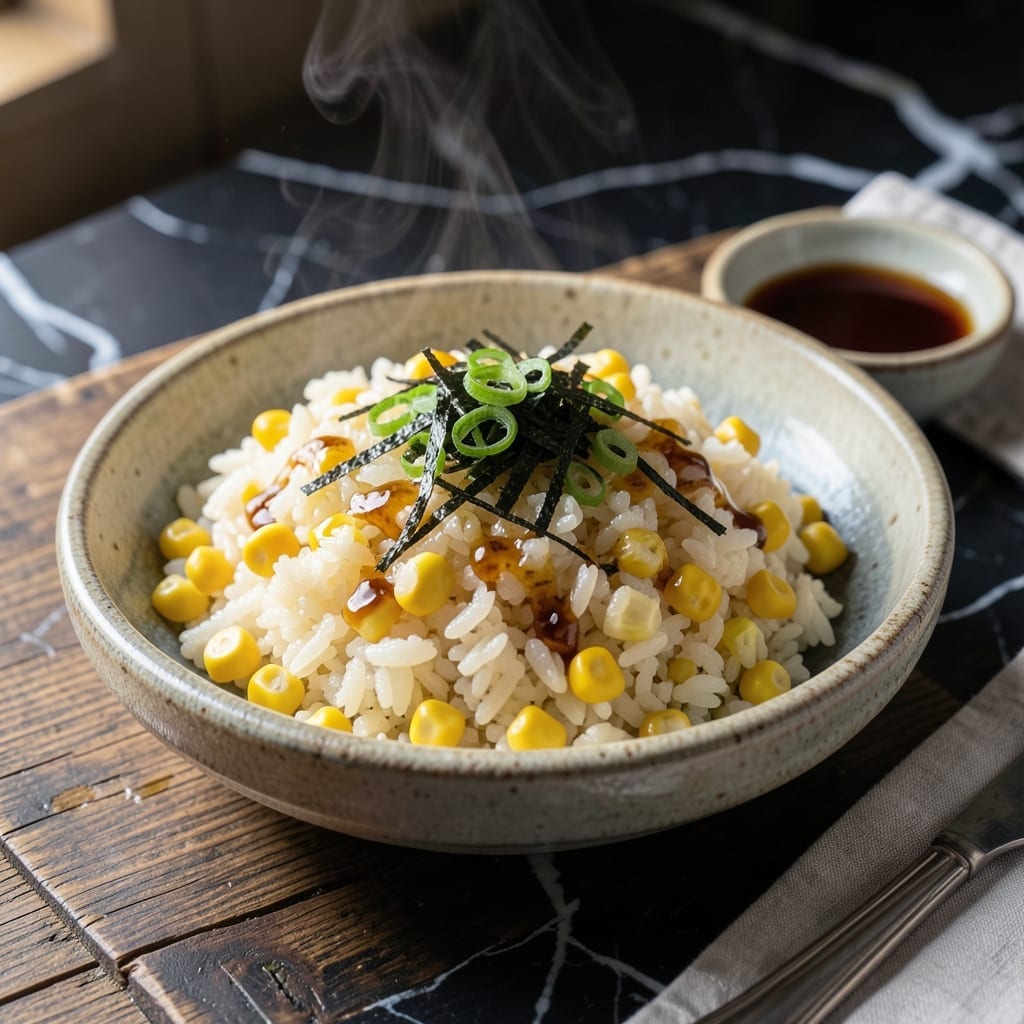
This dish brings the comforting flavors of Japan to your table with minimal effort. Sweet corn kernels and savory rice create a perfect balance in every bite.
The recipe uses simple ingredients and one-pot cooking for foolproof results. It’s a staple that pairs well with any meal.
Ingredients for Japanese Corn Rice
Simple pantry staples plus fresh corn create this comforting one-pot dish with ease.
| Ingredient | Amount | Notes |
|---|---|---|
| Japanese Short-Grain Rice 🍚 | 2 cups | Rinsed until water runs clear |
| Sweet Corn Kernels 🌽 | 1 ½ cups | Fresh, frozen, or canned |
| Dashi Stock 🍜 | 2 ½ cups | Vegetarian dashi recommended |
| Soy Sauce 🫕 | 2 tbsp | Low-sodium preferred for balance |
| Mirin 🍶 | 1 tbsp | Sweet cooking rice wine |
| Sake 🍶 | 1 tbsp | Dry Japanese rice wine |
| Sugar 🍚 | 1 tsp | Granulated white sugar |
| Salt 🧂 | ½ tsp | Adjust to taste |
| Neutral Oil 🫒 | 1 tbsp | Vegetable or canola oil |
| Green Onions 🧅 | 2 whole | Thinly sliced for garnish |
| Sesame Seeds 🌰 | 1 tsp | Toasted for garnish |
| Nori Sheets 🍱 | 1 sheet | Cut into strips for garnish |
The rice quality is paramount for authentic texture. Japanese short-grain rice (sushi rice) is non-negotiable—Koshihikari or Nishiki brands deliver optimal stickiness. Dashi stock forms the flavor base; vegetarian dashi made from kombu and shiitake provides umami without fish. Most Asian markets carry these, but well-stocked Whole Foods locations often have them too. Rinse the rice thoroughly to remove excess starch.
No mirin? 1 tbsp sugar plus 1 tbsp water works in a pinch. Sake can be substituted with dry white wine at equal volume. For the corn, frozen works as well as fresh (thaw first). If using canned, drain and rinse to remove excess sodium. The soy sauce should be Japanese-style for authentic flavor—Kikkoman or Yamasa are reliable choices.
Cooked rice keeps 3-4 days refrigerated in an airtight container. For best results, reheat with a splash of water to restore moisture. The dish freezes well for up to 3 months. Garnishes like green onions and nori are best added fresh when serving.
Why You’ll Love This Recipe
- One Pot Wonder: I just dump everything in the rice cooker—rice, corn, dashi, soy, mirin—and walk away.
- Sweet & Savory: The corn kernels burst with natural sweetness against the umami-rich dashi and soy.
- Lunchbox Hero: Cold leftovers taste even better the next day, and my kids actually finish their bento.
- Budget Stretcher: A handful of corn transforms plain rice into a filling meal for pennies per serving.
Step-by-Step Instructions for Japanese Corn Rice
This method ensures perfect texture and balanced flavors in every comforting bite.
Step 1: Rinse and Soak the Japanese Short-Grain Rice
Place the 2 cups Japanese Short-Grain Rice in a fine-mesh strainer and rinse under cold running water until the water runs completely clear. This removes excess starch that could make your dish gummy. I always swirl the rice with my hand to help release the starch more effectively.
Once rinsed, transfer the rice to a bowl and cover with fresh cold water. Let it soak for 20-30 minutes. This step is crucial—it allows the grains to absorb moisture evenly, which leads to more uniform cooking and a better final texture.
Step 2: Sauté the Sweet Corn Kernels
Heat the 1 tbsp Neutral Oil in a medium pot over medium heat. Add the 1.5 cups Sweet Corn Kernels and cook for 4-5 minutes, stirring occasionally, until the corn brightens in color and develops a slight char on some kernels.
This sautéing step intensifies the sweetness of the corn while adding a subtle depth of flavor. You’ll notice the aroma becomes more pronounced as the natural sugars caramelize slightly. Be careful not to overcook—the corn should retain some bite.
Step 3: Cook the Rice with Dashi and Seasonings
Drain the soaked Japanese Short-Grain Rice and add it to the pot with the corn. Pour in the 2.5 cups Dashi Stock, 2 tbsp Soy Sauce, 1 tbsp Mirin, 1 tbsp Sake, 1 tsp Sugar, and 0.5 tsp Salt. Stir gently to combine all ingredients.
Bring the mixture to a boil over medium-high heat. Once boiling, reduce the heat to low, cover the pot, and let it simmer for 15-18 minutes. You’ll know it’s ready when all the liquid has been absorbed and the rice is tender with a slight chew.
Step 4: Rest and Fluff the Rice
Remove the pot from heat and let it sit, covered, for an additional 10 minutes. This resting period allows the rice to steam and finish cooking evenly. The grains will plump up further and absorb any remaining liquid.
After resting, use a rice paddle or fork to gently fluff the rice. This separates the grains and releases excess steam, preventing a dense or mushy texture. The rice should appear glossy and slightly sticky, with the sweet corn kernels distributed throughout.
Step 5: Garnish and Serve
Transfer the rice to serving bowls. Garnish with the thinly sliced 2 whole Green Onions, 1 tsp Sesame Seeds, and strips of the 1 sheet Nori Sheets. The green onions add a fresh contrast, while the sesame seeds and nori provide a nutty, umami depth.
Serve immediately while hot. The combination of sweet corn, savory dashi, and the slight stickiness of the short-grain rice creates a dish that’s both hearty and comforting. Each spoonful should deliver a balance of flavors and textures that’s satisfyingly consistent.
Pro Tips For Making Japanese Corn Rice
- Rinse the Rice Well: Japanese short-grain rice needs a thorough rinse—3-4 times until the water runs nearly clear—to remove excess starch and get that perfect sticky-yet-separate texture.
- Toast the Corn: Lightly sauté the sweet corn kernels in the pot before adding the rice and dashi; it deepens their natural sweetness and keeps them from tasting raw in the finished dish.
- Mind the Liquid Ratio: Dashi stock isn’t water, so reduce the total liquid by about 10%—I learned this the hard way after ending up with mushy rice more than once.
- Rest Before Serving: Let the finished corn rice sit covered for 5-10 minutes off the heat—this lets the grains absorb the last bits of flavorful liquid and plump up properly.
Perfect Pairings for These Flavors
Side Dish Ideas
This dish shines alongside miso-glazed eggplant—the sweetness of the corn complements the savory miso perfectly. I also love it with teriyaki chicken skewers for a protein boost.
Soup Pairings
A light miso soup with tofu and wakame makes an excellent starter. The umami flavors in both dishes create harmony. For something heartier, try clear onion soup with a poached egg.
Drink Recommendations
Green tea is the classic choice—its bitterness cuts through the richness of the rice. I prefer sencha or genmaicha. For beer lovers, a crisp Sapporo or Asahi lager works beautifully. 🍵
Salad Options
A simple cucumber sunomono with rice vinegar adds refreshing crunch. Alternatively, shredded cabbage salad with sesame dressing provides texture contrast. Both cleanse the palate between bites.
Protein Additions
For a complete meal, top your rice with grilled salmon or a fried egg. The runny yolk mixes deliciously into the rice. I often add shredded chicken for a quick weeknight dinner. 💛
Nutrition Facts
Frequently Asked Questions
Can I use long-grain rice instead?
No, Japanese short-grain rice is essential for the right sticky texture. Long-grain varieties won’t absorb the flavors the same way.
What if I don’t have dashi stock?
Use vegetable broth with a splash of soy sauce for umami. For deeper flavor, add a piece of kombu seaweed while cooking.
Can I make this in a rice cooker?
Sauté the corn first, then combine all ingredients in the cooker. Use the standard white rice setting.
How do I store leftovers?
Keep in an airtight container in the fridge for up to 3-4 days. Reheat with a splash of water to restore moisture.

- Jimmy Dean Sausage and Rice Recipe: Hearty One-Pot Savory Delight - October 19, 2026
- Indian Jasmine Rice Recipe: Fragrant Basmati-Free Elegance - October 19, 2026
- KFC Rizo Rice Recipe: Copycat Side Dish With Savory Spice Blend - October 19, 2026