
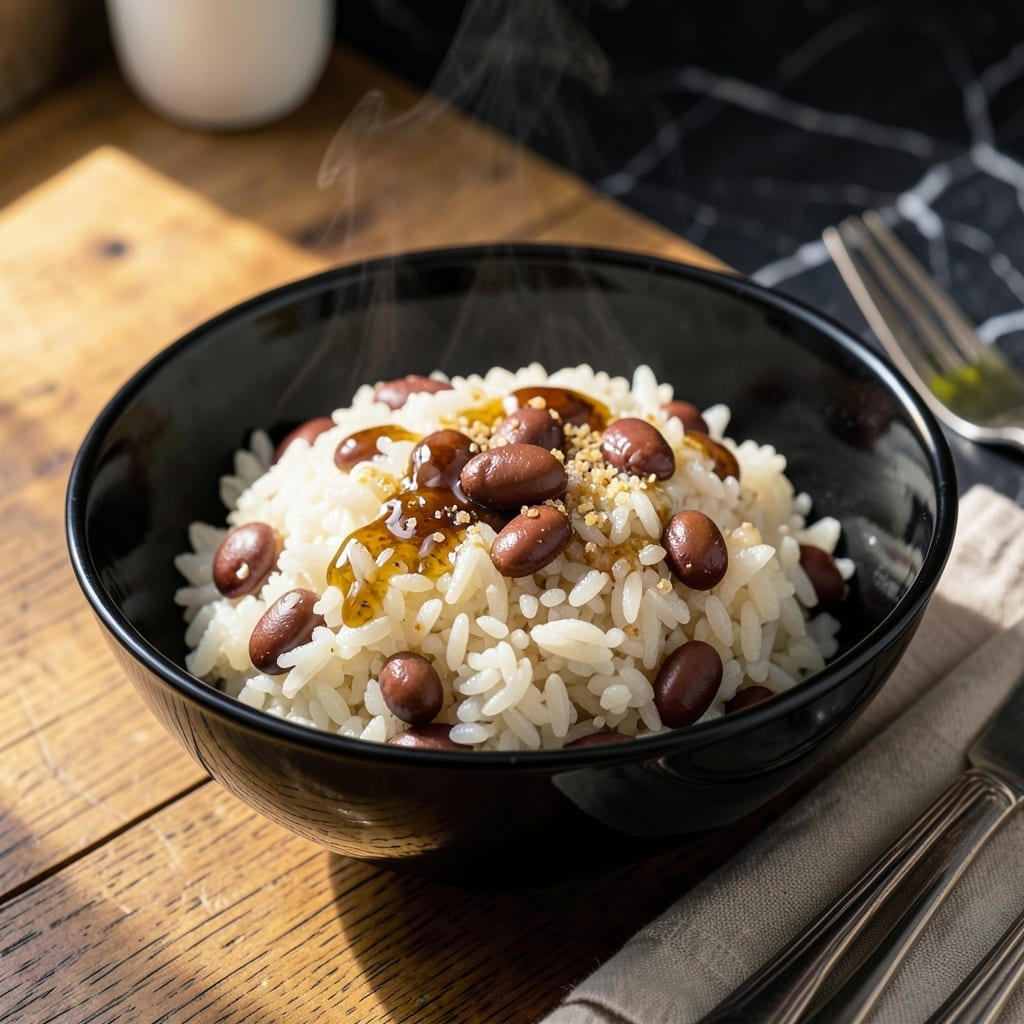
This traditional Japanese red rice combines short-grain white rice with azuki beans for a dish that’s both nourishing and symbolic. The beans lend a subtle earthy sweetness while the rice develops a delightful nutty flavor during cooking.
What makes this recipe special is its simplicity and cultural significance—often served at celebrations and family gatherings. The azuki beans soften beautifully, infusing the rice with their rich color and mild taste.
You’ll achieve perfectly tender grains with a slightly sticky texture that holds together beautifully. The dish offers a balanced combination of protein and complex carbohydrates.
Serve warm as a side dish or enjoy it as a light meal on its own.
Ingredients for Japanese Red Rice
Short list of traditional ingredients for this culturally significant dish with earthy sweetness.
| Ingredient | Amount | Notes |
|---|---|---|
| Short-Grain White Rice 🍚 | 2 cups | Rinsed until water runs clear |
| Dried Azuki Beans 🌱 | 1 cup | Soaked overnight preferred |
| Water 💧 | 3 ½ cups | For cooking rice and beans |
| Soy Sauce 🥢 | 2 tbsp | Low-sodium for control |
| Sugar 🍚 | 1 tbsp | Balances earthy flavors |
| Rice Vinegar 🍯 | 1 tbsp | Adds subtle tanginess |
| Salt 🧂 | ½ tsp | Sea salt preferred |
| Dried Kombu 🌿 | 1 piece | 2-inch square, for umami |
| Sesame Oil 🫒 | 1 tsp | Toasted for aroma |
| Green Onions 🧅 | 2 whole | Thinly sliced for garnish |
| Sesame Seeds 🌰 | 1 tbsp | Toasted for crunch |
The azuki beans are key here. Look for them at Asian markets or well-stocked grocery stores—they’re often labeled adzuki. Brands like Kokuho or Shirataki are reliable. Soaking overnight softens them perfectly (skip if short on time, but add extra water). The short-grain rice should be sticky when cooked—Koshihikari or Calrose work beautifully. Don’t rinse the beans, just the rice.
No azuki beans? Black beans or kidney beans can substitute in a pinch (texture differs slightly). Out of rice vinegar? Apple cider vinegar at half the amount works. For gluten-free, swap soy sauce for tamari. The kombu adds depth but isn’t mandatory—a pinch of MSG mimics the umami if needed. Sugar can be swapped for maple syrup (vegan-friendly).
Leftover rice keeps 4-5 days in the fridge, though it dries out slightly. Reheat with a splash of water to revive. Freezes for 3 months—portion before freezing for easy meals. The flavors deepen overnight (worth the wait).
Why You’ll Love This Recipe
- One Pot Wonder: I just dump rice, azuki beans, and seasonings in a pot, then let it simmer—no fancy steps or extra dishes.
- Sweet and Savory: The soy sauce and sugar create this perfect balance that’s rich but not overpowering, with a hint of nuttiness from the beans.
- Meal Prep Hero: I make a big batch on Sunday and it reheats beautifully for lunches all week, tasting just as good the third day.
- Budget Stretcher: Honestly, dried beans and basic rice make this dish cost almost nothing, yet it feels like a special treat.
Step-by-Step Instructions for Japanese Red Rice
Here’s the foolproof method I use every time for perfectly balanced flavors and textures.
Step 1: Prepare the Rice and Beans
Rinse the 2 cups Short-Grain White Rice in a fine-mesh strainer under cold water until the water runs completely clear. This removes excess starch and prevents a gummy texture. Meanwhile, drain the 1 cup Dried Azuki Beans if you soaked them overnight (I always do—it cuts cooking time in half).
Combine the rice and azuki beans in a large bowl with the 3.5 cups Water. Add the 1 piece Dried Kombu for a subtle oceanic depth. Let this sit for 15 minutes while you prep the other ingredients—the kombu will begin to soften and infuse the water with umami.
Step 2: Cook the Rice and Bean Mixture
Transfer the rice, beans, water, and kombu to a rice cooker or heavy-bottomed pot. If using a pot, bring to a boil over medium-high heat, then reduce to low, cover, and simmer for 40 minutes until the water is fully absorbed and the grains are tender. You’ll know it’s ready when the surface looks pebbled and the aroma shifts from starchy to nutty.
Remove the kombu piece before it starts to fall apart—this prevents the dish from becoming slimy. The azuki beans should be soft but still hold their shape, and the rice should have a slight bite. If the mixture looks dry, add ¼ cup of hot water and let it steam for another 5 minutes.
Step 3: Season and Finish
In a small bowl, whisk together the 2 tbsp Soy Sauce, 1 tbsp Sugar, 1 tbsp Rice Vinegar, and 0.5 tsp Salt until the sugar dissolves completely. This glaze is the flavor powerhouse—sweet, salty, and tangy all at once.
Drizzle the glaze over the cooked rice and beans, then gently fold everything together with a rice paddle or spatula. The rice should glisten with the sauce but not be soggy. Cover and let it rest for 10 minutes to allow the flavors to meld. This resting period is non-negotiable; it ensures every grain absorbs the seasoning.
Step 4: Garnish and Serve
Just before serving, heat the 1 tsp Sesame Oil in a small pan over low heat for 30 seconds until it’s fragrant but not smoking. Drizzle this over the rice, then sprinkle with the 1 tbsp Sesame Seeds and 2 whole Green Onions, thinly sliced. The toasted seeds add a nutty crunch, while the green onions bring a fresh, sharp contrast.
Fluff the rice one last time with a fork, lifting from the bottom to distribute the garnishes evenly. Serve warm in bowls, and watch as the colors pop—deep red azuki beans against the white rice, flecked with green and sesame. The texture should be slightly sticky, with each bite offering a mix of soft beans, tender rice, and a hint of crunch.
Pro Tips For Making Japanese Red Rice
- Soak the Beans: I learned this the hard way—dried azuki beans need at least 4 hours in cold water, or they’ll stay hard and unevenly cook with the rice.
- Rinse the Rice: Swirl short-grain rice in a bowl of water 3-4 times until the water runs clear, or the final dish will taste chalky and dull.
- Watch the Liquid: After burning two batches, I finally figured out azuki beans absorb more water than rice, so add ¼ cup extra liquid per ½ cup beans.
- Simmer Low and Slow: Sounds weird, but it works—once it boils, drop to the lowest heat and keep the lid on tight for 20 minutes, no peeking.
Flavor Customization for These Flavors
Sweet and Savory
Boost the sweetness by increasing the sugar to 2 tbsp or adding 1 tbsp honey. Balance it with an extra pinch of salt to enhance the earthy notes. I love this version in the winter holidays. 💛
Umami Richness
Add 1 tbsp miso paste to the soy sauce glaze for deeper umami. Stir in 1 tsp grated ginger for warmth. The miso pairs beautifully with the azuki beans, creating a more complex flavor profile.
Nutty Twist
Swap the sesame seeds for 1 tbsp toasted black sesame seeds and add ¼ cup chopped walnuts for extra crunch. This variation adds a striking visual contrast and a richer, toastier taste.
Citrus Brightness
Increase the rice vinegar to 2 tbsp and add 1 tsp orange zest to the glaze. The citrus lifts the earthy flavors, making the dish feel lighter and more refreshing. 🌟
Spiced Version
Add ½ tsp ground cinnamon and ¼ tsp star anise powder to the cooking water. These warm spices complement the azuki beans’ natural sweetness, creating a cozy, aromatic dish.
Herbal Garnish
Replace green onions with 2 tbsp chopped cilantro and 1 tbsp chopped mint. This fresh herb combo brightens the dish and pairs well with grilled meats or tofu.
Nutrition Facts
Frequently Asked Questions
Can I use canned azuki beans instead of dried?
Yes, but reduce cooking time to 20 minutes. Drain and rinse canned beans first. They’re softer, so add them after rice starts cooking to prevent mushiness.
Why does my rice turn out mushy?
Over-soaking or excess water causes this. Rinse rice until water runs clear, and use exactly 3.5 cups water for 2 cups rice. Avoid stirring while cooking.
How do I store leftovers?
Keep in an airtight container in the fridge for 4-5 days. Reheat with a splash of water to restore moisture. Freezes well for up to 3 months.
Can I make this gluten-free?
Easily! Swap soy sauce for tamari (gluten-free soy sauce). Check labels to ensure no cross-contamination. All other ingredients are naturally gluten-free.

- Mujadara Rice and Lentils Recipe: Earthy Spiced Lentils With Caramelized Onions - November 1, 2026
- Naija Fried Rice Recipe: Street-Style Spice With Veggie Crunch - November 1, 2026
- Mushy Rice Recipe: Fluffy Grains Transformed in Minutes - November 1, 2026