
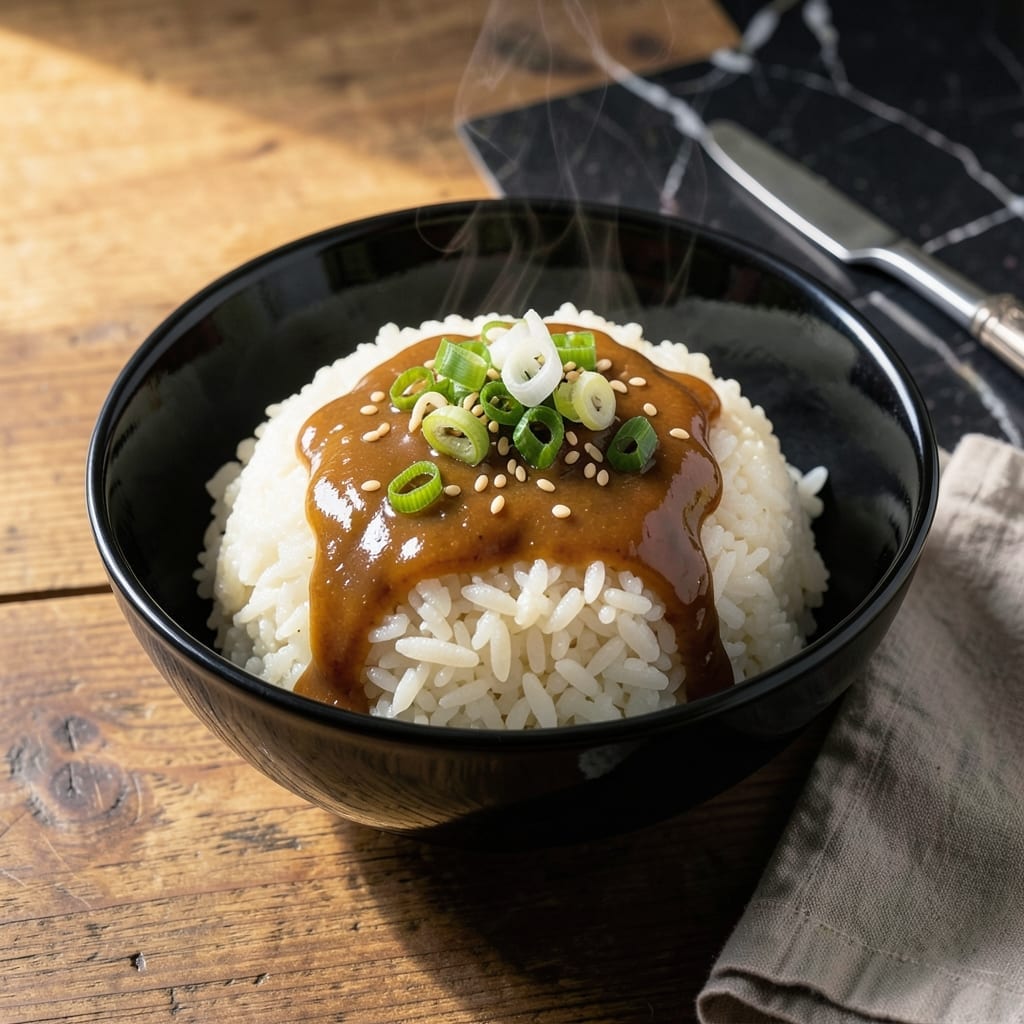
I’ve spent years perfecting this Japanese rice dish, and the secret lies in the balance of texture and flavor. The rice becomes tender, almost like steamed pillows, with each grain distinct yet cohesive.
A simple umami glaze, built from soy sauce, mirin, and dashi, elevates the dish from plain to extraordinary. The key is layering the flavors without overwhelming the natural sweetness of the rice.
This method ensures consistent results, whether you’re using a rice cooker or stovetop. The glaze is brushed on just before serving, so it stays vibrant and aromatic.
It’s a dish that feels special but requires minimal effort. The result is a side that pairs perfectly with grilled proteins or stands alone as a comforting meal.
Ingredients for Japanese Rice Dish
Short list. Big flavor. The rice and glaze are all you really need.
| Ingredient | Amount | Notes |
|---|---|---|
| Japanese Short-Grain Rice 🍚 | 2 cups | Rinsed until water runs clear |
| Water 💧 | 2 ½ cups | For cooking rice |
| Soy Sauce 🫒 | ¼ cup | Low-sodium preferred |
| Mirin 🍶 | 3 tbsp | Sweet cooking rice wine |
| Dashi Stock 🥘 | ¼ cup | Or substitute with water |
| Sugar 🍚 | 1 tbsp | Balances umami flavors |
| Rice Vinegar 🍶 | 1 tbsp | Adds subtle tang |
| Sesame Oil 🫒 | 1 tsp | Toasted for aroma |
| Green Onions 🧅 | 3 whole | Thinly sliced for garnish |
| Sesame Seeds 🌾 | 1 tbsp | Toasted for crunch |
| Nori Sheets 🍣 | 1 sheet | Optional, cut into strips |
| Fresh Ginger 🌿 | 1 tsp | Grated for depth |
The rice is non-negotiable—short-grain Japanese like Koshihikari or Nishiki gives you those pillowy grains. I grab mine from H Mart or the Asian aisle at Whole Foods. For dashi, instant granules work in a pinch, but homemade (kombu + bonito) is worth the effort. The mirin should be hon-mirin if you can find it (look for the label), otherwise aji-mirin is fine.
No mirin? Dry sherry plus 1/2 tsp sugar gets you close. Out of dashi? Vegetable broth with a splash of soy works. The sugar can be swapped for honey or maple syrup at the same amount. If you’re skipping the nori, add 1/2 tsp furikake for that seaweed hit. The green onions? Don’t skip them—they add freshness.
Rice keeps 3-4 days in the fridge, but the glaze is best fresh. Store leftovers in an airtight container. Reheat in the microwave with a splash of water. The glaze can be made ahead and kept for 1 week.
Why You’ll Love This Recipe
- One Pot Wonder: I just dump the rice, water, and seasonings in, set the timer, and walk away. Honestly, it doesn’t get simpler than this.
- Umami Bomb: The mix of soy sauce, mirin, and dashi turns plain rice into something rich and savory. That first bite always makes me pause.
- Meal Prep Hero: I make a big batch on Sunday and it pairs with everything—grilled chicken, roasted veggies, even a fried egg on top.
- Stretches Far: Leftovers taste even better the next day, and a single cup of rice feeds my family for two meals. Budget-friendly and filling.
Step-by-Step Instructions for Japanese Rice Dish
Here’s how to make this dish right—simple steps, perfect results every time.
Step 1: Rinse and Cook the Japanese Short-Grain Rice
Rinse the 2 cups Japanese Short-Grain Rice in a fine-mesh strainer under cold water until the water runs completely clear. This removes excess starch and ensures fluffy, separate grains rather than a sticky clump.
Combine the rinsed rice with the 2.5 cups Water in a rice cooker or medium saucepan. Cook according to your rice cooker’s instructions or bring to a boil, then reduce to a simmer, cover, and cook for 15-20 minutes until the water is absorbed and the rice is tender.
Once done, let it sit covered for 10 minutes to steam. Don’t skip this—it’s the difference between good rice and great rice.
Step 2: Prepare the Umami Glaze
In a small saucepan, combine the 0.25 cup Soy Sauce, 3 tbsp Mirin, 0.25 cup Dashi Stock, 1 tbsp Sugar, 1 tbsp Rice Vinegar, and 1 tsp Fresh Ginger. Stir well to dissolve the sugar.
Bring the mixture to a gentle simmer over medium heat. Let it cook for 3-4 minutes until it thickens slightly and becomes glossy. You’ll notice it clings to the back of a spoon—that’s when you know it’s ready.
Remove from heat and stir in the 1 tsp Sesame Oil. This adds a nutty depth that ties everything together.
Step 3: Toast the Sesame Seeds and Slice the Green Onions
While the rice finishes cooking, toast the 1 tbsp Sesame Seeds in a dry skillet over medium-low heat for 2-3 minutes until they turn golden brown and become fragrant. Stir frequently to prevent burning—they go from perfect to burnt fast.
Thinly slice the 3 whole Green Onions on a diagonal for a nicer presentation. If you’re using the 1 sheet Nori Sheets, cut it into thin strips with kitchen shears for an easy garnish.
Step 4: Assemble and Serve
Transfer the cooked rice to a large bowl. Drizzle the warm umami glaze evenly over the rice, using a spatula to gently fold it in. You want every grain coated, but don’t overmix—keep it light and fluffy.
Divide the rice into serving bowls. Top each with a sprinkle of toasted sesame seeds, a handful of sliced green onions, and the nori strips if using. The contrast of textures and flavors—creamy rice, salty-sweet glaze, crunchy seeds—makes this dish special.
Serve immediately while the rice is still warm and the glaze is glossy. This is best enjoyed fresh, so gather everyone and dig in.
Pro Tips For Making Japanese Rice Dish
- Rinse the Rice: Wash the short-grain rice in 3-4 changes of cold water until it runs nearly clear—this removes excess starch and guarantees fluffy, separate grains instead of a gluey mess.
- Soak 30 Minutes: After rinsing, let the rice soak in fresh water for at least 30 minutes; I learned this the hard way when my first few batches came out unevenly cooked.
- Use Dashi Ratio: Replace about 20-25% of the water with dashi stock for deeper umami, but don’t overdo it or the rice will taste too strong.
- Rest Before Serving: Once cooked, let it sit covered for 10 minutes—yes, even if you’re hungry—so the steam finishes the job and the grains absorb all that soy-mirin flavor.
Serving Suggestions for japanese rice dish
Bowl Presentation
Serve this in shallow, wide bowls to showcase the glossy glaze and vibrant garnishes. I love using handmade ceramic bowls from Japanese markets—they add authenticity. The wide surface lets the rice spread beautifully. ✨
Family-Style Serving
For gatherings, present the rice on a large platter with the glaze in a small pitcher on the side. Let guests drizzle their own portion—this keeps the rice from getting soggy. Add small bowls of garnishes for customization.
Garnish Placement
Sprinkle toasted sesame seeds and green onions in a circular pattern on top. Place nori strips in the center for visual appeal. The contrast of dark nori against white rice is stunning.
Protein Pairings
This dish shines alongside teriyaki chicken or miso-glazed salmon. The umami flavors complement each other perfectly. For vegetarians, grilled tofu with a soy marinade works wonderfully. 💛
Pickled Sides
Add quick-pickled cucumbers or tsukemono on the side. The acidity cuts through the richness and refreshes the palate. I use rice vinegar with a pinch of sugar for my pickles.
Temperature Tip
Serve immediately while the rice is hot and the glaze is still glossy. If you must hold it, keep covered in a warm oven (170°F) for no more than 20 minutes. The texture is best fresh.
Nutrition Facts
Frequently Asked Questions
What type of rice works best?
Use short-grain Japanese rice like Koshihikari or Nishiki for the perfect pillowy texture. Avoid long-grain varieties as they won’t achieve the same stickiness. Rinse thoroughly until the water runs clear for fluffy results.
Can I make the glaze ahead of time?
Yes, the umami glaze keeps well for up to 1 week in the fridge. Reheat gently before using and stir in 1 tsp sesame oil just before serving to restore its aroma.
How do I prevent the rice from sticking?
Rinse the rice well and let it rest covered for 10 minutes after cooking. Use a non-stick pot or rice cooker, and avoid stirring while cooking to keep grains separate.
What can I use instead of mirin?
Substitute with dry sherry plus 1/2 tsp sugar or 1 tbsp honey. For a non-alcoholic option, try rice vinegar with extra sugar to mimic the sweetness.

- Mujadara Rice and Lentils Recipe: Earthy Spiced Lentils With Caramelized Onions - November 1, 2026
- Naija Fried Rice Recipe: Street-Style Spice With Veggie Crunch - November 1, 2026
- Mushy Rice Recipe: Fluffy Grains Transformed in Minutes - November 1, 2026