
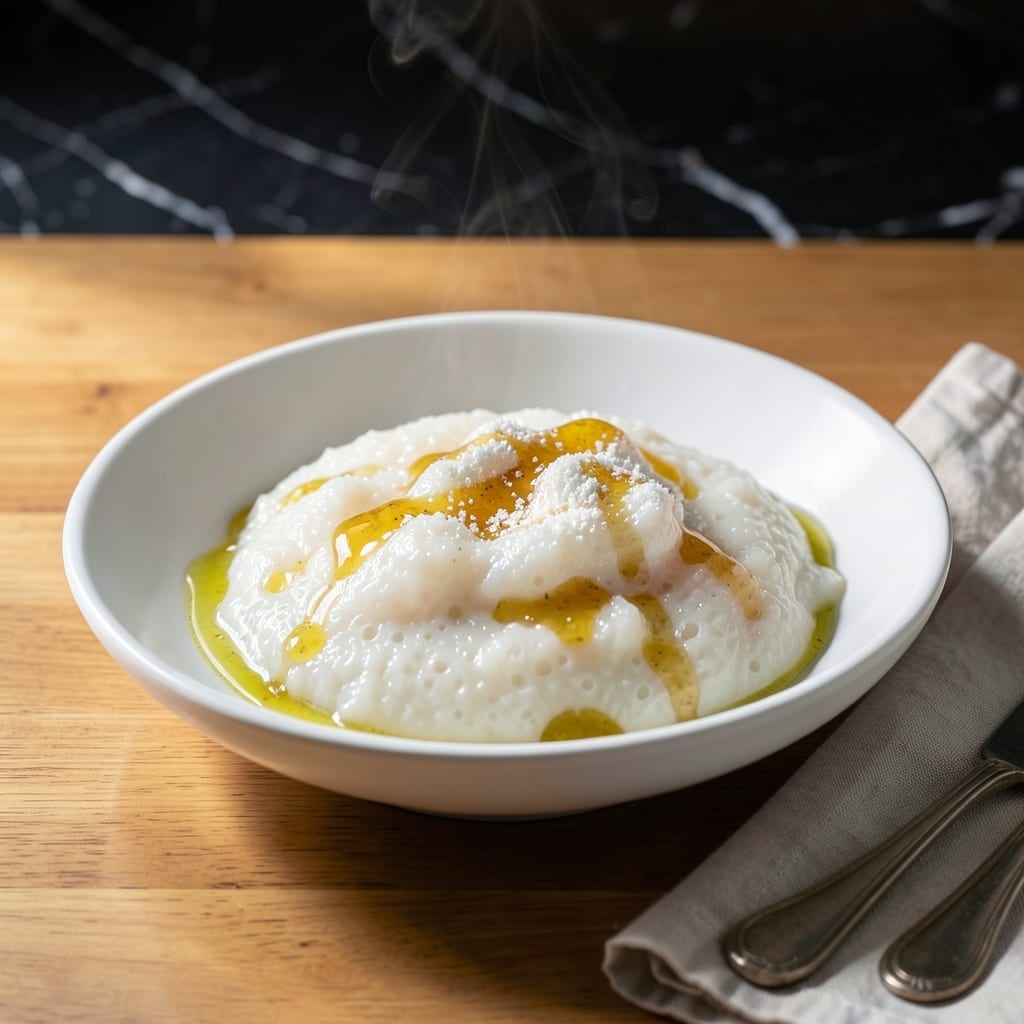
This Japanese rice paste delivers a glossy, sweet finish that elevates any dessert to restaurant quality. The simple combination of glutinous rice flour and water creates a smooth, translucent glaze that clings beautifully to pastries and fruits alike.
I developed this recipe after struggling to find a store-bought version that matched the authentic texture and shine. The key is cooking the mixture just until it thickens, then cooling it to achieve that signature glass-like sheen without any graininess.
The resulting paste can be brushed on mochi, drizzled over ice cream, or used as a decorative topping for cakes. Its neutral sweetness allows other flavors to shine while adding visual appeal that makes desserts look professionally crafted.
Store in an airtight container for up to a week, or make fresh as needed. The process takes less than 10 minutes from start to finish.
Ingredients for Japanese Rice Paste
Six simple ingredients create this glossy, sweet glaze perfect for desserts.
| Ingredient | Amount | Notes |
|---|---|---|
| Glutinous Rice Flour 🌾 | ½ cup | Also called sweet rice flour |
| Granulated Sugar 🍚 | ¼ cup | Adjust to taste preference |
| Water 💧 | 1 cup | Filtered for best results |
| Corn Syrup 🧈 | 2 tbsp | Light or clear preferred |
| Vanilla Extract 🌿 | 1 tsp | Pure vanilla for best flavor |
| Salt 🧂 | 0.125 tsp | Pinch for balance |
The glutinous rice flour is non-negotiable here—look for Mochiko brand at Asian markets or the international aisle. Sweet rice flour and glutinous rice flour are the same thing (despite the name, it’s gluten-free). The sugar can be swapped for other sweeteners, but fine granulated dissolves best. Water quality matters more than you’d think—filtered avoids any off flavors.
No corn syrup? Agave or light honey works in a pinch (though honey isn’t vegan, so stick with agave for strict diets). The vanilla is optional but adds depth—use pure extract, not imitation. If you want a neutral base, skip it entirely. For a richer paste, some recipes add coconut milk, but this version keeps it simple and traditional.
This paste keeps in an airtight container for 5-7 days at room temperature. For longer storage, refrigerate for up to 2 weeks. If it thickens too much, just stir in a splash of warm water to revive it.
Why You’ll Love This Recipe
- Five Ingredients Only: I just dump glutinous rice flour, sugar, water, corn syrup, and vanilla into a pot—no shopping spree required.
- Sweet Vanilla Cloud: The vanilla extract turns the paste into this soft, stretchy sweetness that clings to your tongue in the best way.
- Endless Sweet Uses: I slather it on toast, swirl it into tea, or fill mochi—honestly, it’s my blank canvas for desserts.
- Stays Fresh Days: One batch lasts me a week in the fridge, so I always have a quick sweet fix ready to grab.
Step-by-Step Instructions for Japanese Rice Paste
Here is the proven method for achieving that signature glossy texture and balanced sweetness.
Step 1: Combine Dry Ingredients for Smooth Base
In a medium saucepan, whisk together the 0.5 cup Glutinous Rice Flour, 0.25 cup Granulated Sugar, and 0.125 tsp Salt until fully incorporated. The fine texture of glutinous rice flour ensures a silky final product, so break up any lumps with the back of a spoon or a fine-mesh sieve.
This dry mixture creates the foundation for your paste. The sugar will caramelize slightly during cooking, adding depth of flavor, while the salt balances the sweetness. Don’t skip whisking—this prevents clumping when liquid is added.
Step 2: Gradually Incorporate Wet Components
Slowly pour in the 1 cup Water while continuing to whisk constantly. The mixture will be thin at first, resembling heavy cream. Ensure there are no dry pockets at the bottom of the pan—these will create lumps in your final paste.
Add the 2 tbsp Corn Syrup and 1 tsp Vanilla Extract, then whisk again until fully combined. Corn syrup contributes to the glossy sheen and prevents crystallization, while vanilla adds aromatic complexity. The liquid should appear smooth and slightly opaque before heating.
Step 3: Cook Over Medium Heat with Constant Attention
Place the saucepan over medium heat and cook the mixture, stirring constantly with a silicone spatula or wooden spoon. After 3-4 minutes, you’ll notice the liquid beginning to thicken at the edges.
Continue cooking for 8-10 minutes total, reducing heat slightly if the mixture begins to bubble aggressively. The paste is ready when it pulls away from the sides of the pan and leaves a visible trail when you drag the spatula through it. It should coat the back of a spoon thickly, similar to pudding.
The transformation happens quickly toward the end. Watch for the color to change from milky to translucent with a subtle gloss. If it begins to stick to the bottom, reduce heat immediately—this indicates it’s nearly done.
Step 4: Cool and Verify Consistency
Remove the pan from heat and transfer the paste to a heatproof bowl. Let it cool to room temperature, which takes about 30 minutes. As it cools, it will thicken further and develop its characteristic glossy sheen.
The finished paste should be smooth, stretchy, and slightly tacky to the touch. If it’s too thick once cooled, you can gently reheat it with 1-2 teaspoons of water, stirring until it reaches the desired consistency. Avoid adding too much liquid, as this will dilute the flavor.
Use immediately for glazing desserts, or store in an airtight container at room temperature for up to 3 days. The surface may develop a thin skin during storage—simply stir it back in before use.
Pro Tips For Making Japanese Rice Paste
- Whisk Before Heating: Combine the glutinous rice flour and sugar first, then slowly whisk in the water and corn syrup until completely smooth—I learned this the hard way after dealing with lumpy paste that just wouldn’t dissolve.
- Low and Slow Heat: Cook the mixture over medium-low heat, stirring constantly. After burning two batches, I finally realized high heat turns it grainy instead of silky.
- Skip Cold Water: Use room temperature or slightly warm water to prevent the rice flour from clumping on contact. Cold water makes it seize up, and you’ll spend forever trying to smooth it out.
- Add Vanilla Last: Stir in the vanilla extract only after removing the paste from heat. Adding it too early can make the flavor bitter, and nobody wants that in their delicate rice paste.
Wine and Beer Pairings for These Flavors
Japanese Sake Pairings
For a traditional pairing, reach for a dry Junmai sake like Dassai 39. Its clean, crisp finish cuts through the sweetness while complementing the paste’s delicate rice notes. Serve chilled at 45-50°F for best results. 🍶
Sparkling Wine Options
A brut Prosecco or Cava offers effervescent contrast to the thick, sweet glaze. The bubbles cleanse your palate between bites of dessert. I prefer La Marca Prosecco for its balanced acidity and affordable price point.
Fruity White Wines
Off-dry Riesling from Germany or Washington state pairs beautifully, with its stone fruit notes mirroring the paste’s sweetness. Try Dr. Loosen Blue Slate for a reliable choice. The wine’s acidity prevents the pairing from becoming cloying. 💫
Craft Beer Matches
A Belgian witbier like Hoegaarden works surprisingly well, with its citrus and coriander notes complementing the vanilla in the paste. The light body won’t overwhelm the delicate glaze. Avoid hoppy IPAs that would clash with the sweetness.
Dessert Wine Classic
For a luxurious pairing, try a Moscato d’Asti from Italy. Its low alcohol and peach-apricot flavors create harmony with the rice paste. Saracco Moscato d’Asti is my go-to for its consistent quality and vibrant bubbles.
Nutrition Facts
Frequently Asked Questions
What can I use as a substitute for glutinous rice flour?
There is no perfect substitute, but tapioca starch works in a pinch. It won’t have the same stretchy texture, but creates a similar gloss. Avoid regular rice flour as it won’t produce the right consistency.
Why did my paste turn out lumpy?
Lumps usually mean the dry ingredients weren’t fully whisked before adding liquid. Always sift the glutinous rice flour first and whisk vigorously while adding water to prevent clumping.
Can I make this paste ahead of time?
Yes, it keeps well in an airtight container for 5-7 days at room temperature. If it thickens too much, stir in 1-2 teaspoons warm water to revive it.
How do I adjust the sweetness?
Start with the recipe’s 0.25 cup sugar, then taste and add more 1 tablespoon at a time. Remember the sweetness intensifies as it cools.

- Jamaican Jollof Rice Recipe: Island Spice in Every Bite - October 18, 2026
- Hamburger Rice Hot Dish Recipe: Midwest Comfort in One Pan - October 18, 2026
- Iranian Cabbage Rice Recipe: Aromatic Herbs and Spiced Layers - October 18, 2026