
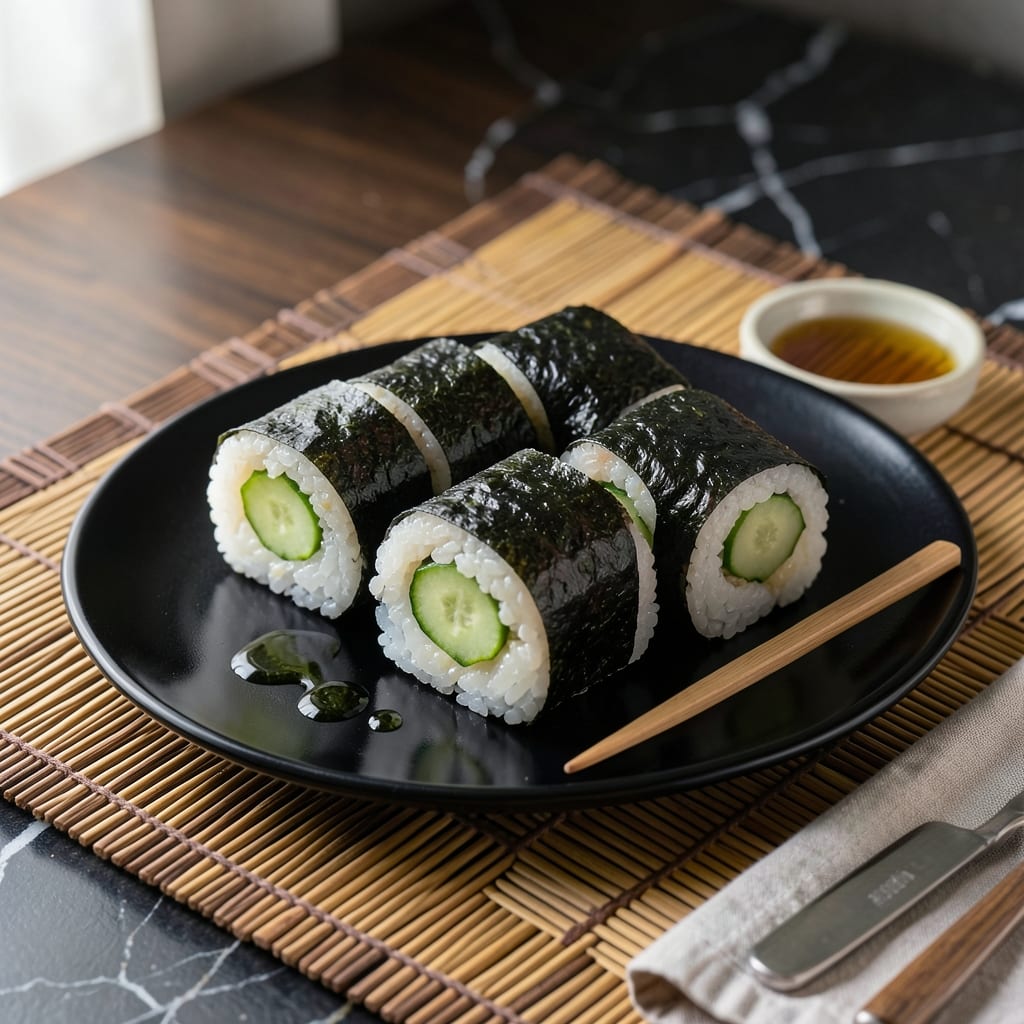
I’ve refined this method over years to deliver authentic flavor without the complexity of traditional sushi-making. The key is properly seasoned rice and precise rolling technique.
This approach uses everyday ingredients and basic kitchen tools. You’ll achieve restaurant-quality results with minimal effort. The seaweed wraps crisply around tender rice and your choice of fillings.
Each bite offers balanced flavors—sweet rice, briny seaweed, and fresh fillings. The process is straightforward once you understand the rhythm of rolling.
Perfect for parties or quick lunches. The technique works with various fillings, from classic cucumber to spicy tuna.
Ingredients for Japanese Rice Roll
Everyday ingredients transform into restaurant-quality seaweed-wrapped bites with balanced, authentic flavors.
| Ingredient | Amount | Notes |
|---|---|---|
| Sushi Rice 🍚 | 2 cups | Short-grain white rice, rinsed thoroughly |
| Nori Sheets 🌊 | 4 sheets | Dried seaweed, full-size |
| Rice Vinegar 🍶 | ¼ cup | Seasoned or unseasoned |
| Granulated Sugar 🍚 | 2 tbsp | Dissolved in vinegar mixture |
| Sea Salt 🧂 | 1 tsp | Fine grain preferred |
| Cucumber 🥒 | 1 whole | Peeled, seeded, julienned |
| Avocado 🥑 | 1 whole | Ripe, thinly sliced |
| Carrot 🥕 | 1 whole | Peeled, julienned |
| Imitation Crab Sticks 🦀 | 8 oz | Surimi, shredded lengthwise |
| Cream Cheese 🧀 | 4 oz | Softened, cut into strips |
| Pickled Ginger 🌸 | ¼ cup | Optional, for serving |
| Soy Sauce 🥢 | ¼ cup | For dipping |
| Wasabi Paste 🟢 | 1 tbsp | Optional, for serving |
| Sesame Seeds 🌰 | 1 tsp | Toasted, for garnish |
The rice is non-negotiable—use short-grain sushi rice for the right sticky texture. Koshihikari or Nishiki brands are standard in professional kitchens, available at Whole Foods or Asian markets. Nori should be crisp and dark green; avoid sheets with tears or dull color. For the vinegar mixture, Mitsukan or Marukan offer consistent quality. Rinse the rice until the water runs clear—this removes excess starch for optimal texture.
No imitation crab? Cooked shrimp or smoked salmon work beautifully. For a vegetarian option, cucumber and avocado alone provide excellent texture. Cream cheese can be swapped for tofu cream cheese if avoiding dairy. The vinegar mixture can use apple cider vinegar in a pinch, though the flavor profile shifts slightly. Always slice fillings into long, thin strips for even distribution.
Store unopened nori in a cool, dark place for up to 1 year. Once opened, keep it sealed in a bag with a damp towel for 1 month. Prepared rolls are best eaten immediately but can be refrigerated for 24 hours—wrap tightly in plastic to prevent drying. The rice mixture should never be refrigerated before rolling.
Why You’ll Love This Recipe
- No Fuss Rolling: I just spread the rice on nori, add fillings, and roll—no fancy tools required. Honestly, my first attempt was lopsided but still tasted amazing.
- Sweet-Tangy Bite: The rice vinegar, sugar, and salt mix gives that classic sushi flavor I crave every time. It’s the little things, like that perfect sticky rice texture, that make it.
- Lunchbox Hero: These stay fresh for hours, so I pack them for picnics or my kid’s school lunch. Between us, they’re the only thing she actually finishes.
- Budget Stretcher: A bag of sushi rice and nori sheets makes a ton of rolls for pennies. I’ll be real: it’s my go-to when I need to feed a crowd without breaking the bank.
Step-by-Step Instructions for Seaweed-Wrapped Bites
Master the technique that transforms simple ingredients into elegant, restaurant-quality rolls with perfect texture.
Step 1: Prepare the Sushi Rice Seasoning
In a small saucepan, gently heat the 0.25 cup rice vinegar, 2 tbsp granulated sugar, and 1 tsp sea salt over medium-low heat. Stir until both the sugar and salt dissolve completely into a clear, fragrant liquid—this usually takes 2-3 minutes.
Remove from heat and set aside to cool. The vinegar mixture should taste balanced, with a hint of sweetness and saltiness that enhances rather than overpowers the rice. I always prepare this first so it has time to cool before mixing with the warm rice.
Step 2: Cook and Season the Rice
Rinse the 2 cups sushi rice thoroughly under cold water until the water runs clear, then cook according to package instructions. Once cooked, transfer the rice to a large wooden or glass bowl (avoid metal, which can react with the vinegar).
Gently fold in the cooled vinegar mixture using a cutting motion with a rice paddle or wooden spoon. Fan the rice with a piece of cardboard or use a handheld fan as you fold—this gives it that signature glossy finish and helps it cool to room temperature. The rice is ready when it’s sticky enough to hold shape but still separates easily.
Step 3: Prepare the Fillings
Peel and seed the 1 whole cucumber, then julienne into matchstick-sized pieces. Peel and julienne the 1 whole carrot similarly. Thinly slice the 1 whole avocado just before assembling to prevent browning.
Shred the 8 oz imitation crab sticks lengthwise into thin strips. Cut the 4 oz cream cheese into ¼-inch thick strips. Arrange all fillings on a plate in separate piles for easy access during rolling. This preparation ensures a smooth, uninterrupted rolling process.
Step 4: Assemble and Roll the Nori Sheets
Place a sheet of nori shiny-side down on a bamboo rolling mat. With wet hands (to prevent sticking), spread a thin, even layer of prepared rice over the nori, leaving a 1-inch border at the top. The rice layer should be about ¼-inch thick—any thicker and the rolls won’t close properly.
Arrange your chosen fillings horizontally across the rice, about 1 inch from the bottom edge. Using the mat, lift the edge closest to you and roll tightly away from you, pressing gently as you go. Seal the edge with a bit of water on your finger. Slice each roll into 6-8 pieces with a sharp, wet knife for clean cuts.
Step 5: Serve with Traditional Accompaniments
Arrange the sliced rolls on a serving platter. Garnish with the 1 tsp sesame seeds for added texture and visual appeal. Serve immediately with the 0.25 cup soy sauce for dipping.
For a complete experience, offer the 0.25 cup pickled ginger and 1 tbsp wasabi paste on the side. The ginger cleanses the palate between bites, while the wasabi adds a spicy contrast that complements the mild flavors of the rolls. These accompaniments elevate the dish from simple to authentic.
Pro Tips For Making Japanese Rice Roll
- Wet Your Hands: Keep a bowl of water with a little vinegar nearby to dip your fingers in—it stops the rice from sticking and actually changes the outcome when shaping the rolls.
- Toast the Nori: Pass the nori sheet quickly over a low gas flame for 2-3 seconds before rolling. I learned this the hard way—it keeps it from getting soggy once the rice hits it.
- Cool the Rice: Spread the cooked sushi rice on a tray and fan it while mixing in the vinegar-sugar-salt blend. Sounds weird, but it works: it gives that glossy, sticky texture you need for tight rolls.
- Tighten the Roll: Use a bamboo mat and press firmly as you roll away from you—don’t just squeeze, roll and compress. My grandmother swore by this, and she was right: it keeps the roll from falling apart when you cut it.
Serving Suggestions for This japanese rice roll
Platter Presentation
Arrange rolls on a flat, white platter to highlight their colors. Alternate 6-8 pieces per roll type for visual variety. I like using a rectangular slate board for modern flair. 🍽️
Sauce Serving
Place 0.25 cup soy sauce in small ceramic dishes for dipping. Add 1 tbsp wasabi paste and 0.25 cup pickled ginger in separate tiny bowls. This traditional trio lets guests customize each bite.
Garnish Touches
Sprinkle 1 tsp toasted sesame seeds over rolls just before serving. Add thin avocado slices on top for freshness. A drizzle of sriracha mayo (mix 2 tbsp mayo with 1 tsp sriracha) adds color and heat.
Side Pairings
Serve with miso soup in small cups for an authentic start. A seaweed salad (available at Whole Foods) complements the rolls perfectly. For crunch, add edamame sprinkled with sea salt.
Drink Pairings
Green tea (hot or iced) is the classic choice to cleanse the palate. For beer lovers, a crisp Sapporo or Asahi enhances the flavors. A light sake like Gekkeikan Horin adds traditional elegance. 🍵
Nutrition Facts
Frequently Asked Questions
What’s the best rice type for this?
Use short-grain sushi rice like Koshihikari or Nishiki. These varieties have the perfect sticky texture to hold rolls together. Long-grain rice won’t work as it lacks the necessary cohesion.
How do I prevent the rice from sticking to my hands?
Keep a bowl of water nearby and wet your hands frequently while handling rice. This prevents sticking without affecting the rice texture. Re-wet your hands between each handful.
Can I make these ahead of time?
Prepare rolls up to 24 hours ahead. Wrap tightly in plastic and refrigerate. Slice just before serving for best texture. Avoid freezing as it changes the rice consistency.
Why did my rolls fall apart when slicing?
Use a very sharp knife and wet it between cuts. Also ensure your rice layer isn’t too thick (¼-inch max) and that you’re rolling tightly enough.

- Mujadara Rice and Lentils Recipe: Earthy Spiced Lentils With Caramelized Onions - November 1, 2026
- Naija Fried Rice Recipe: Street-Style Spice With Veggie Crunch - November 1, 2026
- Mushy Rice Recipe: Fluffy Grains Transformed in Minutes - November 1, 2026