
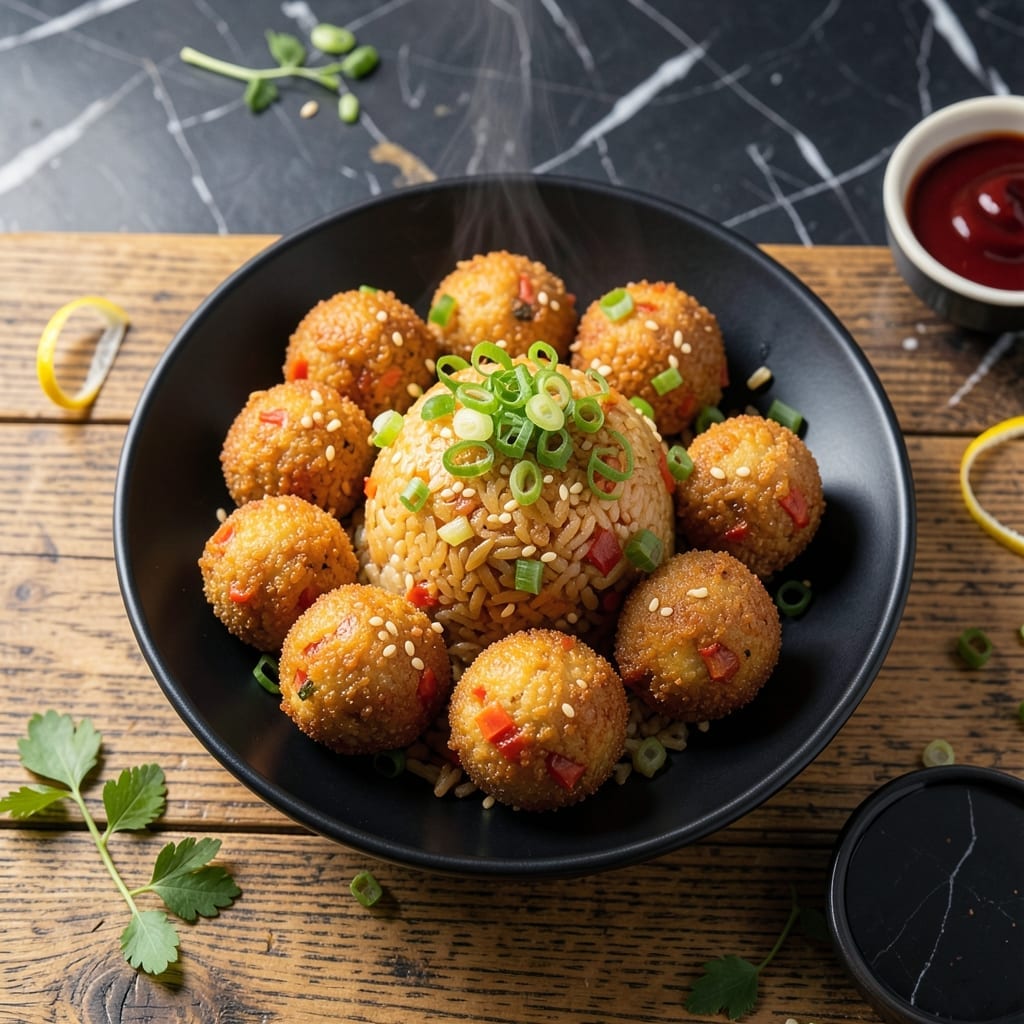
These rice balls redefine leftover fried rice with their crispy golden exterior and spicy, tangy center. I developed this method to transform everyday ingredients into an impressive appetizer or main course.
The secret lies in chilling the kimchi-infused rice mixture before shaping, which prevents the balls from falling apart during frying. A quick roll in panko breadcrumbs ensures that signature crispy texture that contrasts perfectly with the soft, flavorful interior.
Each bite delivers the bold fermented heat of kimchi balanced with the subtle sweetness of rice. The aroma of sizzling oil and fermented spices fills the kitchen as these cook, promising a dish that’s as satisfying to make as it is to eat.
Serve warm with a side of spicy mayo or pickled vegetables for a complete experience. This recipe turns simple ingredients into a crowd-pleasing favorite.
Ingredients for Kimchi Fried Rice Balls
Transform leftover rice into these bold, crispy bites with fermented kimchi and panko.
| Ingredient | Amount | Notes |
|---|---|---|
| Cooked White Rice 🍚 | 4 cups | Day-old, chilled preferred |
| Kimchi 🥬 | 1 ½ cups | Well-fermented, chopped finely |
| Panko Breadcrumbs 🍞 | 1 ½ cups | For crispy coating |
| All-Purpose Flour 🌾 | ¼ cup | For binding mixture |
| Large Eggs 🥚 | 2 whole | Beaten for binding |
| Green Onions 🧅 | ½ cup | Thinly sliced, divided |
| Garlic Cloves 🧄 | 3 cloves | Minced finely |
| Gochujang 🌶️ | 2 tbsp | Korean chili paste |
| Soy Sauce 🫒 | 1 tbsp | Low-sodium preferred |
| Sesame Oil 🫒 | 1 tsp | For finishing aroma |
| Vegetable Oil 🫒 | 2 cups | For deep frying |
| Sesame Seeds 🌿 | 1 tbsp | Toasted, for garnish |
| Salt 🧂 | ½ tsp | Adjust to taste |
| Black Pepper 🌶️ | ¼ tsp | Freshly ground |
The kimchi is non-negotiable here—look for well-fermented, spicy napa cabbage kimchi (the kind in the refrigerated section, not shelf-stable). H Mart or Korean grocers will have the best selection. For the rice, day-old is ideal as it’s drier and binds better; freshly cooked rice can get gummy. Panko breadcrumbs are essential for that signature crispy texture—regular breadcrumbs won’t deliver the same crunch.
No kimchi? Sauerkraut with extra gochujang can work in a pinch (drain it well). Swap panko for crushed cornflakes or tempura batter mix for a gluten-free option. If avoiding eggs, 2 tbsp cornstarch mixed with water binds the rice just as well. The gochujang adds depth—if you can’t find it, sriracha plus a pinch of sugar gets you close but won’t be as complex.
Assembled rice balls can sit in the fridge for 1-2 hours before frying (cover tightly). Leftovers keep 3-4 days in the fridge—reheat in the air fryer or oven to recapture the crisp. Freeze uncooked balls on a tray first, then transfer to a bag for up to 1 month.
Why You’ll Love This Recipe
- I’ll be real: this is my go-to for repurposing that extra rice from last night’s takeout.
- One Bowl Wonder: I love that I can mix the rice, kimchi, and flour in a single bowl before coating—minimal cleanup, maximum flavor.
- Crispy-Creamy Bite: The panko gives that perfect crunch, while the inside stays soft and tangy from the kimchi.
- Party or Lunchbox: Honestly, these work just as well for game day snacks as they do for my kid’s school lunch.
Step-by-Step Instructions for Kimchi Fried Rice Balls
Master these techniques to create the perfect balance of crispy exterior and flavorful spicy filling.
Step 1: Prepare the Kimchi Fried Rice Filling
In a large bowl, combine the 4 cups Cooked White Rice with 1.5 cups Kimchi, 2 tbsp Gochujang, 1 tbsp Soy Sauce, 3 cloves Garlic Cloves, 0.5 tsp Salt, and 0.25 tsp Black Pepper. Mix thoroughly until the rice is evenly coated and vibrant red in color.
The kimchi should be well-fermented and finely chopped to distribute its tangy spice throughout the mixture. I add 0.5 cup Green Onions (reserving some for garnish) for freshness. The filling should be sticky enough to hold its shape when formed into balls.
Step 2: Form and Coat the Rice Balls
Using your hands, shape the seasoned rice mixture into 12-16 balls (about 2-inch diameter each). Wet your hands slightly to prevent sticking. The balls should hold together firmly but not be packed too tightly.
Set up a breading station with three shallow bowls: one with 0.25 cup All-Purpose Flour, one with 2 whole Large Eggs (lightly beaten), and one with 1.5 cups Panko Breadcrumbs. Roll each ball in flour, dip in egg, then coat thoroughly with panko, pressing gently to adhere. Place on a plate and refrigerate for 15 minutes to set the coating.
Step 3: Deep-Fry to Golden Perfection
Heat 2 cups Vegetable Oil in a deep, heavy-bottomed pan to 350°F. Use a thermometer for accuracy—this temperature ensures even cooking without burning the panko. The oil should be deep enough to submerge the balls halfway.
Fry the rice balls in batches (don’t overcrowd) for 4-5 minutes, turning occasionally, until they’re golden brown and crispy on all sides. The filling should be heated through. Drain on a wire rack or paper towels to maintain crispiness.
Step 4: Finish and Garnish
While the rice balls are still hot, drizzle with 1 tsp Sesame Oil and sprinkle with the remaining 0.5 cup Green Onions and 1 tbsp Sesame Seeds. The sesame oil adds a final aromatic touch that complements the spicy filling.
Serve immediately while the exterior is still crispy. Each bite should deliver a contrast of textures: the crunchy panko shell giving way to the soft, flavorful kimchi rice inside. The sesame seeds add both visual appeal and a nutty flavor that ties everything together.
Pro Tips For Making Kimchi Fried Rice Balls
- Chill the Rice: Use day-old, cold rice straight from the fridge—it holds its shape better and fries up crispier than fresh rice.
- Squeeze the Kimchi: Drain and squeeze out excess liquid from the kimchi before mixing, or your rice balls will turn mushy instead of holding together.
- Double Coat: Roll the rice balls in flour first, then egg, then panko for extra crunch that actually stays put during frying.
- Fry in Batches: Don’t crowd the pan—fry 3-4 rice balls at a time in hot oil to keep the temperature stable and ensure even browning.
Wine and Beer Pairings for These Flavors
Crisp White Wines
A dry Riesling from Washington State offers the perfect contrast with its bright acidity cutting through the rich, spicy flavors. I also love Albariño from Spain—its citrus and peach notes complement the fermented kimchi beautifully. Always serve well-chilled at 45-50°F. 🍷
Light Beers
A Korean lager like Hite or OB Beer provides a clean, crisp palate cleanser. For craft options, a pilsner or light American lager works wonderfully. The carbonation lifts the richness while the mild flavor doesn’t compete with the kimchi’s boldness.
Rosé Options
Dry rosé from Provence with its subtle berry notes and crisp finish balances the heat. I prefer one with minimal residual sugar to avoid clashing with the spice. Serve at 50°F for optimal flavor expression. ✨
Sparkling Choices
Prosecco or Cava brings effervescence that refreshes your palate between bites. The bubbles help cut through the oiliness of the fried exterior while complementing the tangy kimchi. Look for brut styles to avoid excess sweetness.
Non-Alcoholic Pairings
For a non-alcoholic option, sparkling yuzu juice offers a citrusy kick that mirrors the dish’s acidity. Korean barley tea (boricha) provides a nutty contrast to the spice. Both should be served ice-cold for maximum refreshment.
Nutrition Facts
Frequently Asked Questions
Can I use fresh rice instead of day-old?
Day-old works best as it’s drier and binds better. Freshly cooked rice can get gummy when formed into balls. If using fresh, spread it on a tray and refrigerate for 30 minutes first.
Why chill the rice balls before frying?
Chilling for 15 minutes helps the coating set and prevents the balls from falling apart during frying. It creates a better texture contrast between the crispy exterior and soft interior.
What can I use instead of panko?
For a gluten-free option, try crushed cornflakes or tempura batter mix. Regular breadcrumbs work but won’t be as crispy. For extra crunch, mix panko with crushed almonds.
Can I bake these instead of frying?
Yes, bake at 400°F for 20-25 minutes, turning halfway. They won’t be as crispy as fried but will still be delicious. Brush with oil first for better browning.

- Mujadara Rice and Lentils Recipe: Earthy Spiced Lentils With Caramelized Onions - November 1, 2026
- Naija Fried Rice Recipe: Street-Style Spice With Veggie Crunch - November 1, 2026
- Mushy Rice Recipe: Fluffy Grains Transformed in Minutes - November 1, 2026