
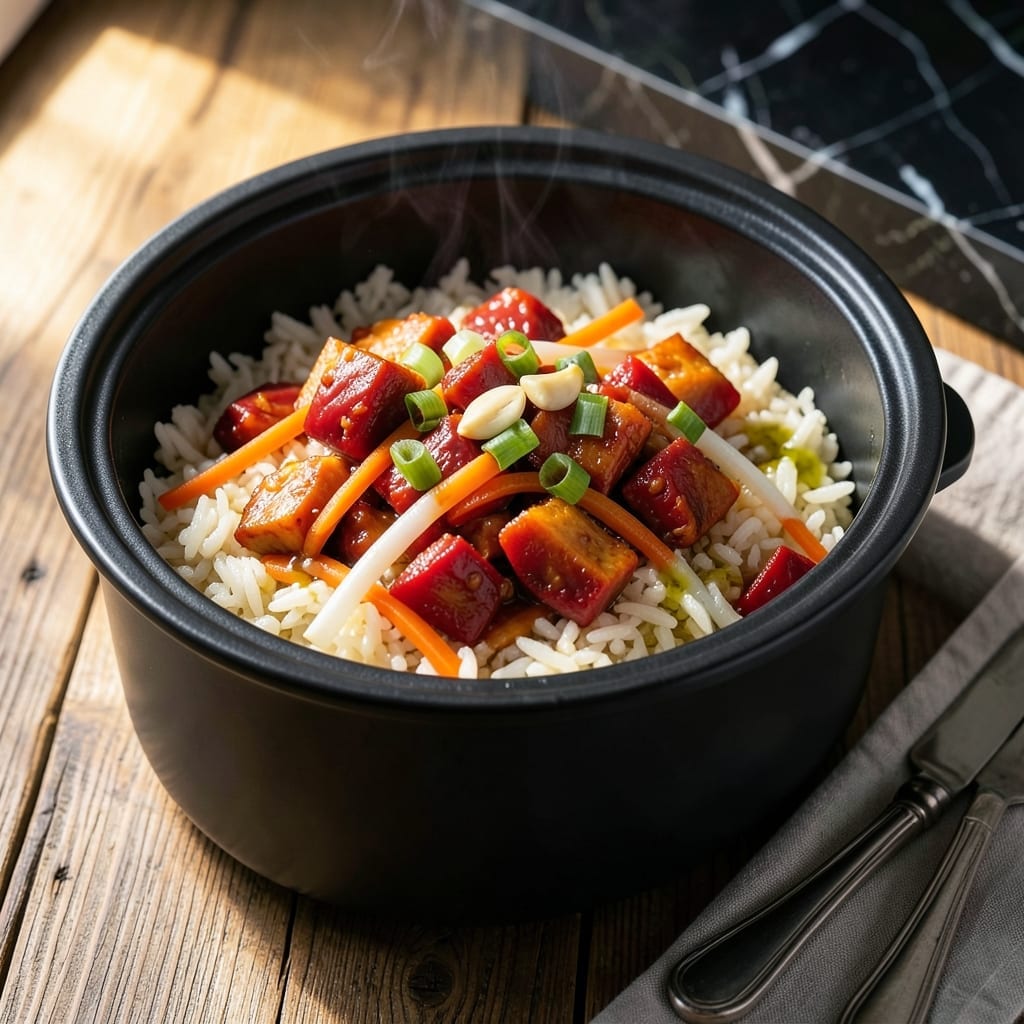
This rice cooker method transforms kimchi into a deeply flavorful, one-pot meal with minimal effort. The fermented spice infuses every grain, creating a dish that’s both comforting and bold.
I developed this technique to maximize convenience without sacrificing authenticity. The rice cooker handles the work, while the kimchi’s natural tang and heat build complexity as it steams.
What emerges is a vibrant, slightly sticky rice with pockets of kimchi and a subtle crunch from the vegetables. The aroma alone signals this isn’t your ordinary steamed rice.
Serve as a side or main dish, topped with a fried egg for extra richness. The entire process stays contained in a single appliance.
Ingredients for Kimchi Rice Cooker
Bold fermented flavors and fresh vegetables create this vibrant one-pot meal in your rice cooker.
| Ingredient | Amount | Notes |
|---|---|---|
| Kimchi 🥬 | 2 cups | Well-aged, chopped with juices |
| Jasmine Rice 🍚 | 1 ½ cups | Rinsed until water runs clear |
| Vegetable Stock 🥣 | 1 ½ cups | Low-sodium preferred for balance |
| Carrots 🥕 | 1 whole | Julienned for even cooking |
| Green Onions 🧅 | 4 whole | Thinly sliced, whites and greens separated |
| Garlic Cloves 🧄 | 4 cloves | Minced finely for even distribution |
| Ginger Root 🌿 | 1 tbsp | Freshly grated for maximum flavor |
| Sesame Oil 🫒 | 1 tbsp | Toasted variety for depth |
| Soy Sauce 🍶 | 2 tbsp | Low-sodium or tamari for gluten-free |
| Gochujang 🌶️ | 1 tbsp | Korean chili paste for heat |
| Large Eggs 🥚 | 4 whole | Optional for topping, fried sunny-side up |
| Sesame Seeds 🌰 | 1 tbsp | Toasted for garnish |
| Neutral Oil 🫒 | 1 tbsp | For sautéing aromatics |
The kimchi quality is non-negotiable here. Seek out well-aged, deeply fermented napa cabbage kimchi—the kind with visible effervescence when opened. H Mart or Korean markets will have the best selection, but Whole Foods often carries decent options in their refrigerated section. Avoid newer batches that lack the sour complexity this dish requires. The rice should be jasmine for the right texture—sushi rice can work but tends to be stickier.
Short on kimchi? Add 1 extra tablespoon gochujang for heat and depth. No gochujang? Sriracha plus a pinch of sugar mimics the sweet-spicy balance. The carrots can be substituted with zucchini or bell peppers (cut into matchsticks). For gluten-free, tamari replaces soy sauce seamlessly. The eggs are optional but add a richness that complements the kimchi’s tang perfectly.
Leftovers keep beautifully for 4-5 days refrigerated—the flavors actually improve as they meld. Freezes well for 3 months if you omit the eggs. Reheat with a splash of water to restore moisture. Always store kimchi in its original liquid to maintain freshness and prevent drying out.
Why You’ll Love This Recipe
- Set It & Forget: I dump everything in the rice cooker and walk away—no stirring, no babysitting, just perfectly tender jasmine rice soaked in kimchi goodness.
- Umami Bomb: The fermented kimchi and vegetable stock create this deep, tangy-savory flavor that makes every bite ridicuously addictive.
- Lunchbox MVP: I make a big batch on Sunday, and it reheats beautifully all week—my kids even eat the carrots when they’re mixed in.
- Pantry Hero: Honestly, it uses stuff I already have lying around, and that one jar of kimchi lasts for multiple meals.
Step-by-Step Instructions for Kimchi Rice Cooker Meal
This one-pot method delivers perfectly seasoned rice with minimal effort and maximum flavor.
Step 1: Sauté the Aromatics and Vegetables
Add the 1 tbsp Neutral Oil to the rice cooker pot and set to sauté mode if available. Add the julienned Carrots, the whites of the 4 whole Green Onions, 4 cloves Garlic Cloves, and 1 tbsp Ginger Root. Sauté for 3-4 minutes until the carrots begin to soften and the garlic becomes fragrant.
This step builds the flavor foundation. The aromatics should release their scent without browning—if they start to color too quickly, reduce heat slightly. Stir frequently to prevent sticking.
Step 2: Toast the Rice and Incorporate Sauces
Add the rinsed 1.5 cups Jasmine Rice to the pot and stir for 1 minute to lightly toast the grains. This enhances the nutty flavor of the rice and prevents mushiness.
Create a well in the center and add the 1 tbsp Gochujang, 2 tbsp Soy Sauce, and 1 tbsp Sesame Oil. Stir thoroughly to coat every grain of rice with the sauce mixture. The rice should appear evenly colored with a vibrant reddish hue from the gochujang.
Step 3: Add Liquids and Kimchi
Pour in the 1.5 cups Vegetable Stock and add all 2 cups Kimchi with its juices. Stir well to distribute the kimchi evenly throughout the rice. The liquid should cover the rice by about ½ inch.
The kimchi juices are essential—they infuse the dish with tangy, spicy depth. Ensure no rice grains are sticking to the sides of the pot above the liquid line, as this can cause burning. Gently press down any floating kimchi pieces to submerge them.
Step 4: Cook and Steam
Secure the rice cooker lid and set to the standard rice cooking cycle. Let it cook undisturbed for the full cycle, typically 20-25 minutes. Avoid opening the lid during cooking—this releases steam and can result in unevenly cooked rice.
When the cooker switches to warm mode, let it steam for an additional 10 minutes. The rice is done when all liquid is absorbed and the grains are tender with a slight chew. Fluff the rice gently with a fork to check for doneness and distribute the kimchi evenly.
Step 5: Garnish and Serve
Drizzle with a bit of extra Sesame Oil if desired, then sprinkle the green portions of the Green Onions and 1 tbsp Sesame Seeds over the top. For a complete meal, fry the 4 whole Large Eggs sunny-side up in a separate pan and place one on each serving.
The eggs should have runny yolks that mix into the rice when broken. Serve immediately while hot, with extra soy sauce on the side for those who prefer a saltier profile. Each serving will have a balance of spicy, tangy, and umami flavors.
Pro Tips For Making Kimchi Rice Cooker
- Rinse the Kimchi: I learned this the hard way—give your kimchi a quick rinse under cold water to remove excess salt, unless you want a dish that tastes like ocean water.
- Use Aged Kimchi: Sounds weird, but it works: the older, sourer kimchi actually changes the outcome, giving your rice that deep, tangy flavor you’re after.
- Skip the Overcrowding: Resist the urge to cram all the ingredients in at once—leave at least an inch at the top of the rice cooker or you’ll end up with a mushy, uneven mess.
- Sauté First, Cook Later: After burning three batches, I finally figured out that quickly sautéing the carrots and kimchi in a little oil before adding them to the rice cooker makes a real difference in the final texture.
Regional Styles of This Recipe
Korean Traditional
In Korea, this dish is called kimchi bokkeumbap and is typically made in a stone pot for a crispy bottom layer. The version we’re making adapts this method for a rice cooker, keeping the same bold flavors. I love how the rice cooker maintains the kimchi’s tang while adding convenience. 💛
Japanese Adaptation
In Japan, a similar dish called kimchi meshi is popular. The difference lies in the use of short-grain rice and sometimes the addition of pork belly for richness. I often swap jasmine rice for sushi rice when I want a stickier texture that’s easier to eat with chopsticks.
Chinese Influence
Chinese-style kimchi rice often includes lap cheong (Chinese sausage) for a sweeter, smokier profile. The rice is usually stir-fried in a wok rather than steamed. To mimic this, I’ll sauté the rice in the cooker after the initial cycle for a wok-like texture and depth.
American Fusion
In the US, it’s common to see this dish topped with avocado slices or crumbled bacon for a brunch twist. I like to add a drizzle of sriracha mayo for creaminess. This fusion style works perfectly with the rice cooker method, blending ease with creativity. 🔥
Vegan Variation
For a plant-based approach, skip the eggs and add tofu cubes or edamame for protein. I’ve found that marinated tofu absorbs the kimchi flavors beautifully. The rice cooker makes this vegan version just as hearty and satisfying.
Nutrition Facts
Frequently Asked Questions
Can I use fresh kimchi instead of aged?
Fresh kimchi works but lacks the deep tang of aged. For best results, use kimchi that’s been fermenting for at least 1-2 weeks to develop the complex flavors this dish needs.
What if my rice cooker doesn’t have a sauté function?
Sauté the aromatics in a separate pan first, then transfer to the rice cooker with the rice and liquids. This ensures the flavors still develop properly without burning.
How do I make this dish less spicy?
Reduce the gochujang to ½ tbsp or omit it entirely, and use mild kimchi. You can also rinse the kimchi briefly to remove some of the spice.
Can I add protein to this recipe?
Add diced chicken, tofu, or pork during the sauté step. For seafood, stir in cooked shrimp at the end to avoid overcooking.

- Mujadara Rice and Lentils Recipe: Earthy Spiced Lentils With Caramelized Onions - November 1, 2026
- Naija Fried Rice Recipe: Street-Style Spice With Veggie Crunch - November 1, 2026
- Mushy Rice Recipe: Fluffy Grains Transformed in Minutes - November 1, 2026