
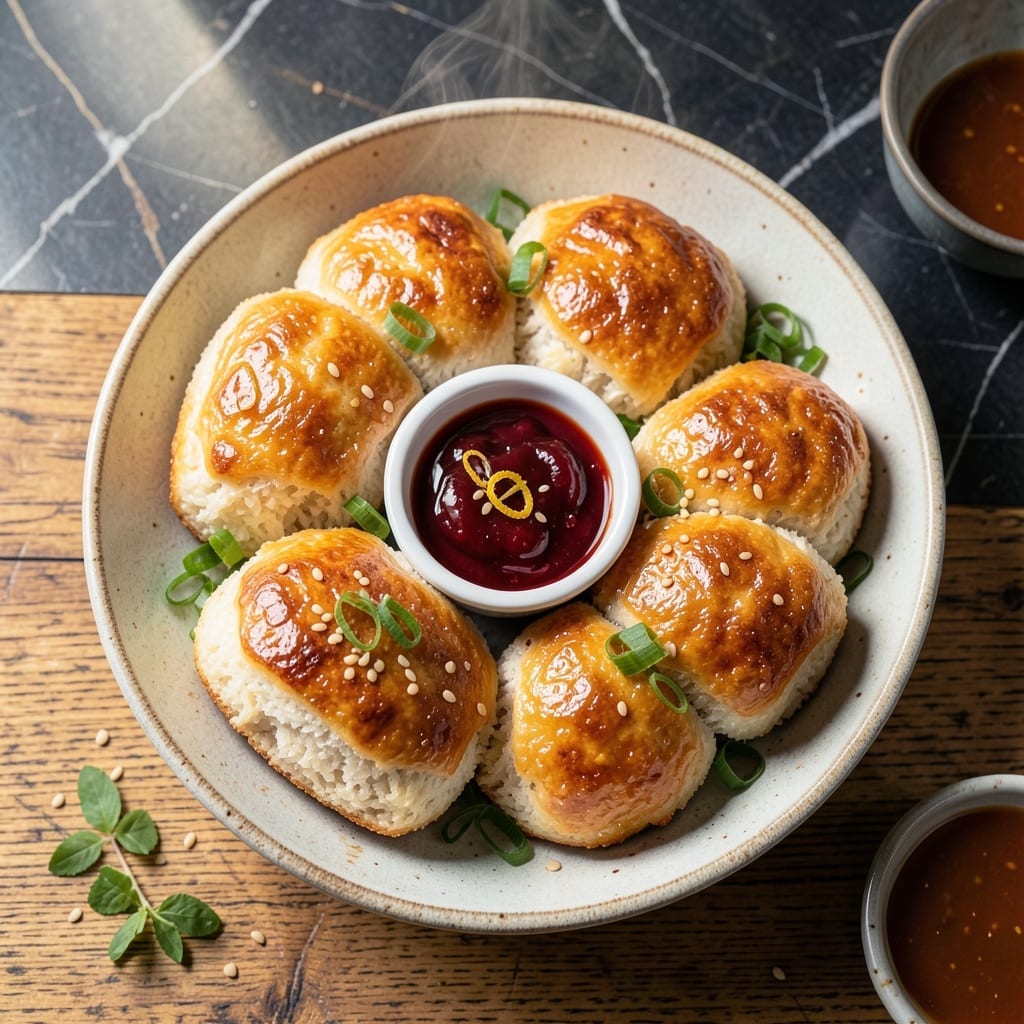
This Korean rice bread delivers the perfect balance of soft, chewy centers and crispy golden edges that make it irresistible.
I developed this recipe after testing multiple techniques to achieve that signature texture. The key is a precise combination of rice flour and wheat flour, which creates the ideal chewiness while maintaining structure.
The baking process transforms the dough into pillowy bread with a delicate crunch. Each bite offers a satisfying contrast that keeps you reaching for more.
Simple ingredients and clear steps make this accessible for home bakers. The results rival any bakery version.
Ingredients for Korean Rice Bread
Pantry staples plus a few special touches create this bakery-quality bread at home.
| Ingredient | Amount | Notes |
|---|---|---|
| Rice Flour 🌾 | 1 ½ cups | Fine, white rice flour preferred |
| All-Purpose Flour 🌾 | 2 cups | Sifted for best texture |
| Granulated Sugar 🍚 | ¼ cup | Fine white sugar for sweetness |
| Active Dry Yeast 🍞 | 2 ¼ tsp | One 0.25 oz packet equivalent |
| Warm Water 💧 | 1 ¼ cups | 110°F for yeast activation |
| Large Egg 🥚 | 1 whole | Room temperature for binding |
| Unsalted Butter 🧈 | 2 tbsp | Melted and cooled slightly |
| Salt 🧂 | 1 tsp | Fine sea salt for balance |
| Milk 🥛 | ¼ cup | Whole milk for richness |
| Vegetable Oil 🫒 | 1 tbsp | For greasing bowl and pan |
| Honey 🍯 | 1 tbsp | Optional for glaze finish |
| Sesame Seeds 🌰 | 1 tbsp | For topping, lightly toasted |
The rice flour is non-negotiable for authenticity. Bob’s Red Mill offers consistent quality, but Asian grocery stores often have finer grinds that yield superior texture. The all-purpose flour should be unbleached for optimal structure. Yeast freshness is critical—check the expiration date and store it in the freezer if keeping long-term.
No rice flour? Gluten-free all-purpose flour blends can work in a pinch, though the texture will differ. Substitute honey with maple syrup for a vegan option. The butter can be swapped for coconut oil (use refined to avoid coconut flavor). If you’re out of yeast, this recipe won’t rise properly—plan ahead.
Store dough covered in the fridge for up to 24 hours before baking. Baked bread keeps at room temperature for 2-3 days in an airtight container. For longer storage, freeze slices for up to 1 month and reheat in the toaster to restore crispness.
Why You’ll Love This Recipe
- No-Knead Magic: I just mix the rice flour, yeast, and warm water—no fancy techniques or elbow grease required.
- Sweet Pillowy Bite: The sugar caramelizes slightly, giving it that soft, cloud-like texture with a delicate sweetness.
- Breakfast or Snack: Honestly, it’s as good with jam at dawn as it is with a cup of tea in the afternoon.
- Budget Stretch: A bag of rice flour and a little yeast make a batch that feeds my family twice over.
Step-by-Step Instructions for Korean Rice Bread
Follow this tested method to achieve the perfect balance of chewy interiors and crispy edges.
Step 1: Activate the Yeast and Combine Wet Ingredients
In a small bowl, dissolve the 2.25 tsp Active Dry Yeast in the 1.25 cups Warm Water at 110°F. Let it sit for 5-7 minutes until the mixture becomes frothy—this confirms the yeast is active and ready to work its magic.
In a separate large bowl, whisk together the 1 whole Large Egg, 0.25 cup Granulated Sugar, 2 tbsp Unsalted Butter (melted and cooled), 0.25 cup Milk, and 1 tbsp Honey. The sugar and honey feed the yeast, while the egg and milk add richness to the dough.
Step 2: Incorporate Dry Ingredients to Form the Dough
In another bowl, sift together the 1.5 cups Rice Flour and 2 cups All-Purpose Flour with the 1 tsp Salt. Gradually add this dry mixture to the wet ingredients, stirring until a shaggy dough forms. The rice flour gives this bread its signature chewy texture.
Switch to a dough hook attachment on your stand mixer and knead on medium speed for 8-10 minutes until the dough is smooth and elastic. If the dough feels too sticky, add a teaspoon of all-purpose flour, but avoid over-flouring—this can make the bread dense.
Step 3: First Rise Until Doubled in Size
Lightly grease a clean bowl with the 1 tbsp Vegetable Oil and place the dough inside, turning to coat all sides. Cover with a damp kitchen towel and let it rise in a warm, draft-free place for 1 to 1.5 hours or until doubled in volume.
This first rise develops the gluten structure and allows the yeast to ferment, which contributes to the bread’s airy yet chewy consistency. You’ll know it’s ready when the dough springs back slowly when pressed gently with a finger.
Step 4: Shape, Second Rise, and Achieve Crispy Edges
Punch down the risen dough to release excess air, then divide it into 12 equal portions for individual buns. Roll each portion into a smooth ball and place them on a parchment-lined baking sheet, spacing them 2 inches apart to allow for expansion.
Cover the buns with a damp towel and let them rise for another 30-45 minutes until puffy. Near the end of this rise, preheat your oven to 375°F. This second rise ensures a light texture, while the high oven temperature guarantees those promised crispy edges.
Step 5: Bake and Finish with Sesame Seeds
Bake the buns for 18-22 minutes until the tops are golden brown and the edges look crisp. Halfway through baking, brush the tops with a little extra milk or melted butter for added sheen and flavor.
Remove the buns from the oven and immediately brush with the 1 tbsp Honey diluted with a teaspoon of warm water for a subtle sweet glaze. Sprinkle with 1 tbsp Sesame Seeds while still warm so they adhere properly. Let cool on a wire rack for 10 minutes before serving to set the texture.
Pro Tips For Making Korean Rice Bread
- Proof the Yeast: I learned this the hard way—always dissolve the yeast in warm water with a pinch of sugar first and wait for it to foam for 5-10 minutes. If it doesn’t bubble, your bread won’t rise, no matter how long you wait.
- Balance the Flours: Sounds weird, but it works: use a 3:2 ratio of rice flour to all-purpose flour for that perfect chewy-yet-light texture. Too much rice flour makes it dense, and too little loses the authentic taste.
- Skip Cold Water: After burning three batches, I finally figured out that warm water (around 110°F) is non-negotiable for activating the yeast. Cold water slows it down, and hot water kills it—yes, even if you’re impatient like me.
- Rest the Dough: My grandmother swore by this, and she was right: let the dough rest for at least 1 hour after kneading, covered with a damp towel. It relaxes the gluten and makes shaping way easier, even if the dough feels too sticky at first.
Make-Ahead Tips for This Recipe
Overnight Dough Prep
After kneading, place the dough in a greased bowl and refrigerate for up to 12 hours. This slow fermentation develops deeper flavor. I often prep the dough before bed and bake fresh in the morning. The cold also makes shaping easier.
Morning Baking
Remove the chilled dough from the fridge and let it sit at room temperature for 30 minutes before shaping. This takes the chill off without overproofing. Proceed with shaping and the second rise as usual.
Freezing Baked Bread
Cool the bread completely, then wrap individual buns tightly in plastic wrap and place in a freezer bag. They keep for up to 1 month at 0°F. Thaw overnight in the fridge before reheating. 💡
Reheating Methods
For best results, reheat frozen buns in a 350°F oven for 8-10 minutes wrapped in foil. This restores the chewy texture and crisp edges. Microwaving works in a pinch but can make them gummy.
Dough Storage
If you need to pause after the first rise, punch down the dough and refrigerate for up to 24 hours. Let it come to room temperature before shaping. This flexibility helps with busy schedules.
Always use an airtight container for both dough and baked bread to prevent drying out. ❄️
Nutrition Facts
Frequently Asked Questions
Can I use gluten-free flour instead of rice flour?
Rice flour is essential for the authentic chewy texture. A gluten-free blend can work, but the result will be denser. For best results, stick to fine white rice flour.
Why didn’t my bread get crispy edges?
Crispy edges require a hot oven at 375°F and proper spacing between buns. Ensure they’re 2 inches apart and baked until golden brown. Overcrowding traps steam, softening the crust.
How do I store leftovers to keep them fresh?
Store cooled bread in an airtight container at room temperature for 2-3 days. For longer storage, freeze for up to 1 month and reheat in the oven.

- Mujadara Rice and Lentils Recipe: Earthy Spiced Lentils With Caramelized Onions - November 1, 2026
- Naija Fried Rice Recipe: Street-Style Spice With Veggie Crunch - November 1, 2026
- Mushy Rice Recipe: Fluffy Grains Transformed in Minutes - November 1, 2026