
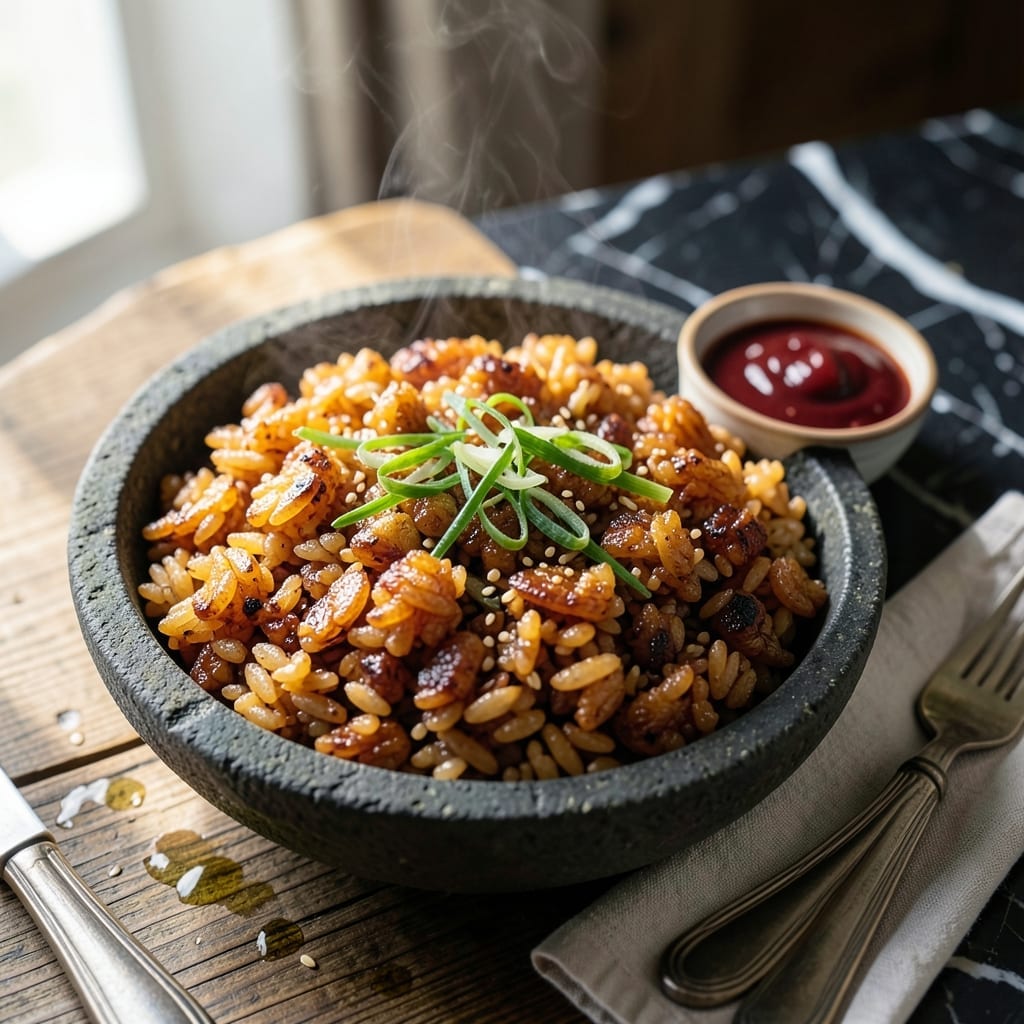
This traditional Korean dish transforms leftover rice into a crispy, nutty delight that’s both comforting and flavorful. Nurungji captures the essence of resourcefulness in Korean cuisine.
By carefully toasting the rice in a pot, you create a golden, slightly charred layer with a satisfying crunch. The result is a simple yet deeply satisfying side or snack.
Ingredients for Korean Scorched Rice
Leftover rice gets a second life with just a few pantry staples and toppings.
| Ingredient | Amount | Notes |
|---|---|---|
| Cooked White Rice 🍚 | 4 cups | Day-old, preferably short-grain |
| Sesame Oil 🫒 | 2 tbsp | Toasted for nutty aroma |
| Soy Sauce 💧 | 2 tbsp | Low-sodium preferred |
| Gochujang 🌶️ | 1 tbsp | Korean red pepper paste |
| Sugar 🥄 | 1 tsp | White or brown, for balance |
| Garlic Cloves 🧄 | 2 cloves | Minced for even distribution |
| Green Onions 🧅 | 3 whole | Thinly sliced for garnish |
| Sesame Seeds 🌾 | 1 tbsp | Toasted for extra crunch |
| Seaweed Snacks 🌊 | 2 sheets | Thinly cut, optional garnish |
| Eggs 🥚 | 2 whole | Optional, for topping |
| Kimchi 🥬 | ½ cup | Chopped, for serving |
| Vegetable Oil 🛢️ | 1 tbsp | For crisping rice |
The rice is everything here. Day-old short-grain (like sushi rice) crisps up best—fresh rice is too moist and won’t char properly. Most Asian markets carry short-grain in bulk, but Trader Joe’s or H Mart have great options too. If you’re using a rice cooker, spread the leftover rice in a thin layer on a baking sheet and refrigerate overnight to dry it out (worth the extra minute).
No gochujang? Sriracha mixed with a little miso paste gets you close to that sweet-spicy depth. For a milder version, skip the gochujang and add a pinch of red pepper flakes. The soy sauce can be tamari for gluten-free, but the flavor will be slightly different. If you’re out of sesame oil, a light toasted oil (like avocado oil) works, but the nutty aroma won’t be the same.
Leftovers keep 2-3 days in the fridge, but the crispiness fades fast. Reheat in a dry skillet to revive the crunch. For meal prep, store toppings separately and assemble fresh. The rice base itself can be frozen for 1 month—just reheat gently to avoid sogginess.
Why You’ll Love This Recipe
- 5-Minute Fix: I just crisp up leftover rice in a pan with sesame oil—no prep, no fuss.
- Sweet-Spicy Crunch: That gochujang and sugar glaze caramelizes into little sticky, spicy bites. Honestly, I lick the pan.
- Breakfast or Midnight Snack: Works as a quick breakfast with a fried egg on top or a late-night bite straight from the skillet.
- Zero Waste Winner: Uses up day-old rice and pantry staples I always have on hand.
Step-by-Step Instructions for Korean Scorched Rice
Here’s the method I use to achieve that perfect crispy texture with rich, nutty flavor.
Step 1: Prepare and Season the Cooked White Rice
Start with the 4 cups Cooked White Rice—day-old works best because it’s drier and crisps up more easily. Break apart any clumps with your hands so the grains are separate. This ensures even crisping and prevents steaming in the pan.
In a small bowl, whisk together the 2 tbsp Soy Sauce, 1 tbsp Gochujang, 1 tsp Sugar, and 2 cloves Garlic Cloves (minced). Pour this mixture over the rice and toss gently to coat every grain. The sauce should be evenly distributed but not soggy.
Step 2: Crisp the Rice to Golden Perfection
Heat the 1 tbsp Vegetable Oil in a large, heavy-bottomed skillet or nonstick pan over medium-high heat. Add the seasoned rice and press it down firmly with a spatula, spreading it into an even layer. Let it cook undisturbed for 5-7 minutes.
You’ll know it’s ready to flip when the bottom develops a deep, golden brown crust and you can hear a gentle sizzle. Resist the urge to stir—this is how you get that coveted crispy texture. Flip sections carefully to crisp the other side for another 5-7 minutes.
Step 3: Finish with Aromatic Oils and Garnishes
Drizzle the 2 tbsp Sesame Oil over the crispy rice and toss gently to coat. The toasted sesame oil adds a deep, nutty aroma that defines nurungji. Cook for an additional 1-2 minutes to let the flavors meld together.
Remove from heat and transfer to a serving dish. Immediately sprinkle with the 3 whole Green Onions (thinly sliced) and 1 tbsp Sesame Seeds. The residual heat will soften the green onions slightly while keeping their fresh crunch.
Step 4: Serve with Traditional Toppings
For the full experience, serve the scorched rice with the 0.5 cup Kimchi (chopped) on the side. The tangy, spicy kimchi cuts through the richness of the crispy rice beautifully. If using, thinly cut the 2 sheets Seaweed Snacks as a garnish for added umami.
For extra protein, fry the 2 whole Eggs sunny-side up and place them on top of each serving. The runny yolk adds a luxurious finish. Serve immediately while the rice is still hot and crispy—this dish doesn’t wait well.
Pro Tips For Making Korean Scorched Rice
- Crisp the Rice First: Spread the cooked white rice thinly in the pan and let it sit undisturbed for 2-3 minutes on medium-high heat—I learned this the hard way after scraping burnt bits off the bottom too many times.
- Thin the Gochujang: Mix the gochujang with a splash of water or soy sauce before adding it to the pan, otherwise it’ll clump and leave streaks in your rice.
- Skip Fresh Rice: Use day-old, cold rice from the fridge—fresh rice is too moist and will steam instead of crisp, no matter how long you wait.
- Finish with Sesame: Drizzle the sesame oil at the very end, not during cooking, so it keeps its aroma instead of burning off into bitterness.
Common Mistakes When Making This Recipe
Overcrowding the Pan
Using too much rice at once creates steam that prevents crisping. I spread 4 cups Cooked White Rice in a thin, even layer with space between grains. A 12-inch skillet works perfectly for this amount.
Skipping Day-Old Rice
Fresh rice contains too much moisture to char properly. I always use day-old short-grain rice—the drier texture is essential. If in a hurry, spread fresh rice on a baking sheet and refrigerate for 2-3 hours to dry it out. 🔥
Stirring Too Soon
Disturbing the rice before it forms a crust prevents even browning. I let it cook undisturbed for 5-7 minutes until I see a deep golden brown crust forming. Patience here creates that satisfying crunch.
Wrong Heat Level
Too low heat steams the rice, too high burns it. I maintain medium-high heat throughout cooking. If your pan starts smoking excessively, reduce heat slightly but keep it hot enough to crisp.
Neglecting the Sauce
The sauce should coat without making rice soggy. I mix 2 tbsp Soy Sauce, 1 tbsp Gochujang, and 1 tsp Sugar thoroughly before tossing with rice. Use just enough to flavor, not drown, the grains.
Skipping the Final Toast
Adding 2 tbsp Sesame Oil at the end is crucial for authentic flavor. I drizzle it over the crispy rice and cook for 1-2 minutes to let the nutty aroma infuse every bite. This step transforms good nurungji into great nurungji. ✨
Nutrition Facts
Frequently Asked Questions
Can I use fresh rice instead of day-old?
Fresh rice is too moist and won’t crisp properly. Spread it on a baking sheet and refrigerate for 2-3 hours to dry it out first. This mimics the texture of day-old rice for better results.
What’s the best pan for making nurungji?
A 12-inch skillet with a heavy bottom works best. Cast iron or nonstick pans distribute heat evenly and prevent sticking. Avoid thin pans that may cause uneven cooking.
How do I store leftovers?
Store in an airtight container in the fridge for 2-3 days. Reheat in a dry skillet to restore crispiness. For longer storage, freeze for up to 1 month but expect a softer texture.

- Mujadara Rice and Lentils Recipe: Earthy Spiced Lentils With Caramelized Onions - November 1, 2026
- Naija Fried Rice Recipe: Street-Style Spice With Veggie Crunch - November 1, 2026
- Mushy Rice Recipe: Fluffy Grains Transformed in Minutes - November 1, 2026