
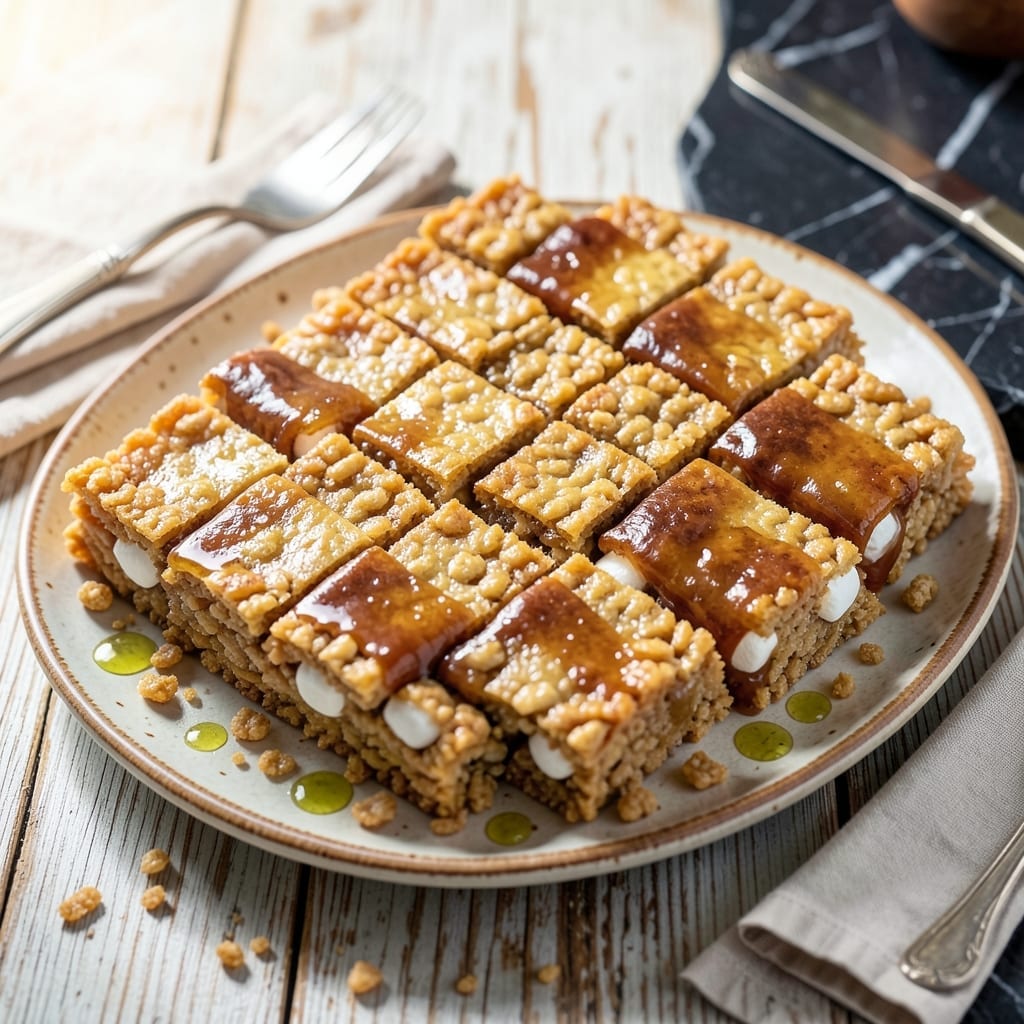
There’s a reason these treats have remained a classic for generations—they’re the perfect balance of crispy and chewy in every bite.
This recipe stays true to the traditional method while ensuring foolproof results every time. The key lies in melting the butter and marshmallows together until completely smooth before mixing in the cereal.
What emerges is a pan of golden, perfectly textured squares that hold their shape while maintaining that signature snap. The marshmallow coating creates a sticky, sweet binder that transforms simple ingredients into something magical.
Whether for bake sales, lunchboxes, or midnight snacks, this version delivers the nostalgic taste you remember with minimal effort and maximum satisfaction.
Ingredients for Kroger Rice Krispie Treats
Just five ingredients transform into these nostalgic, perfectly textured treats everyone loves.
| Ingredient | Amount | Notes |
|---|---|---|
| Unsalted Butter 🧈 | ½ cup | Melted for base mixture |
| Mini Marshmallows 🍬 | 10 cups | For smooth melting texture |
| Rice Krispies Cereal 🥣 | 6 cups | Kroger brand preferred |
| Vanilla Extract 🌿 | 1 tsp | Pure extract for best flavor |
| Salt 🧂 | ¼ tsp | Fine sea salt preferred |
The marshmallows are the foundation here. Kroger’s store-brand mini marshmallows melt beautifully without breaking the bank. For the cereal, their house brand Rice Krispies deliver that signature snap, crackle, pop at a great value. Use fresh marshmallows (check the bag’s expiration date) as stale ones won’t melt smoothly. The butter should be unsalted to control the sweetness level precisely.
No mini marshmallows? Regular marshmallows cut in half work in a pinch but take longer to melt. Want a richer flavor? Brown the butter before adding marshmallows. The vanilla extract adds depth—pure extract beats imitation. For a festive touch, mix in sprinkles or crushed candy canes after combining with cereal.
These keep beautifully at room temperature in an airtight container for up to 3 days. For longer storage, wrap individual squares in parchment paper and freeze for 6 weeks. The texture is best the day they’re made, but they’ll still disappear quickly regardless.
Why You’ll Love This Recipe
- One Bowl Wonder: I melt the butter, toss in the mini marshmallows, and stir in the Rice Krispies—no extra dishes, no fuss.
- Vanilla Magic: That splash of vanilla in the marshmallow-butter mix turns simple into crave-worthy with every bite.
- Party Ready: Honestly, I’ve brought these to potlucks, birthdays, and even school bake sales—they disappear fast.
- Budget Friendly: A box of cereal, a bag of marshmallows, and butter? Feeds a crowd for under ten bucks.
Step-by-Step Instructions for Rice Krispie Treats
Here’s the method. Straightforward, tested, works every time.
Step 1: Melt the Butter and Prepare the Pan
Begin by melting the 0.5 cup Unsalted Butter in a large, heavy-bottomed saucepan over low heat. I use a light-colored pan so I can monitor the melting process carefully—you don’t want the butter to brown, just melt completely.
While the butter melts, prepare a 9×13-inch baking dish by lightly greasing it with additional butter or line it with parchment paper. This prevents sticking and makes cutting easier later. The pan preparation is crucial for clean removal of the treats after setting.
Step 2: Melt the Marshmallows with Vanilla and Salt
Once the butter is fully melted, add all 10 cups Mini Marshmallows to the saucepan. Stir constantly with a silicone spatula or wooden spoon as they begin to melt. The mixture will be thick at first, but it will gradually become smooth and glossy.
After about 5-7 minutes, when the marshmallows are nearly completely melted, stir in the 1 tsp Vanilla Extract and 0.25 tsp Salt. The vanilla adds depth of flavor, while the salt balances the sweetness. Remove the saucepan from heat once the mixture is fully smooth and combined.
Step 3: Incorporate the Cereal
Working quickly, add all 6 cups Rice Krispies Cereal to the melted marshmallow mixture. Use the spatula to fold the cereal into the mixture gently but thoroughly, ensuring every piece is coated evenly. The cereal will begin to soften slightly as it absorbs the warm marshmallow mixture.
Be careful not to overmix, as this can crush the cereal and result in dense treats. The ideal texture should maintain some crispness from the cereal while being fully bound by the marshmallow mixture. You should see the cereal pieces glistening with the marshmallow coating.
Step 4: Press and Shape the Treats
Transfer the cereal mixture to the prepared baking dish. Use the spatula or buttered hands to press the mixture evenly into the pan. Press firmly but gently—too much pressure will compact the treats, making them hard instead of light and airy.
For even pressing, I like to use a piece of parchment paper on top of the mixture and press down with a flat-bottomed measuring cup. This ensures an even surface without sticking. The mixture should fill the pan completely and be about 1-1.5 inches thick.
Step 5: Cool and Cut into Squares
Allow the treats to cool at room temperature for at least 30 minutes. This gives the marshmallow mixture time to set fully, holding the cereal together. Resist the urge to cut them too soon—premature cutting will result in crumbly, misshapen treats.
Once completely cool, use a sharp knife to cut into 16 equal squares. For clean cuts, I run the knife under hot water between each cut. Store the treats in an airtight container at room temperature for up to 3 days, though they’re best enjoyed fresh.
Pro Tips For Making Kroger Rice Krispie Treats
- Melt Butter Low: Use medium-low heat when melting the butter to keep the marshmallows from seizing up—after burning two batches, I finally figured out that patience prevents that bitter, burnt taste.
- Use Fresh Marshmallows: Sounds weird, but it works: fresh mini marshmallows melt smoother and stickier than stale ones, so check the bag’s date if your treats keep crumbling.
- Press While Warm: Press the mixture into the pan immediately after mixing—waiting even 2 minutes makes it harder to shape, and I learned this the hard way with lumpy, uneven layers.
- Salt the Butter: Add a pinch of salt to the melted butter before the marshmallows go in—about ¼ teaspoon balances the sweetness, especially since you’re using unsalted butter.
Best Sauces and Condiments for This Dish
Chocolate Drizzle
Melt 1 cup semi-sweet chocolate chips with 2 tbsp coconut oil in the microwave in 30-second intervals. Stir until smooth, then drizzle over cooled treats. This adds a rich contrast to the sweet marshmallow. I use Ghirardelli chocolate chips for best results. 💫
Salted Caramel Sauce
Warm ½ cup store-bought caramel sauce with ¼ tsp flaky sea salt for a sweet-salty combination. Drizzle lightly over the top just before serving. The salt enhances the buttery flavor of the treats.
Peanut Butter Glaze
Whisk ½ cup creamy peanut butter with 3 tbsp powdered sugar and 2-3 tbsp milk until smooth. This creamy topping pairs perfectly with the crispy cereal texture. Use Jif or Skippy for consistent results.
Fruit Compote
A warm raspberry or strawberry compote adds a bright, tangy contrast. Simmer 1 cup frozen berries with 2 tbsp sugar until thickened, then cool slightly before spooning over squares. The acidity cuts through the sweetness beautifully.
White Chocolate Swirl
Melt 1 cup white chocolate chips and swirl into the marshmallow mixture before adding cereal. This creates ribbons of white chocolate throughout each bite. Add ½ tsp vanilla extract to the melted white chocolate for extra flavor. ✨
Cinnamon Sugar Dust
Mix 2 tbsp sugar with 1 tsp cinnamon and sprinkle lightly over the top of pressed treats before cooling. This simple addition gives a warm spice note that complements the buttery base perfectly.
Nutrition Facts
Frequently Asked Questions
Can I use regular marshmallows instead of mini?
Yes, but cut them in half first for even melting. Regular marshmallows take 2-3 minutes longer to melt completely and may create lumps if not stirred constantly.
How do I keep the treats from sticking to my hands?
Lightly butter your hands or use a buttered spatula. For less mess, press the mixture with a piece of parchment paper on top.
Why did my treats turn out hard?
Overmixing or pressing too firmly compacts the cereal. Use gentle pressure and mix just until combined for light, airy results.
Can I make these ahead of time?
They keep well at room temperature in an airtight container for up to 3 days. For longer storage, freeze wrapped squares for 6 weeks.

- Mujadara Rice and Lentils Recipe: Earthy Spiced Lentils With Caramelized Onions - November 1, 2026
- Naija Fried Rice Recipe: Street-Style Spice With Veggie Crunch - November 1, 2026
- Mushy Rice Recipe: Fluffy Grains Transformed in Minutes - November 1, 2026