
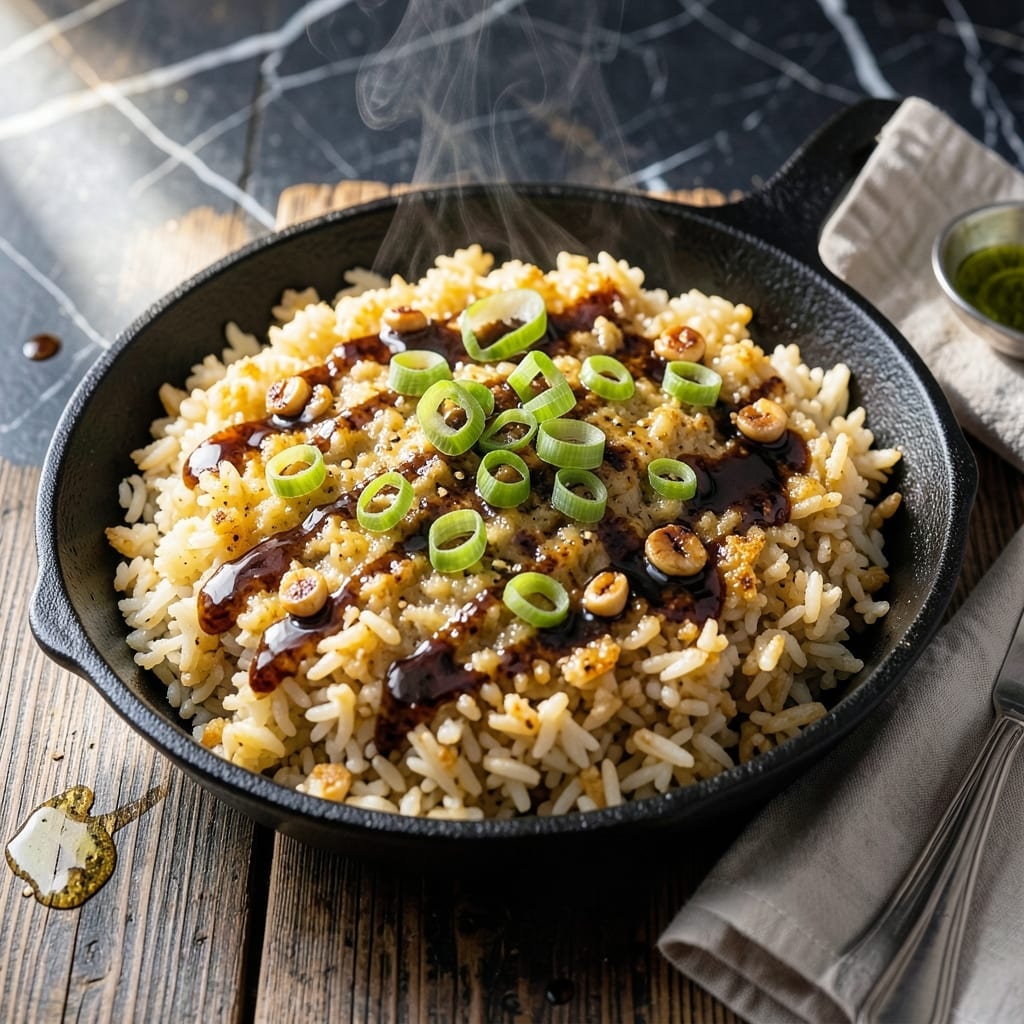
Don’t toss that mushy rice—transform it into a crispy-edged dish that’s better than the original. This method revives leftovers with minimal effort and maximum flavor.
The trick is high heat and patience. Spread the rice thin in a hot pan, then let it crisp undisturbed. A splash of oil ensures golden, crispy results.
You’ll end up with rice that’s tender inside and shatteringly crispy outside—no one will guess it started as leftovers. The texture is the star.
Vegan-friendly by default, this technique works with any rice variety. Ready in 10 minutes.
Ingredients for Leftover Mushy Rice
Transform leftover rice with these crispy-edged essentials for maximum flavor revival.
| Ingredient | Amount | Notes |
|---|---|---|
| Cooked White Rice 🍚 | 4 cups | Day-old, chilled, mushy texture ideal |
| Neutral Oil 🫒 | 3 tbsp | High smoke point preferred |
| Garlic Cloves 🧄 | 3 cloves | Minced for aromatic depth |
| Green Onions 🧅 | 4 whole | Thinly sliced for garnish |
| Soy Sauce 💧 | 2 tbsp | Low-sodium for control |
| Toasted Sesame Oil 🫒 | 1 tsp | For finishing aroma |
| Sea Salt 🧂 | ½ tsp | Fine grain for even distribution |
| Ground Black Pepper 🌶️ | ¼ tsp | Freshly ground preferred |
| Red Pepper Flakes 🌶️ | ¼ tsp | Adjust for heat preference |
| Frozen Peas 🌱 | ½ cup | Thawed, optional add-in |
| Carrots 🥕 | ½ cup | Finely diced, optional add-in |
| Fresh Cilantro 🌿 | ¼ cup | Chopped, for garnish |
The rice quality is paramount here. Day-old, chilled rice with a slightly dry texture crisps most effectively—freshly cooked rice lacks the necessary starch retrogradation. Use a high smoke point neutral oil like avocado or refined coconut oil for the initial crisping phase. Whole Foods and Trader Joe’s carry excellent organic options if you’re avoiding GMO oils.
No green onions? Shallots or chives work at a one-to-one ratio. Soy sauce can be replaced with tamari for gluten-free or coconut aminos for a milder flavor. The sesame oil is non-negotiable for authenticity, but toasted walnut oil offers a similar depth. For extra protein, fold in diced extra-firm tofu (pressed and cubed) during the final minute of cooking.
Crispy rice is best served immediately but can be kept warm in a 200°F oven for up to 30 minutes. Leftovers lose their crispness but can be refrigerated for 2 days and briefly re-crisped in a hot pan. Store unused rice in an airtight container for up to 5 days prior to frying.
Why You’ll Love This Recipe
- One Pan Dinner: I just heat the rice, toss in garlic and green onions, and let the soy sauce do its magic.
- Garlic Lover’s Dream: The sizzling garlic in oil hits the rice with this deep, savory punch that’s honestly hard to beat.
- Weekday Lifesaver: I throw this together when I’m starving and the fridge is bare—leftovers turn into a whole new meal.
- Zero Waste Win: Between us, I hate throwing out old rice, and this recipe makes it taste better than the first time.
Step-by-Step Instructions for Crispy Edged Rice Revival
Transform mushy rice into a crispy, flavorful dish with this method. Simple, efficient, foolproof.
Step 1: Prepare the Rice and Aromatics
Begin by breaking up the 4 cups cooked white rice with your hands or a fork to separate any clumps. The grains should be loose and distinct, not packed together. This ensures even crisping in the pan.
Mince the 3 cloves garlic cloves and thinly slice the 4 whole green onions, keeping the white and green parts separate for layered flavor. Finely dice the 0.5 cup carrots if using, aiming for uniform ¼-inch pieces for consistent cooking.
Thaw the 0.5 cup frozen peas by running them under warm water for 1 minute, then drain well. Excess moisture will steam the rice instead of frying it.
Step 2: Sear for Maximum Crispiness
Heat 2 tbsp neutral oil in a large nonstick skillet over medium-high heat until it shimmers. Add the rice, spreading it into an even layer. Press down firmly with a spatula to create direct contact with the pan.
Cook undisturbed for 4-5 minutes until the bottom develops a golden-brown, crispy crust. Resist the urge to stir—this is how you achieve the coveted crispy texture. If any areas brown too quickly, reduce heat slightly.
Stir the rice, then press down again to form a new crust. Repeat this process 2-3 times until at least half the grains are crispy and golden.
Step 3: Build Flavor with Aromatics
Push the rice to one side of the skillet and add the remaining 1 tbsp neutral oil to the empty space. Add the minced garlic and diced carrots, if using. Sauté for 1-2 minutes until the garlic is fragrant and just golden—don’t let it burn.
Add the 0.5 cup peas and cook for 1 minute to heat through. Stir everything together with the rice, then drizzle the 2 tbsp soy sauce evenly over the top. The soy sauce should sizzle and coat the grains lightly.
Season with 0.5 tsp sea salt, 0.25 tsp ground black pepper, and 0.25 tsp red pepper flakes. Toss well to distribute the seasoning evenly.
Step 4: Finish and Garnish
Drizzle the 1 tsp toasted sesame oil over the rice and toss to coat. This adds a nutty aroma that enhances the dish’s depth. Cook for an additional 1-2 minutes to let the flavors meld.
Remove from heat and stir in the sliced green onions, reserving a handful for garnish. The residual heat will soften them slightly while keeping their fresh bite.
Transfer the rice to a serving dish and top with the reserved green onions and 0.25 cup chopped fresh cilantro. The cilantro adds a bright, fresh finish that balances the dish’s rich, savory notes.
Pro Tips For Making Leftover Mushy Rice
- Break Up the Rice: Spread the mushy rice on a plate and break up clumps with your fingers or a fork before frying—this prevents gummy texture and ensures even browning.
- Hot Pan, Cold Rice: Heat the oil until shimmering before adding the rice, and make sure the rice is cold from the fridge. I learned this the hard way—warm rice just turns to paste.
- Press for Crisp: After adding the rice, press it down firmly with a spatula and resist stirring for 2-3 minutes. That’s how you get those golden, crispy bits everyone fights over.
- Garlic Last: Add the minced garlic and green onions only in the last 30 seconds of cooking. Sounds weird, but it keeps the garlic from burning while still infusing the dish with flavor.
Dietary Considerations for leftover mushy rice
Gluten-Free Friendliness
This dish is naturally gluten-free as written, using only rice, vegetables, and naturally gluten-free seasonings. The soy sauce is the only potential concern—simply swap in tamari or coconut aminos to keep it safe for gluten-sensitive eaters. I always keep San-J tamari in my pantry for this reason. 💪
Vegan and Plant-Based
Fully vegan by default, this recipe contains no animal products. The rice, vegetables, and seasonings all align with plant-based diets. For extra protein, I often add ½ cup crumbled firm tofu during the final cooking stage.
Low-Sodium Option
To reduce sodium, use low-sodium soy sauce or tamari and cut the added sea salt in half. Boost flavor with extra garlic, ginger, or a squeeze of lime instead. The dish stays vibrant without excess salt.
Allergen Considerations
This recipe is free from dairy, eggs, nuts, and most common allergens. The only allergen to watch is soy in the sauce. For soy-free versions, use coconut aminos and ensure your sesame oil is processed in a dedicated facility.
Dietary Flexibility
Easily adaptable for other diets: omit added oil for oil-free, use cauliflower rice for low-carb, or add cooked chicken for high-protein. The technique works with any dietary needs.
I love how this simple method serves so many eaters without extra effort. 🌱
Nutrition Facts
Frequently Asked Questions
Why does mushy rice crisp up better?
The broken starches in mushy rice dry out and form a crispy crust faster than intact grains. Pressing it firmly into a hot pan creates maximum contact for even browning.
Can I use fresh rice instead?
Fresh rice contains too much moisture and will steam rather than crisp. Always use day-old chilled rice for best results. If in a hurry, spread fresh rice on a tray and refrigerate uncovered for 1 hour.
How do I prevent burning?
Use medium-high heat and resist stirring too soon. If edges darken too quickly, reduce heat slightly. Stir only after a golden crust forms, about 4-5 minutes.
What pan works best?
A heavy nonstick or cast iron skillet distributes heat evenly. Avoid thin pans—they create hot spots that burn the rice. Always preheat the pan for 2-3 minutes before adding oil.

- Mujadara Rice and Lentils Recipe: Earthy Spiced Lentils With Caramelized Onions - November 1, 2026
- Naija Fried Rice Recipe: Street-Style Spice With Veggie Crunch - November 1, 2026
- Mushy Rice Recipe: Fluffy Grains Transformed in Minutes - November 1, 2026