
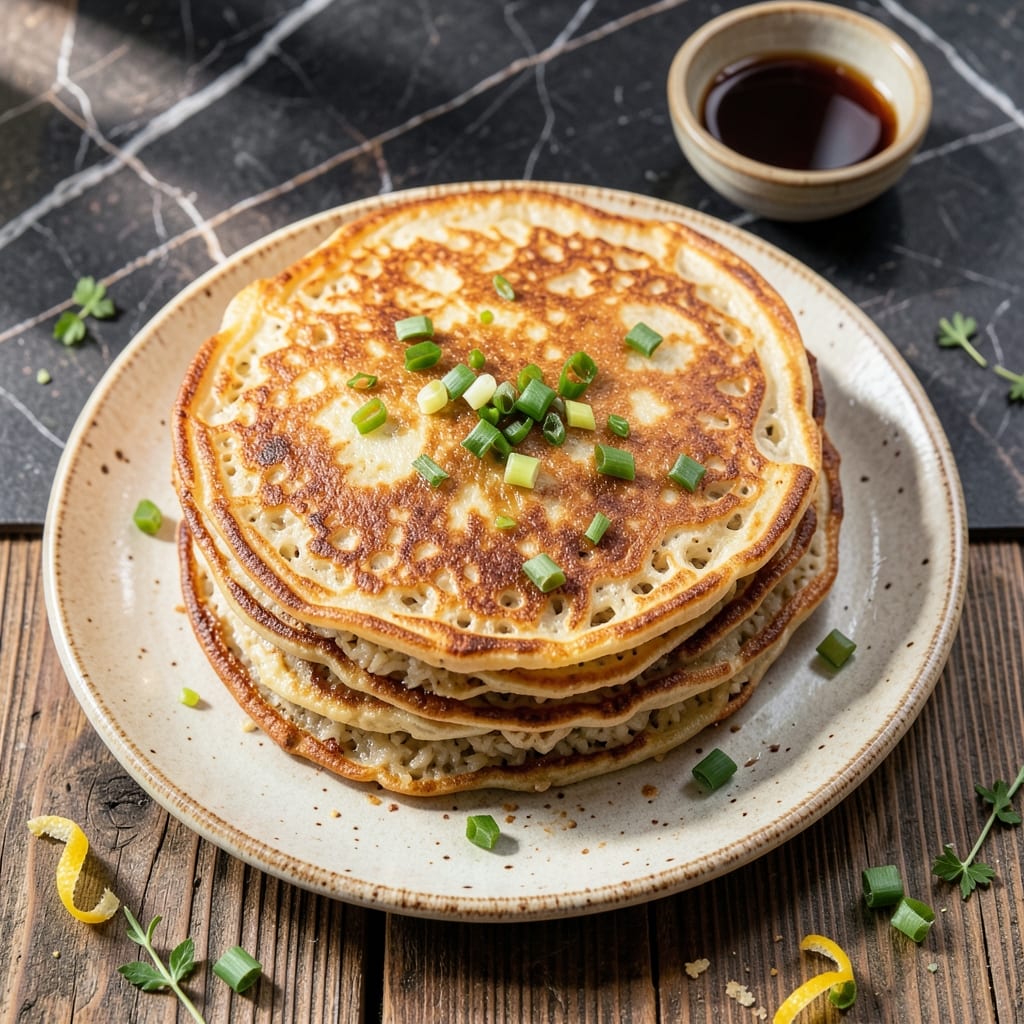
Transform yesterday’s rice into today’s crispy, golden pancakes with this waste-nothing approach. I developed this method after one too many takeout containers of leftover rice went to waste, and it’s become my go-to for quick, satisfying meals.
The key is using cold, day-old rice which holds its shape better than fresh. A simple batter of egg and flour binds the grains while creating a crispy exterior when pan-fried. The process takes less than 20 minutes from start to finish.
Each bite delivers a perfect contrast of textures: shatteringly crispy edges giving way to tender rice centers. The pancakes work equally well as a side dish or light main, with endless topping possibilities.
Serve with soy sauce for a savory option or drizzle with honey for a sweet twist. This recipe proves that leftovers can be just as exciting as the original meal.
Ingredients for Leftover Rice Pancakes
Turn leftover rice into golden, crispy pancakes with just a few pantry staples.
| Ingredient | Amount | Notes |
|---|---|---|
| Leftover Cooked Rice 🍚 | 3 cups | Cold, day-old preferred |
| All-Purpose Flour 🌾 | ½ cup | For binding the pancakes |
| Large Eggs 🥚 | 2 whole | Beaten for batter |
| Green Onions 🧅 | 3 whole | Thinly sliced for garnish |
| Vegetable Oil 🫒 | 3 tbsp | For pan-frying pancakes |
| Soy Sauce 🥢 | 2 tbsp | For serving or mixing in |
| Garlic Cloves 🧄 | 2 cloves | Minced for flavor |
| Salt 🧂 | ½ tsp | Adjust to taste |
| Black Pepper 🌶️ | ¼ tsp | Freshly ground preferred |
| Sesame Seeds 🌰 | 1 tbsp | Toasted, for garnish |
| Honey 🍯 | 2 tbsp | Optional for sweet version |
The rice is key here—use cold, day-old cooked rice for the best texture. Any variety works, but jasmine or long-grain hold their shape best. Most grocery stores carry these, but I always grab basmati from Trader Joe’s for its clean taste. If your rice is fresh, spread it on a tray and refrigerate for 30 minutes to firm up (worth the extra minute).
No all-purpose flour? Rice flour or cornstarch at a 1:1 ratio works too. Out of green onions? Chives or shallots add a similar bite. For a gluten-free version, swap flour for almond flour or oat flour. The soy sauce can be replaced with tamari or coconut aminos if needed. Want extra crunch? Add a handful of finely chopped nuts.
Pancakes stay fresh in the fridge for 2-3 days in an airtight container. Reheat in a dry pan to restore crispiness. The batter itself can be prepped a day ahead—just stir in the egg right before cooking. Freeze cooked pancakes for up to 1 month.
Why You’ll Love This Recipe
- No-Fuss Batter: I just dump the rice, flour, eggs, and green onions in a bowl—no blender, no fuss. Honestly, it’s the easiest way to turn last night’s takeout into something new.
- Crispy Outside, Soft Inside: That golden crust from the oil with the tender rice center? Ridiculously good. The green onions add just the right pop of freshness.
- Breakfast or Snack: I’ve made these for lazy Sunday brunches and as a quick after-school bite. Between us, they disappear either way.
- Zero Food Waste: Here’s what sold me—it uses up that half-container of rice sitting in my fridge. Saves me money and guilt.
Step-by-Step Instructions for Leftover Rice Pancakes
Here is the method to transform cold rice into golden, crispy pancakes with minimal effort.
Step 1: Combine Rice with Binder Ingredients
In a large mixing bowl, break up the 3 cups Leftover Cooked Rice with your hands or a fork until there are no large clumps. The grains should be separate and dry—this ensures even distribution in the batter.
Add the 0.5 cup All-Purpose Flour, 2 whole Large Eggs, 2 cloves minced Garlic Cloves, 0.5 tsp Salt, and 0.25 tsp Black Pepper. Mix thoroughly with a wooden spoon or spatula until the flour is fully incorporated and the eggs bind everything together. The batter should hold its shape when pressed but not be sticky.
Step 2: Heat Oil and Shape Pancakes
Place a large skillet or griddle over medium heat and add 1 tbsp Vegetable Oil. The oil is ready when it shimmers slightly and a small piece of rice dropped in sizzles immediately.
Scoop ¼ cup portions of the rice mixture into the pan, pressing down gently with the back of the measuring cup or a spatula to flatten into ½-inch thick pancakes. Don’t press too hard, or they’ll become dense. Leave space between each pancake to flip easily.
Step 3: Cook Until Golden and Crisp
Cook the pancakes undisturbed for 4-5 minutes until the edges turn golden brown and crisp. You’ll notice the bottoms release easily from the pan when they’re ready to flip.
Carefully flip each pancake and add another 1 tbsp Vegetable Oil to the pan if it looks dry. Cook for another 4-5 minutes until the second side is equally golden brown and crisp. The pancakes should feel firm to the touch with no soft spots in the center.
Step 4: Garnish and Serve
Transfer the pancakes to a paper towel-lined plate to drain any excess oil. While still hot, drizzle with 2 tbsp Soy Sauce and sprinkle with the thinly sliced 3 whole Green Onions and 1 tbsp Sesame Seeds.
For a sweet version, replace the soy sauce with 2 tbsp Honey. Serve immediately while crispy—the texture softens as they cool. Each pancake should have a delicate crunch on the outside and a tender, flavorful interior.
Pro Tips For Making Leftover Rice Pancakes
- Press Out Moisture: Squeeze as much water as possible from the rice before mixing—leftover rice holds more liquid than you think, and skipping this makes the batter too thin.
- Heat the Oil First: Get the pan screaming hot before adding the batter, about 1-2 minutes on medium-high, otherwise the pancakes will absorb oil and turn greasy instead of crisp.
- Break Up the Rice: Mash or chop the rice into smaller grains so it binds better with the flour and eggs—I learned this the hard way after making pancakes that kept falling apart in the pan.
- Add Egg Last: Mix the flour and rice first, then fold in the beaten eggs at the end to avoid overworking the batter, which makes the pancakes dense instead of light and crispy.
Storing and Reheating This Dish
Fridge Storage
Let your pancakes cool completely before storing. Place them in an airtight container with parchment paper between layers to prevent sticking. They’ll stay fresh in the fridge for 2-3 days without losing flavor. ❄️
Freezer Method
For longer storage, freeze cooked pancakes on a baking sheet first, then transfer to a freezer bag. They’ll keep for up to 1 month. I always label my bags with the date to track freshness.
Oven Reheating
Preheat your oven to 375°F and place pancakes on a wire rack over a baking sheet. Heat for 8-10 minutes until crispy. This method works best for larger batches.
Skillet Revival
My favorite way to bring them back to life! Heat a dry skillet over medium heat and warm pancakes for 2-3 minutes per side. Add a drizzle of oil for extra crispiness. 🔥
Microwave Option
For a quick fix, microwave on 50% power for 30-45 seconds. Place a damp paper towel over them to retain moisture. Note that this softens the texture.
Serving Tip
Always reheat from frozen or refrigerated state without thawing. Re-crisp in a skillet after microwaving if needed. This dish tastes just as good the second time around!
Nutrition Facts
Frequently Asked Questions
Can I use fresh rice instead of leftover?
Fresh rice is too moist and sticky, making pancakes fall apart. Spread cooked rice on a tray and refrigerate for 30 minutes to firm up before using.
What if my batter is too wet?
Add 1-2 tablespoons more flour until the mixture holds its shape when pressed. The texture should resemble damp sand, not liquid.
Can these be made gluten-free?
Yes! Swap all-purpose flour for almond flour or gluten-free oat flour in equal amounts. The texture will be slightly denser but still crispy.
How do I keep them warm while cooking batches?
Preheat oven to 200°F and place cooked pancakes on a wire rack. They’ll stay crispy for up to 20 minutes without overcooking.

- Lump Rice Recipe Sri Lanka: Traditional Island-Style Texture - November 4, 2026
- Laos Sticky Rice Recipe: Traditional Steamed Perfection - November 4, 2026
- Magic Rice Recipe: One-Pot Aromatic Wonder - November 4, 2026