
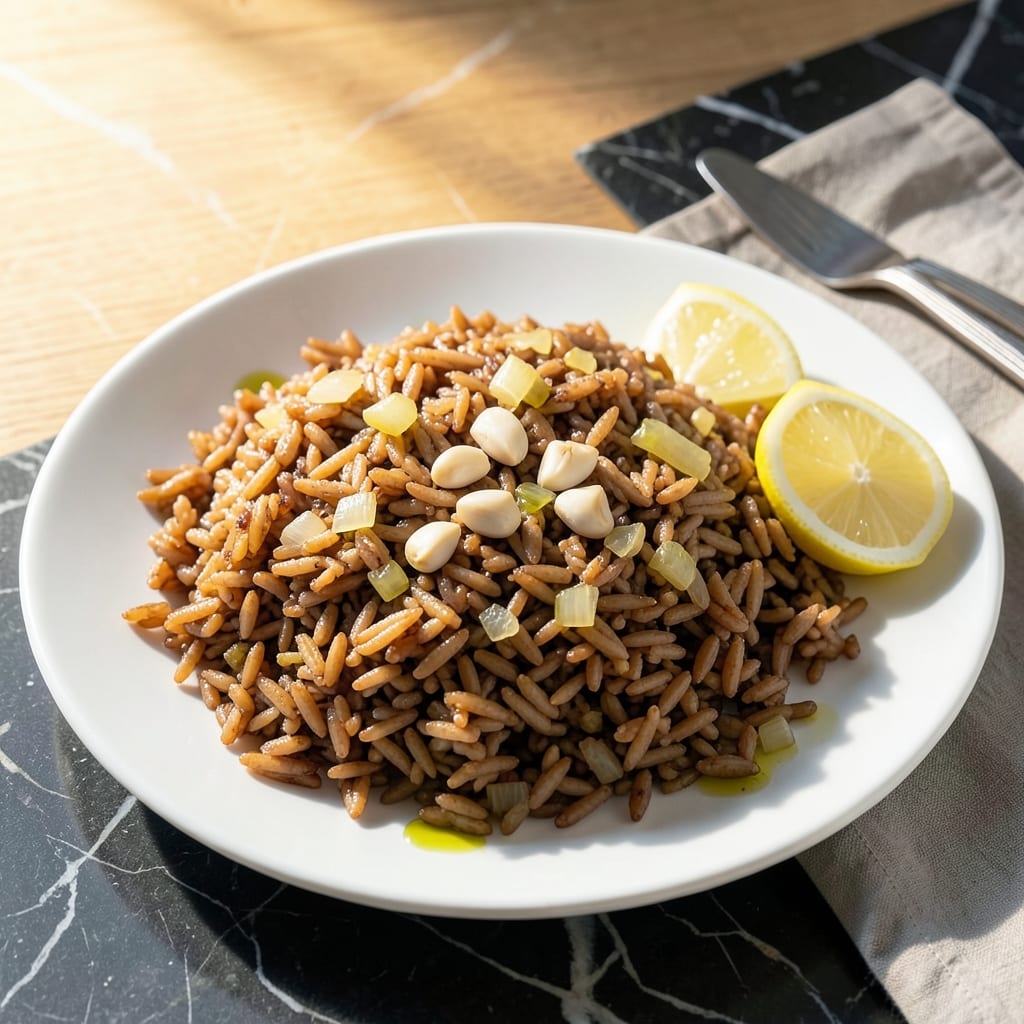
This creation brings bright citrus flavor to the table with a perfect balance of zesty and nutty. The simple cooking method ensures every grain stays tender and separate.
With just a few ingredients and 30 minutes, you’ll have a side dish that complements any meal. The lemon adds freshness while brown rice provides hearty, wholesome texture.
Ingredients for Lemon Brown Rice
Bright citrus meets nutty grains in this simple yet flavorful side dish.
| Ingredient | Amount | Notes |
|---|---|---|
| Brown Rice 🍚 | 1 ½ cups | Long-grain variety preferred |
| Water 💧 | 3 ½ cups | Or vegetable broth for extra flavor |
| Lemon 🍋 | 1 whole | Zested and juiced |
| Extra-Virgin Olive Oil 🫒 | 2 tbsp | For sautéing and finishing |
| Garlic Cloves 🧄 | 3 cloves | Minced finely |
| Yellow Onion 🧅 | ½ whole | Finely diced |
| Sea Salt 🧂 | 1 tsp | Adjust to taste |
| Black Pepper 🌶️ | ½ tsp | Freshly ground |
| Fresh Parsley 🌿 | ¼ cup | Chopped for garnish |
| Vegetable Broth 🥕 | ½ cup | Low-sodium preferred |
| Bay Leaf 🍃 | 1 whole | Optional for depth |
The rice is the foundation here. Long-grain brown rice holds its shape and texture best—avoid short-grain or instant varieties. I source mine from Whole Foods or Trader Joe’s for consistent quality. The lemon should be fresh (bottled juice lacks brightness), and organic if possible for the zest. Look for firm, heavy lemons with vibrant yellow skin.
No fresh lemon? Bottled juice in a pinch, but skip the zest and add a pinch of citric acid for brightness. Out of brown rice? Basmati or jasmine work, but adjust water slightly. For the broth, Better Than Bouillon (vegetable base) is my go-to—just mix with hot water. The parsley can be swapped with cilantro or chives if that’s what you have on hand.
Cooked rice keeps well in the fridge for 4-5 days in an airtight container. Freeze for up to 3 months if making ahead. Reheat with a splash of water to restore moisture. The zest and parsley garnish are best added fresh when serving.
Why You’ll Love This Recipe
- One Pot Wonder: I toss everything in a single pot—brown rice, water, lemon, olive oil, garlic—and let it simmer. No fancy techniques, just hands-off cooking.
- Bright and Zesty: The lemon and garlic infuse the rice with a fresh, tangy kick that’s way more exciting than plain brown rice.
- Meal Prep Hero: I make a big batch on Sunday and it keeps beautifully for lunches all week. Between us, it tastes even better the next day.
- Budget Friendly: Brown rice is cheap, and a little lemon and garlic go a long way. I’ll be real: it’s one of the most affordable sides I make.
Step-by-Step Instructions for Lemon Brown Rice
This method ensures perfectly cooked grains with bright citrus notes throughout.
Step 1: Sauté Aromatics for Flavor Foundation
Heat the 2 tbsp extra-virgin olive oil in a medium saucepan over medium heat. Add the finely diced 0.5 whole yellow onion and cook for 3-4 minutes until translucent and just beginning to soften at the edges.
Stir in the minced 3 cloves garlic cloves and cook for an additional 30 seconds until fragrant. Watch carefully to prevent burning—the garlic should turn golden, not brown. This base builds the flavor profile that will infuse the entire dish.
Step 2: Toast Rice and Add Liquids
Add the 1.5 cups brown rice to the pan and stir to coat the grains with oil. Toast for 2 minutes, stirring constantly, until the rice becomes slightly nutty and aromatic. You’ll notice the grains turn slightly opaque as they absorb the flavors.
Pour in the 3.5 cups water, 0.5 cup vegetable broth, 1 tsp sea salt, and 0.5 tsp black pepper. Add the 1 whole bay leaf and bring to a boil. The liquid should cover the rice by about ½ inch—if it doesn’t, add a splash more water.
Step 3: Incorporate Lemon and Simmer
Once boiling, reduce the heat to low, cover the pan, and let it simmer. Stir in the zest of the 1 whole lemon—this adds a vibrant, citrusy aroma. Cook for 30 minutes without lifting the lid, allowing steam to work its magic.
After 30 minutes, check the rice. It should be tender with a slight bite. If it’s still firm, add ¼ cup water and continue cooking for another 5-10 minutes. The grains should be plump and the liquid mostly absorbed.
Step 4: Finish with Fresh Lemon and Parsley
Remove the pan from heat. Discard the bay leaf and stir in the juice of the 1 whole lemon. The acid brightens the dish and balances the nutty depth of the brown rice. Taste and adjust seasoning if needed—the lemon should be noticeable but not overpowering.
Let the rice sit covered for 10 minutes to steam and fluff. Before serving, fold in the 0.25 cup fresh parsley for a pop of color and freshness. The parsley should be vibrant green and evenly distributed throughout.
Pro Tips For Making Lemon Brown Rice
- Toast the Rice: Cook the brown rice in olive oil for 2-3 minutes before adding liquid—it deepens the nutty flavor and prevents mushiness, which I learned the hard way after skipping this step once.
- Zest Before Juicing: Grate the lemon zest first, then juice it; you’ll get more oils and a brighter citrus punch without wasting any of that aromatic outer layer.
- Double the Garlic: Sounds like overkill, but brown rice can handle it—mince 4-5 cloves instead of 2, and sauté until just golden to avoid bitterness.
- Rest the Rice: After cooking, let it sit covered for 10 minutes off the heat; the steam finishes the grains and keeps them separate, even the stubborn brown rice.
Dietary Considerations for lemon brown rice
Vegan and Plant-Based Friendly
This dish is naturally 100% plant-based, making it perfect for vegan diets. All ingredients—brown rice, lemon, and aromatics—are animal-product-free. I love that it delivers hearty flavor without any compromise for plant-based eaters. 🌱
Gluten-Free by Nature
Brown rice contains no gluten, and this recipe avoids any wheat-based additives. Just ensure your vegetable broth is certified gluten-free—Better Than Bouillon is a safe bet. Always check labels if you have celiac disease or severe gluten sensitivity.
Low-Sodium Adaptations
To reduce sodium, swap sea salt for 1 tsp salt-free seasoning or simply omit it. Use low-sodium vegetable broth and boost flavor with extra lemon zest or fresh herbs. I often add ½ tsp garlic powder for depth without the salt.
Nut-Free and Allergen Safe
This creation contains no nuts, dairy, eggs, or soy, making it safe for most common allergies. The only potential concern is bay leaf—remove it before serving to prevent choking hazards. Always verify ingredient sources if cross-contamination is a concern.
Diabetic-Friendly Option
Brown rice has a lower glycemic index than white rice, making this a better choice for blood sugar management. Pair with protein-rich dishes to further slow glucose absorption. Portion control is key—stick to ½ cup servings to maintain balanced blood sugar levels. 💡
Low-Fat and Heart Healthy
With only 2 tbsp olive oil for the entire recipe, this dish is naturally low in fat. The extra-virgin olive oil provides heart-healthy monounsaturated fats. For even lower fat, reduce oil to 1 tbsp and use a non-stick pan.
Nutrition Facts
Frequently Asked Questions
Can I use white rice instead?
Yes, but reduce water to 2.5 cups and cook for 15-18 minutes. White rice cooks faster and lacks the nutty depth of brown rice.
What if my rice turns out mushy?
Mushy rice usually means too much water or lifting the lid while cooking. Use the exact 3.5 cups liquid and resist peeking! Let it steam 10 minutes after cooking.
How do I make it more flavorful?
Boost flavor with ½ tsp turmeric or 1 tsp dried herbs. Sautéing the rice in oil before adding liquid adds a nutty depth.
Can I add other vegetables?
Stir in ½ cup diced bell peppers or zucchini with the onions. For leafy greens, add spinach at the very end.

- Mujadara Rice and Lentils Recipe: Earthy Spiced Lentils With Caramelized Onions - November 1, 2026
- Naija Fried Rice Recipe: Street-Style Spice With Veggie Crunch - November 1, 2026
- Mushy Rice Recipe: Fluffy Grains Transformed in Minutes - November 1, 2026