
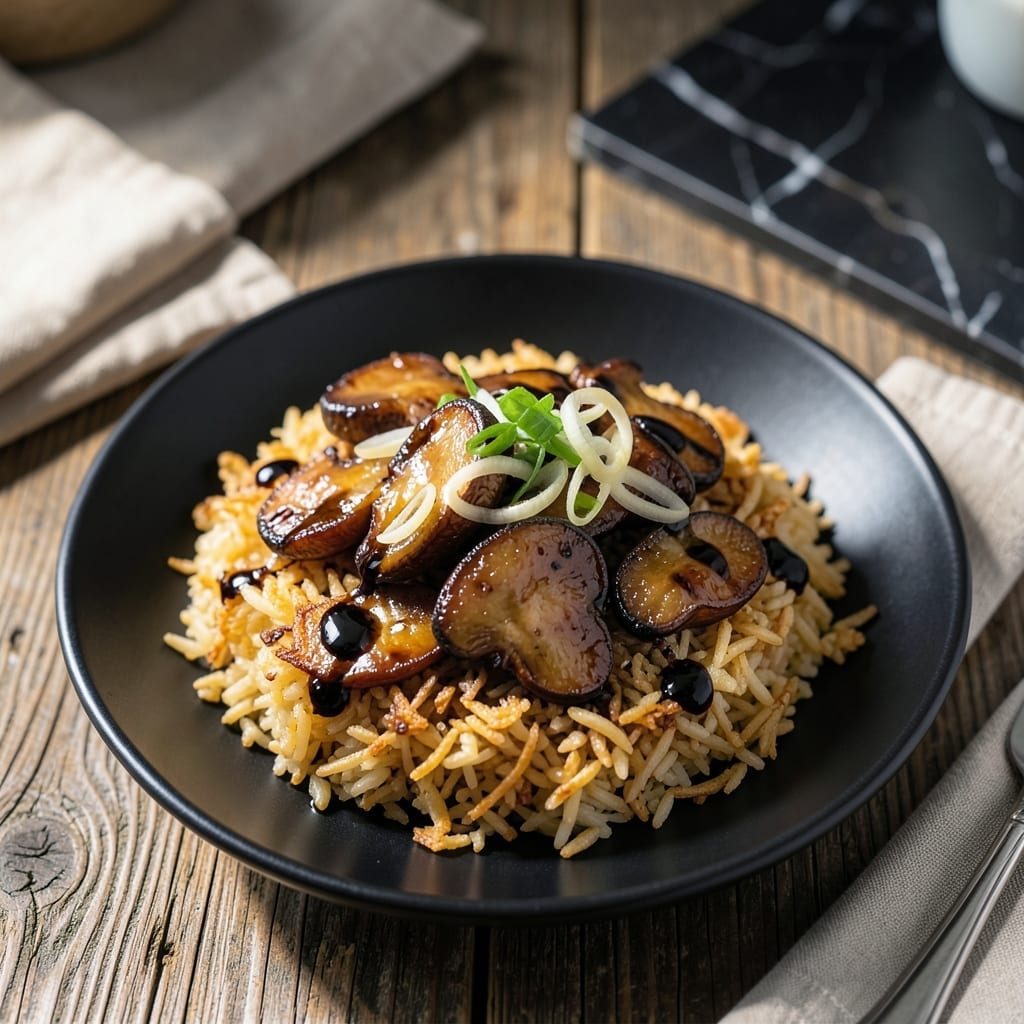
This vegan side dish delivers crispy texture and deep umami flavor that elevates any meal. I developed this method to mimic the signature crunch of popular restaurant versions at home.
Mushrooms and rice transform through careful toasting and seasoning. The secret lies in pressing the cooked rice firmly before frying to achieve that desirable golden, crispy exterior.
Each bite offers satisfying contrast between the shatteringly crispy edges and tender interior. The mushrooms lend earthy depth while soy sauce provides salty umami richness.
Perfect as an appetizer or side, this dish brings restaurant-quality texture to your kitchen. The technique ensures consistent results every time.
Ingredients for Majordomo Mushroom Crispy Rice
Rice, mushrooms, and pantry staples create this umami-packed, restaurant-quality dish with irresistible crunch.
| Ingredient | Amount | Notes |
|---|---|---|
| Jasmine Rice 🍚 | 2 cups | Uncooked, rinsed thoroughly |
| Shiitake Mushrooms 🍄 | 8 oz | Fresh, stems removed, sliced |
| Soy Sauce 🫒 | 3 tbsp | Low-sodium preferred for control |
| Sesame Oil 🫒 | 1 tbsp | Toasted for depth of flavor |
| Garlic Cloves 🧄 | 4 cloves | Minced finely for even distribution |
| Fresh Ginger 🌿 | 1 tbsp | Peeled and grated finely |
| Green Onions 🧅 | 4 whole | Thinly sliced, whites and greens separated |
| Neutral Oil 🫒 | 3 tbsp | Avocado or vegetable oil for frying |
| Rice Vinegar 🍶 | 1 tbsp | Balances richness with acidity |
| Sugar 🍚 | 1 tsp | Optional, enhances caramelization |
| Salt 🧂 | ½ tsp | Diamond Crystal kosher preferred |
| Black Pepper 🌶️ | ¼ tsp | Freshly ground for best flavor |
| Sesame Seeds 🌰 | 1 tbsp | Toasted, for garnish |
The rice is non-negotiable—jasmine rice has the right starch content for that perfect crisp. Shiitake mushrooms bring the meaty texture this dish demands (cremini work in a pinch). For soy sauce, Kikkoman low-sodium is my go-to, but any quality brand will do. The sesame oil must be toasted—Kadoya is a reliable choice at most Asian markets or Whole Foods.
No jasmine rice? Short-grain sushi rice can work but requires more pressing to crisp up. Oyster mushrooms make a great shiitake substitute with their similar texture. If avoiding gluten, swap soy sauce for tamari at a 1:1 ratio. The sugar can be omitted, but it helps achieve that signature golden-brown crust. Coconut aminos offer a milder alternative to soy sauce if preferred.
cooked rice can be made 1 day ahead and refrigerated—this actually improves the crisping process. Store leftovers in an airtight container for up to 3 days. Re-crisp in a skillet or air fryer for best results. Sesame seeds toast in seconds, so keep an eye on them.
Why You’ll Love This Recipe
- I’ll be real: the crispy bits taste even better the next day, straight from the fridge.
- One Pan Magic: I love how everything—jasmine rice, shiitakes, and that garlic-soy glaze—comes together in a single skillet.
- Umami Bomb: The shiitakes soak up the soy and sesame oil like a flavor sponge, honest to goodness worth every bite.
- Weeknight Hero: Between us, this is my Tuesday night lifesaver when I need something fast and filling.
Step-by-Step Instructions for Majordomo Mushroom Crispy Rice
This professional technique delivers maximum crunch and umami depth in every bite.
Step 1: Cook and Cool the Jasmine Rice
Rinse the 2 cups Jasmine Rice thoroughly under cold water until the water runs clear. This removes excess starch that could make the rice gummy. Cook the rice according to package instructions, but use slightly less water than recommended for a firmer texture.
Once cooked, spread the rice on a baking sheet in an even layer. Refrigerate uncovered for at least 2 hours or preferably overnight. This drying step is crucial—it removes moisture so the rice will achieve that signature crispiness when fried. The grains should be cold and firm to the touch before proceeding.
Step 2: Sauté Aromatics and Shiitake Mushrooms
Heat 2 tbsp Neutral Oil in a large skillet or wok over medium-high heat until shimmering. Add the 4 cloves Garlic Cloves and 1 tbsp Fresh Ginger, stirring constantly for 30 seconds until fragrant but not browned. Burnt garlic will impart bitterness, so keep it moving.
Add the 8 oz Shiitake Mushrooms in a single layer and cook undisturbed for 2 minutes to develop a golden sear. Then stir-fry for another 3-4 minutes until the mushrooms are tender and their edges are deeply browned. This builds the umami foundation that defines the dish.
Step 3: Crisp the Rice in Batches
Increase heat to high and add the remaining 1 tbsp Neutral Oil to the skillet. Working in batches to avoid crowding, add the cold rice, pressing it firmly into the pan with a spatula. Let it cook undisturbed for 2-3 minutes until the bottom layer forms a golden, crispy crust.
Flip sections of rice and repeat until most grains have crispy edges. The rice should sizzle audibly when it’s ready to flip—this is your cue that the crust has formed. Crowding the pan will steam the rice instead of frying it, so be patient with the batches.
Step 4: Combine and Season
Return all rice to the skillet and add the 3 tbsp Soy Sauce, 1 tbsp Rice Vinegar, 1 tsp Sugar, 0.5 tsp Salt, and 0.25 tsp Black Pepper. Drizzle the 1 tbsp Sesame Oil over the top. Toss everything together gently to distribute the mushrooms and seasonings evenly without breaking up the crispy rice clusters.
Cook for an additional 1-2 minutes to allow the flavors to meld. The rice should be uniformly coated with sauce but still maintain its crispy texture. Taste and adjust seasoning if needed—remember the soy sauce is already salty, so go easy on additional salt.
Step 5: Garnish and Serve Immediately
Transfer the crispy rice to a serving platter. Garnish with the 4 whole Green Onions (both whites and greens) and 1 tbsp Sesame Seeds. The contrast of the crispy rice, tender mushrooms, and fresh green onion is what makes this dish exceptional.
Serve immediately while the rice is still hot and crispy. The texture changes quickly as it cools, so have your diners ready. Each serving should have a mix of the crispy rice clusters, umami-rich mushrooms, and the aromatic garnishes for the full Majordomo experience.
Pro Tips For Making Majordomo Mushroom Crispy Rice
- Use Day-Old Rice: Fresh rice is too moist—spread leftover jasmine rice on a tray and refrigerate overnight so it dries out and crisps up properly in the pan.
- Sear Mushrooms First: Shiitakes release a ton of water, so cook them separately in a screaming-hot pan until golden before adding to the rice to avoid a soggy mess.
- Skip the Overcrowding: I learned this the hard way—crispy rice needs space in the pan, so work in batches if needed to get that golden, crunchy texture.
- Toast the Garlic: Mince the garlic fine and cook it in sesame oil until just fragrant (about 30 seconds) before adding other ingredients—burnt garlic ruins the dish.
Essential Equipment for majordomo mushroom crispy rice
The Right Pan
A heavy cast iron skillet or carbon steel wok is essential for even heat distribution and that perfect crisp. I use my Lodge 12-inch for this—it retains heat beautifully. Avoid nonstick pans as they don’t get hot enough for proper browning.
High Heat Tool
Your stove needs to reach high heat quickly. I invested in a propane burner for outdoor cooking, but a good gas range works too. Electric stoves struggle with this technique. The pan should be smoking hot before adding rice.
Rice Pressing Tool
Use a metal spatula or rice paddle to press the rice firmly into the pan. I prefer a stainless steel fish spatula—it’s thin enough to get under the crispy edges without breaking them. Press hard to create maximum surface contact.
Oil Management
Keep avocado oil or another high-smoke-point oil on hand for topping up between batches. I measure 1 tbsp at a time to avoid over-oiling. The oil should shimmer but not smoke when you add the rice.
Cooling Setup
A rimmed baking sheet is perfect for cooling the cooked rice. I line mine with parchment for easy cleanup. Spread the rice in a thin, even layer to speed up the cooling process. This step is non-negotiable for crispy results. 🔥
Serving Dish
Have a warm serving platter ready. I use a stoneware plate that retains heat. Transfer the crispy rice immediately to maintain its texture. The contrast of hot crispy rice against cool garnishes is part of the magic.
Nutrition Facts
Frequently Asked Questions
Can I use day-old rice for this?
Yes! Day-old rice is actually ideal. It has less moisture, which helps achieve that perfect crispy texture. Just break up any clumps before pressing it into the pan.
Why press the rice firmly into the pan?
Pressing creates maximum contact with the hot surface, forming a golden crust. The firm pressure ensures even browning and that signature shatter when you bite into it.
Can I make this gluten-free?
Swap regular soy sauce for tamari at a 1:1 ratio. It delivers the same umami depth without gluten. Always check labels to confirm.
How do I keep the rice crispy if serving later?
Re-crisp in a dry skillet over medium-high heat for 2-3 minutes, or use an air fryer at 375°F for 4-5 minutes. Avoid microwaving, as it will make the rice soggy.

- Mujadara Rice and Lentils Recipe: Earthy Spiced Lentils With Caramelized Onions - November 1, 2026
- Naija Fried Rice Recipe: Street-Style Spice With Veggie Crunch - November 1, 2026
- Mushy Rice Recipe: Fluffy Grains Transformed in Minutes - November 1, 2026