
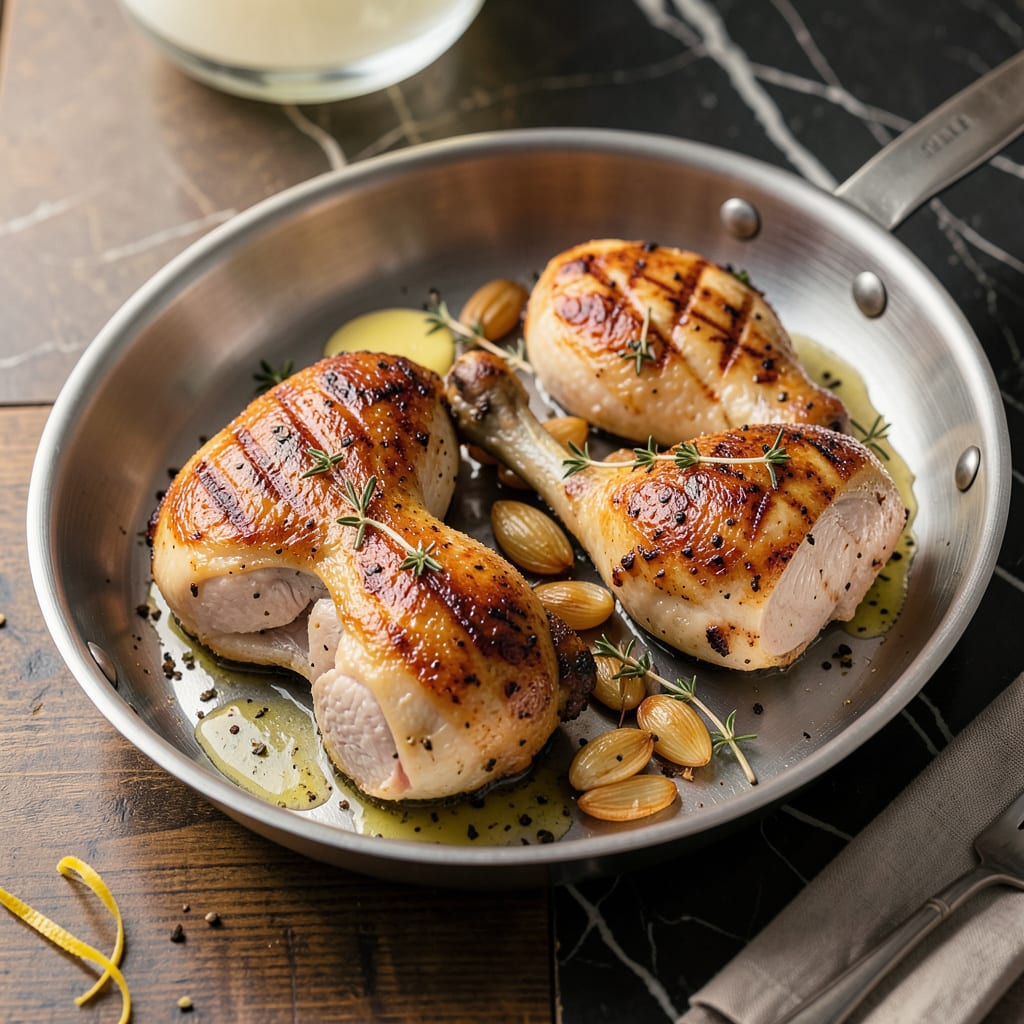
Stainless steel pans get a bad rap for sticking, but they’re actually the secret to getting that perfect golden crust on chicken. I used to struggle with it too—until I figured out the right heat and timing. Now I swear by my stainless steel for chicken that’s crispy outside and juicy inside every time.
Here’s the thing—it’s all about patience and technique. You need to let the pan get properly hot before adding the chicken, and resist the urge to move it around. That first sear creates the foundation for flavor, and if you do it right, the chicken will release naturally when it’s ready to flip.
What you end up with is chicken that has that restaurant-quality crust, with all those beautiful browned bits in the pan that turn into the best pan sauce. No more dry, bland chicken or frustrating cleanup. Just perfectly cooked meat with serious flavor in under 30 minutes.
Whether you’re making simple garlic-herb chicken or something with more kick, this method works every time. Let me show you exactly how to make it happen in your own kitchen.
📚 In This Guide
- What You’ll Need
- Instructions
- Tips and Common Mistakes
What Youll Need
- ● Chicken – 1–2 lbs (boneless, skinless breasts or thighs, or whole pieces with skin for extra crispiness)
- ● Stainless steel pan – 10–12″ (heavy-bottomed for even heat distribution)
- ● Cooking oil – 1–2 tbsp (high-smoke-point oils like avocado, grapeseed, or refined coconut oil work best)
- ● Salt & black pepper – To taste (or 1 tsp salt + ½ tsp pepper per lb of chicken)
- ● Tongs or spatula – For flipping (avoid forks to keep juices intact!)
- ○ Meat thermometer – Optional but highly recommended (aim for 165°F internal temp)
- ○ Butter or garlic – Optional (1–2 tbsp for extra flavor in the last 2 minutes)
- ● Paper towels – To pat chicken dry (key for a crispy crust!)
- ○ Lemon or fresh herbs – Optional garnish (brightens up the dish!)
Instructions for Cooking Chicken in Stainless Steel
Here’s my foolproof method for getting that perfect sear without any sticking—every single time.
Prep the Chicken and Pan
Start by patting your chicken pieces completely dry with paper towels. I can’t stress this enough—any moisture on the surface will steam instead of sear, and that’s what causes sticking. Use enough pressure to really absorb all the liquid, especially if you’ve rinsed the chicken.
While you’re drying the chicken, place your stainless steel pan on the stove over medium heat. Let it heat up gradually for about 5 minutes—you want it evenly hot before adding any oil. A properly heated pan is your first defense against sticking.
Add Oil and Test the Temperature
Add just enough oil to lightly coat the bottom of the pan—about 1-2 tablespoons should do it. Swirl it around so it covers the entire cooking surface. The oil should shimmer and move fluidly when you tilt the pan, but it shouldn’t smoke yet.
Here’s the thing—I always do a quick temperature test before adding the chicken. Sprinkle a few drops of water into the pan. If they dance across the surface and evaporate immediately, your pan is ready. If they just sit there, give it another minute to heat up. This simple test prevents that frustrating moment when your chicken sticks on contact.
Cook the Chicken Undisturbed
Lay your chicken pieces in the pan, starting with the skin-side down if they have skin. Place them away from you to avoid oil splatter, and don’t overcrowd the pan—leave at least an inch between pieces. You’ll hear that beautiful sizzle immediately if your pan was hot enough.
Now comes the hard part: don’t touch it. Let the chicken cook undisturbed for 5-7 minutes for boneless pieces or 7-9 minutes for bone-in. You’ll know it’s ready to flip when the edges start to turn opaque and the chicken releases easily from the pan with just a gentle nudge. If it resists, give it another minute—the crust isn’t ready yet.
Flip and Finish Cooking
Once the chicken releases easily, flip it using tongs (never a fork—you don’t want to pierce the meat). The crust should be a deep golden brown, almost caramelized in spots. Cook the second side for about 4-6 minutes less than the first side, since it will cook faster.
For bone-in pieces, I like to tilt the pan slightly and spoon some of the hot oil over the chicken for the last 2 minutes—this helps crisp up any spots that might have steamed instead of seared. The chicken is done when it reaches an internal temperature of 165°F in the thickest part, away from the bone.
Rest and Serve
Transfer the chicken to a clean plate or cutting board and let it rest for 5-10 minutes before serving. This resting period allows the juices to redistribute throughout the meat instead of running out onto your cutting board when you slice into it.
While it rests, you can make a quick pan sauce if you like. Just pour out most of the fat, add a splash of broth or wine, and scrape up all those delicious browned bits. The fond (those browned bits) is pure flavor—don’t let it go to waste! Serve your beautifully seared chicken while it’s still warm for the best texture and flavor.
Tips and Common Mistakes
Mastering this technique comes down to a few key details that make all the difference between sticking and that perfect golden crust.
The Heat Factor: In Step 1, that 5 minutes of preheating your stainless steel pan over medium heat is non-negotiable. I learned this the hard way after ruining two batches by rushing this step. The gradual heating ensures the entire surface reaches the right temperature evenly, which prevents those frustrating stuck-on spots. If your pan isn’t properly heated, the chicken will steam instead of sear, and you’ll lose that beautiful crust we’re after.
Technique Tip: When you’re in Step 3 cooking the chicken undisturbed for 5-7 minutes (or 7-9 minutes for bone-in), resist the urge to peek or prod. The crust needs this uninterrupted time to form properly. I like to set a timer and walk away—trust the process. You’ll know it’s ready to flip when the edges turn opaque and the chicken releases with just a gentle nudge from your tongs. If it’s still clinging, give it another 30 seconds.
Temperature Matters: That 165°F internal temperature in Step 4 isn’t just about safety—it’s the sweet spot for juicy, perfectly cooked chicken. I always check in multiple spots, especially near the bone for bone-in pieces, since that’s where it cooks slowest. A good instant-read thermometer is worth its weight in gold here. And don’t forget that 2 minutes of spooning hot oil over bone-in pieces at the end—this little trick makes all the difference in getting that restaurant-quality crispiness.
Resting is Critical: The 5-10 minutes of resting time in Step 5 might seem unnecessary when you’re hungry, but it’s what separates dry chicken from juicy perfection. During this time, the muscle fibers relax and reabsorb the juices that were pushed to the center during cooking. If you cut into it too soon, all those flavorful juices will end up on your cutting board instead of in your chicken. I use this time to make a quick pan sauce with the fond—those browned bits are pure flavor gold.
Pro Tips for Cooking Chicken In Stainless Steel Pan
- Mastering this technique comes down to a few key details that make all the difference between sticking and that perfe…
- The Heat Factor: In Step 1, that 5 minutes of preheating your stainless steel pan over medium heat is non-negotiable….
- Technique Tip: When you’re in Step 3 cooking the chicken undisturbed for 5-7 minutes (or 7-9 minutes for bone-in), re…
Frequently Asked Questions
Why does my chicken stick to the stainless steel pan even when it’s hot?
Sticking usually happens if the pan isn’t hot enough or the chicken isn’t dry. Pat the chicken very dry with paper towels, preheat the pan on medium-high for 2–3 minutes, and add oil just before cooking. Let the chicken sear undisturbed for 3–4 minutes to form a crust—it’ll release naturally when ready!
How long should I cook chicken breast in a stainless steel pan?
For boneless, skinless breasts (6–8 oz): Sear 5–6 minutes per side on medium-high, then reduce heat to medium-low and cook until internal temp hits 165°F (about 12–15 minutes total). Use a meat thermometer for accuracy—overcooking dries it out!
Can I use butter instead of oil for cooking chicken in stainless steel?
Yes, but clarified butter (ghee) is better—regular butter burns at high heat. If using butter, mix it with a high-smoke-point oil (like avocado or grapeseed) to prevent scorching. Add butter toward the end for basting to keep flavors rich without burning.
How do I clean a stainless steel pan after cooking chicken?
Let the pan cool slightly, then soak in warm, soapy water for 10–15 minutes. Use a nylon scrubber or baking soda paste for stuck bits—avoid steel wool (it scratches!). For tough residue, boil water + vinegar in the pan to loosen grime. Rinse and dry thoroughly to prevent water spots.
Why is my chicken rubbery or dry when cooked in stainless steel?
Overcooking or uneven heat is the culprit! Use medium heat after searing, pull chicken at 160°F (it’ll rise to 165°F while resting), and let it rest 5–10 minutes before slicing. Brining (30 mins in saltwater) also keeps it juicy.
Mastering cooking chicken in a stainless steel pan is all about patience, heat control, and a few clever tricks—now you’ve got the tools to nail that perfect golden crust every time! 🍗✨ Whether you’re searing thighs, breasts, or drumsticks, remember: preheat well, don’t rush the browning, and let the pan do the work.
Ready to put your skills to the test? Grab that pan, pick your favorite chicken cut, and start cooking with confidence! For extra inspiration, try experimenting with marinades or herbs next—your taste buds will thank you. Happy cooking!

- Jollof Rice Sauce Recipe: West African Tomato and Spice Infusion - September 25, 2026
- Japanese Rice Soup Recipe: Umami-Rich Comfort in a Bowl - September 25, 2026
- Homemade Cream Of Rice Recipe: Silk-Smooth Breakfast in Minutes - September 25, 2026