
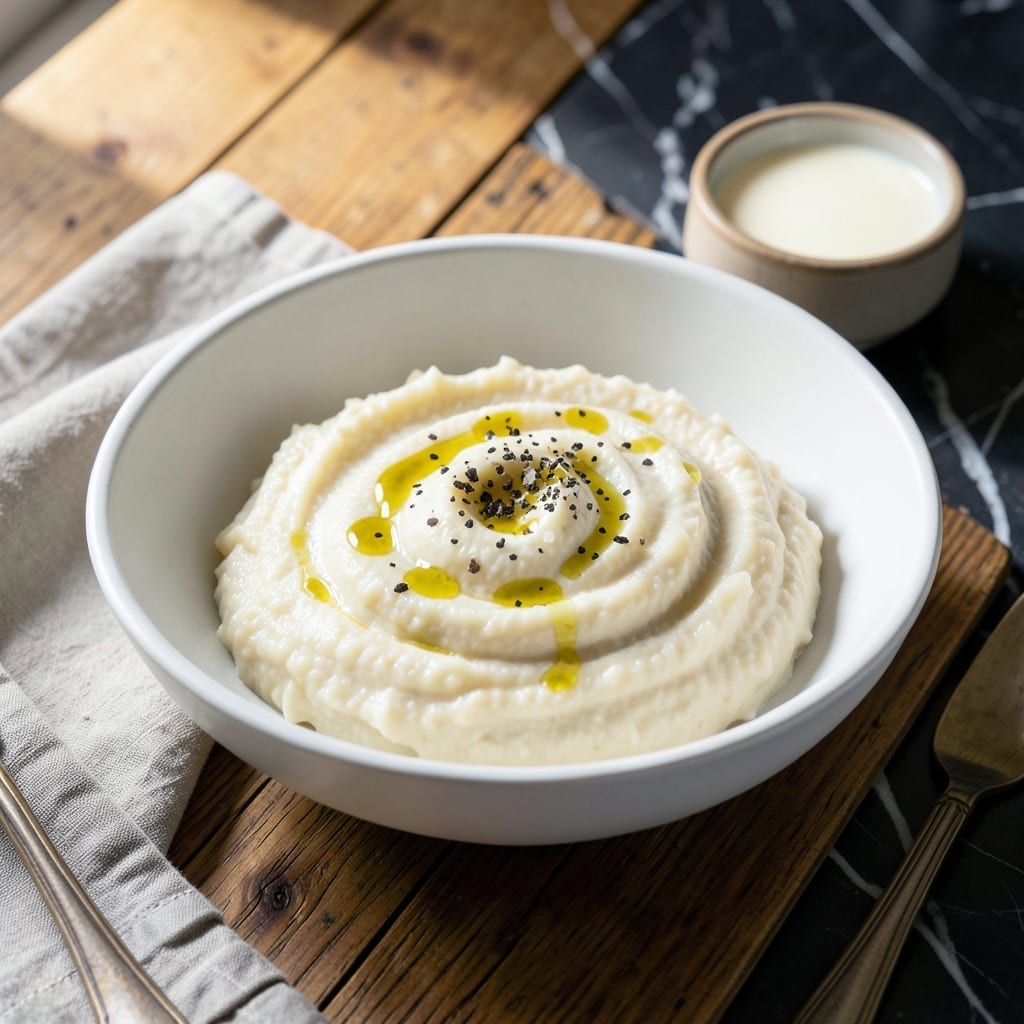
I’ve perfected a method for transforming simple rice into a velvety, comforting side that feels indulgent. This dish proves that humble ingredients can deliver restaurant-quality results with the right technique.
The key is cooking the rice until ultra-tender, then mashing it with a touch of fat and liquid for a creamy, smooth texture. It’s an unexpected twist that turns ordinary rice into something special, almost like a cross between mashed potatoes and risotto.
What you get is a dish with a rich, buttery depth and a consistency that’s both fluffy and satisfying. It pairs beautifully with roasted meats, grilled vegetables, or as a base for hearty stews.
Simple to make, but the results are anything but basic.
Ingredients for Mashed Rice
Simple ingredients with rich potential. Velvety, fluffy, and deeply satisfying results await.
| Ingredient | Amount | Notes |
|---|---|---|
| Long-Grain White Rice 🍚 | 2 cups | Rinsed until water runs clear |
| Water 💧 | 4 cups | For cooking rice |
| Vegan Butter 🧈 | ½ cup | Unsalted, softened to room temperature |
| Unsweetened Plant-Based Milk 🥛 | ½ cup | Oat or almond milk works best |
| Extra-Virgin Olive Oil 🫒 | 2 tbsp | High-quality for richness |
| Sea Salt 🧂 | 1 ½ tsp | Fine grain, divided |
| Garlic Cloves 🧄 | 3 cloves | Minced for depth of flavor |
| Nutritional Yeast 🧀 | 2 tbsp | For cheesy, umami flavor |
| Fresh Chives 🌿 | ¼ cup | Finely chopped for garnish |
| Freshly Ground Black Pepper 🌶️ | ½ tsp | To taste |
The rice quality is non-negotiable for that ultra-tender texture. Jasmine or basmati long-grain white rice works best—avoid instant or pre-cooked varieties. I source mine from Whole Foods or bulk bins for optimal freshness. Rinsing until the water runs clear removes excess starch, which prevents gummy results. For the plant-based milk, Oatly or Califia Farms deliver the creamiest texture without overpowering flavors.
No vegan butter? Coconut oil or refined avocado oil work as substitutes, though the flavor profile will shift slightly. Swap nutritional yeast for white miso paste (1 tbsp) if you want a different umami depth. Fresh chives can be replaced with green onions or parsley. If you’re out of plant-based milk, warm vegetable broth adds a savory note. The garlic must be fresh—powder won’t give the same aromatic punch.
The mashed rice keeps well, covered, in the fridge for 4-5 days. Reheat gently with a splash of plant-based milk to restore creaminess. For longer storage, freeze portions for up to 3 months—thaw overnight before reheating. Always bring to room temperature before mashing for the smoothest texture.
Why You’ll Love This Recipe
- One-Pot Wonder: I just dump rice, water, and a pat of vegan butter into a pot—no fancy steps, no extra dishes.
- Creamy Dream: The plant-based milk and olive oil turn plain rice into something luxuriously smooth.
- Weeknight Hero: It’s my go-to side for everything from roasted veggies to spicy stews. Honestly, it pairs with anything.
- Budget Stretch: A pound of rice costs pennies and makes enough for leftovers that reheat beautifully.
Step-by-Step Instructions for Mashed Rice
This professional method ensures creamy, flavorful results with perfect texture every time.
Step 1: Cook the Rice to Optimal Tenderness
Rinse the 2 cups Long-Grain White Rice under cold water until the water runs clear to remove excess starch. This prevents gummy results. Combine the rinsed rice with the 4 cups Water and 1 teaspoon Sea Salt in a medium saucepan.
Bring to a boil over high heat, then reduce to low, cover, and simmer for 15-18 minutes until all liquid is absorbed and the grains are tender. Remove from heat and let it sit covered for 5 minutes to steam and fluff.
Step 2: Infuse Aromatics and Prepare Cream Base
While the rice cooks, heat the 2 tbsp Extra-Virgin Olive Oil in a small skillet over medium heat. Add the 3 cloves Garlic Cloves (minced) and sauté for 1-2 minutes until fragrant but not browned. This builds a flavor foundation without bitterness.
In a separate small saucepan, gently warm the 0.5 cup Unsweetened Plant-Based Milk with the remaining 0.5 tsp Sea Salt until just steaming—do not boil. Warm milk incorporates better into the rice, preventing a grainy texture.
Step 3: Mash and Incorporate Creamy Elements
Transfer the cooked rice to a large bowl. Add the 0.5 cup Vegan Butter (softened) and the 2 tbsp Nutritional Yeast. Using a potato masher or sturdy spoon, mash the rice until it reaches your desired consistency—smooth with some texture or completely silky.
Pour in the warmed plant-based milk and sautéed garlic with its oil. Fold everything together gently but thoroughly. The mixture should be creamy but not soupy. If it seems dry, add a splash more warm milk.
Step 4: Season and Finish with Fresh Herbs
Taste and adjust seasoning with the 0.5 tsp Freshly Ground Black Pepper. The flavors should be well-balanced, with the butter and nutritional yeast providing richness and depth. If needed, add a pinch more sea salt.
Just before serving, fold in the 0.25 cup Fresh Chives (finely chopped), reserving a small amount for garnish. This adds a fresh, oniony brightness that cuts through the creaminess. Serve immediately while warm and fluffy.
Pro Tips For Making Mashed Rice
- Soak the Rice: I learned this the hard way—soaking long-grain white rice for 15-20 minutes before cooking guarantees a softer, creamier mash.
- Heat the Milk: Cold plant-based milk can make the dish greasy; warm it gently first for a smoother, more cohesive texture.
- Skip the Boil: Resist the urge to boil the rice vigorously—simmer it low and slow to prevent a gluey, overworked mash.
- Add Oil Last: Stir in the extra-virgin olive oil at the very end to preserve its bright, fruity flavor—it’ll shine instead of cooking off.
Essential Equipment for mashed rice
Rice Cooker
A high-quality rice cooker like the Zojirushi Neuro Fuzzy ensures perfectly cooked grains every time. I’ve found it takes the guesswork out of achieving that ideal tender texture. The consistent heat distribution prevents undercooked or burnt rice. 💡
Potato Masher
For smooth results, use a sturdy potato masher—I prefer the OXO Good Grips model. It crushes the rice evenly without creating a paste. A fork works in a pinch but requires more effort for the same consistency.
Heavy Saucepan
An enamel-coated cast iron or stainless steel saucepan with a tight lid is essential for even cooking. My Le Creuset Dutch oven works beautifully. Avoid thin aluminum pans that can cause hot spots.
Small Skillet
A 8-inch nonstick skillet is perfect for toasting garlic in olive oil. I use All-Clad for its even heat and easy cleanup. This step builds the aromatic base that elevates the dish’s depth.
Mixing Bowl
A large, wide mixing bowl gives you room to mash and fold without spills. I love my stainless steel prep bowls from Winco. The smooth surface makes cleanup effortless.
Measuring Tools
Precision matters, so keep measuring cups and spoons handy. I use OXO’s angled measuring cups for easy reading. A kitchen scale can also help ensure accurate rice-to-liquid ratios. 🔥
Nutrition Facts
Frequently Asked Questions
Can I use brown rice instead of white?
Yes, but adjust the cooking time. Brown rice needs 40-45 minutes and more liquid. The texture will be slightly nuttier and less creamy, but still delicious.
Why is my mashed rice gluey?
Overmixing or not rinsing the rice first causes excess starch. Rinse until water runs clear and mash just until smooth. Avoid overworking it.
Can I make this ahead of time?
Store in an airtight container for 4-5 days. Reheat with a splash of plant-based milk to restore creaminess.
What can I substitute for nutritional yeast?
Try 1 tablespoon white miso paste or a sprinkle of vegan Parmesan for umami depth. Both add a savory note without dairy.

- Mujadara Rice and Lentils Recipe: Earthy Spiced Lentils With Caramelized Onions - November 1, 2026
- Naija Fried Rice Recipe: Street-Style Spice With Veggie Crunch - November 1, 2026
- Mushy Rice Recipe: Fluffy Grains Transformed in Minutes - November 1, 2026