
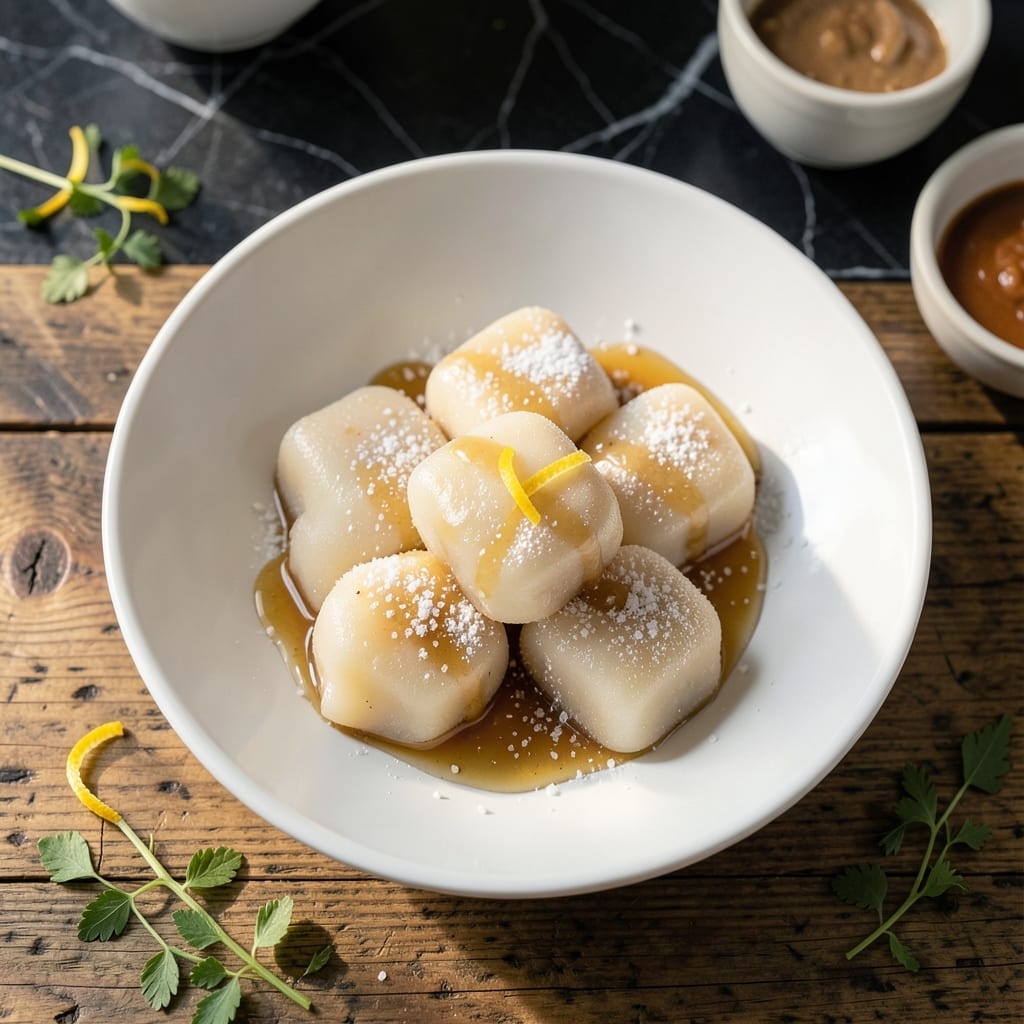
I discovered a foolproof way to make mochi without rice flour using everyday pantry staples. This method delivers the same chewy texture and sweet flavor you love, with minimal effort.
The secret is using cornstarch and tapioca flour as substitutes, combined with a microwave technique that speeds up the process. No special equipment needed—just a bowl and your kitchen microwave.
You’ll end up with soft, stretchy mochi that’s ready in 10 minutes. The texture is spot-on, and the flavor is just as satisfying as traditional versions.
Perfect for satisfying cravings or impressing guests with a homemade treat. Here’s how to make it.
Ingredients for Mochi Recipe Easy No Rice Flour
No rice flour needed. Just pantry staples for chewy, sweet mochi in minutes.
| Ingredient | Amount | Notes |
|---|---|---|
| Cornstarch 🌾 | 1 cup | Plus extra for dusting |
| Tapioca Flour 🌾 | ½ cup | Also called tapioca starch |
| Granulated Sugar 🍚 | ½ cup | Adjust to taste preference |
| Water 💧 | ½ cup | Warm for faster dissolving |
| Vanilla Extract 🌿 | 1 tsp | Pure vanilla preferred |
| Salt 🧂 | ¼ tsp | Fine grain for even distribution |
| Coconut Oil 🫒 | 1 tbsp | Melted, or neutral oil |
| Food Coloring 🎨 | ¼ tsp | Optional, gel-based works best |
| Potato Starch 🥔 | 2 tbsp | For extra chewiness |
| Powdered Sugar 🍚 | 2 tbsp | For coating finished mochi |
The cornstarch and tapioca flour are non-negotiable here—they mimic rice flour’s stretchy magic. Bob’s Red Mill is my go-to brand (available at Whole Foods or most grocery stores). Potato starch adds that extra bounce, but if you can’t find it, skip it—your mochi will still be delicious. Make sure your coconut oil is melted but not hot when mixing (warm to the touch, not scalding).
No cornstarch? Arrowroot powder at a 1:1 ratio works, but texture might be slightly different. Swap tapioca flour for more cornstarch if needed, though the chew won’t be as pronounced. Vanilla can be omitted, but I love the depth it adds. For coloring, natural food dyes (like beet powder for pink) keep it vegan. Skip the food coloring entirely for classic white mochi.
Store mochi in an airtight container at room temp for 2-3 days (it dries out fast). For longer storage, wrap individually in plastic and freeze for up to 1 month. Dust with extra cornstarch before storing to prevent sticking. Best served fresh, though—nothing beats warm, just-made mochi.
Why You’ll Love This Recipe
- No Specialty Flour: I love that I don’t need to hunt down rice flour—just cornstarch and tapioca from my pantry.
- Vanilla Sweetness: The sugar and vanilla give it that classic mochi flavor without being cloying.
- Weeknight Friendly: Honestly, it’s ready before the kids finish arguing over who gets the last one.
- Budget Stretcher: Tapioca and cornstarch are cheap, and this batch makes enough to share—or not.
Step-by-Step Instructions for No-Rice-Flour Mochi
This method delivers chewy, sweet mochi in minutes with your microwave—no specialty flours required.
Step 1: Mix Dry Ingredients for Base
In a microwave-safe bowl, whisk together the 1 cup Cornstarch, 0.5 cup Tapioca Flour, and 2 tbsp Potato Starch until no lumps remain. I find a fine-mesh sieve helps eliminate any stubborn clumps in the Cornstarch.
Add the 0.5 cup Granulated Sugar and 0.25 tsp Salt, then whisk again for 30 seconds to ensure even distribution. The sugar should look fully incorporated, with no visible grains. This dry mix forms the foundation of your mochi’s chewy texture.
Step 2: Combine Wet Ingredients and Color
Create a well in the center of your dry ingredients. Pour in the 0.5 cup Water, 1 tbsp Coconut Oil, 1 tsp Vanilla Extract, and 0.25 tsp Food Coloring if using. Stir with a silicone spatula until just combined—don’t overmix at this stage.
The mixture will look thin and slightly lumpy, almost like a thin pancake batter. That’s perfect. If you’re using gel food coloring, you’ll see vibrant streaks that will distribute as you microwave. The Coconut Oil should be fully melted and incorporated into the liquid.
Step 3: Microwave in Short Bursts
Microwave the mixture on high for 1 minute, then remove and stir vigorously for 30 seconds. You’ll notice the mixture thickening and turning translucent at the edges. This is the starches activating.
Return to the microwave for another 30-45 seconds. Stop when the mixture pulls away from the sides of the bowl and forms a single, stretchy mass. Be careful—the bowl and mixture will be very hot. If it’s not fully set, microwave in 15-second intervals until it reaches this consistency.
Step 4: Dust and Shape the Dough
Lightly dust a clean surface with extra Cornstarch. Turn out the hot mochi dough and let it cool for 1-2 minutes until safe to handle. The texture should be stretchy and slightly sticky—this is normal.
Knead the dough briefly, just until smooth, adding more Cornstarch as needed to prevent sticking. Divide into 4 equal portions and roll each into a ball. For best results, work quickly while the dough is still warm and pliable.
Step 5: Coat and Rest Before Serving
Roll each mochi ball in the 2 tbsp Powdered Sugar until fully coated. This prevents sticking and adds a touch of sweetness. Place on a plate and let rest at room temperature for 5 minutes.
The Powdered Sugar will absorb slightly into the surface, creating a smooth finish. Serve warm for the gooiest texture, or let cool completely for a firmer bite. Each piece should stretch slightly when pulled, with a satisfying chew and sweet vanilla flavor.
Pro Tips For Making Mochi Recipe Easy No Rice Flour
- Mix the Dry First: Whisk the cornstarch, tapioca flour, and sugar together before adding wet ingredients—I learned this the hard way after ending up with clumpy mochi.
- Steam, Don’t Boil: Use a steamer basket over simmering water for even cooking; boiling the mixture directly can make it gummy and dense.
- Dust Generously: Coat your work surface and hands with extra cornstarch when kneading, or the dough will stick like glue.
- Rest Before Shaping: Let the steamed dough sit covered for 5 minutes before kneading—it’s easier to handle and less likely to crack.
Common Mistakes When Making This Dish
Overmixing the Dough
Once the mixture thickens in the microwave, stir just until combined. Overworking the dough develops too much starch, making your mochi dense instead of stretchy. I use a silicone spatula and stop the moment it forms a single mass. 💡
Skipping the Rest
Let your mochi rest for 5 minutes after shaping. This allows the starches to fully set, creating that perfect chewy texture. Skipping this step often results in gummy, underdeveloped pieces.
Inaccurate Measurements
Use exact amounts, especially for the 1 cup Cornstarch and 0.5 cup Tapioca Flour. Even small deviations can throw off the texture. I measure by weight when possible for precision.
Microwave Overheating
Watch closely during the final 30-45 seconds of microwaving. The mixture can go from perfect to rubbery in seconds. Stop as soon as it pulls away from the bowl edges.
Insufficient Dusting
Dust your surface generously with Cornstarch before handling. This prevents sticking and makes shaping easier. Re-dust your hands and surface as needed while working.
Using Cold Ingredients
Ensure your 0.5 cup Water and 1 tbsp Coconut Oil are warm. Cold liquids slow starch activation, leading to uneven cooking. I use water straight from the tap if it’s warm.
Nutrition Facts
Frequently Asked Questions
Can I use all-purpose flour instead of cornstarch?
No, all-purpose flour won’t give the right stretchy texture. Stick with cornstarch or arrowroot powder as substitutes for the authentic chew.
Why does my mochi turn out rubbery?
Overheating in the microwave or overmixing the dough can cause this. Cook in short bursts and stop stirring once it forms a single mass.
How do I store leftover mochi?
Keep in an airtight container at room temperature for 2-3 days. Dust with extra cornstarch to prevent sticking.
Can I make this without a microwave?
Yes! Steam the mixture in a heatproof bowl over boiling water for 10-12 minutes, stirring occasionally.

- Mujadara Rice and Lentils Recipe: Earthy Spiced Lentils With Caramelized Onions - November 1, 2026
- Naija Fried Rice Recipe: Street-Style Spice With Veggie Crunch - November 1, 2026
- Mushy Rice Recipe: Fluffy Grains Transformed in Minutes - November 1, 2026