
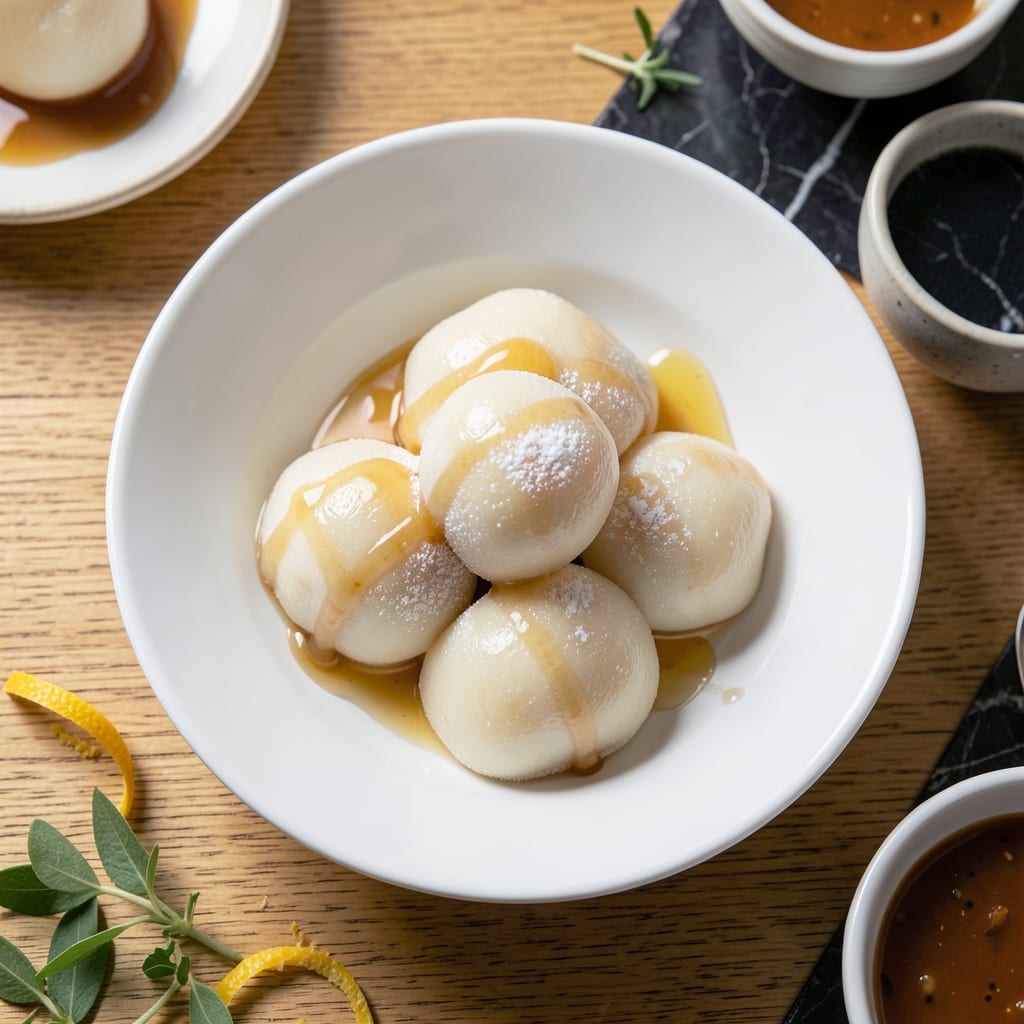
There’s something magical about the first time you pull apart a piece of fresh mochi and feel that signature chewy resistance give way to a soft, pillowy center. This recipe uses rice flour to create that perfect texture every time.
I’ve refined this method to eliminate guesswork, ensuring consistent results whether you’re a first-timer or a seasoned baker. The key is precise measurements and gentle handling to maintain the delicate structure of the dough.
The process is straightforward, with a resting period that allows the rice flour to fully hydrate. What emerges is a batch of milky, slightly sweet mochi with just the right amount of stretch and tenderness.
Serve warm for the best experience, when the texture is at its most luxurious. This dish proves that simple ingredients can create extraordinary results.
Ingredients for Milk Mochi Recipe Rice Flour
Eight ingredients transform rice flour into pillowy, chewy milk mochi with perfect texture every time.
| Ingredient | Amount | Notes |
|---|---|---|
| Glutinous Rice Flour 🌾 | 2 cups | Also called sweet rice flour |
| Whole Milk 🥛 | ¾ cup | Full-fat for creaminess |
| Granulated Sugar 🍚 | ⅓ cup | Adjust to taste preference |
| Cornstarch 🌾 | 2 tbsp | For dusting and texture |
| Unsalted Butter 🧈 | 2 tbsp | Melted for richness |
| Vanilla Extract 🌿 | 1 tsp | Pure extract preferred |
| Salt 🧂 | ¼ tsp | Fine sea salt recommended |
| Food Coloring 🎨 | ¼ tsp | Optional, for tinting |
The rice flour is non-negotiable—glutinous rice flour (often labeled sweet rice flour) is the only type that delivers that signature elastic bite. Bob’s Red Mill is widely available and reliable. Whole milk provides the creamy base, but 2% works in a pinch (though the texture won’t be quite as rich). Avoid low-fat or skim entirely—they lack the fat needed for proper structure.
No glutinous rice flour? There’s no perfect substitute—regular rice flour or all-purpose won’t give you the same chew. For a dairy-free version, coconut milk works well, but the flavor shifts noticeably. Cornstarch can be swapped for potato starch at a 1:1 ratio if that’s what you have. The butter can be replaced with coconut oil, but melt it first to ensure even distribution.
Fresh mochi is best enjoyed the same day, but it’ll keep in an airtight container at room temperature for 2-3 days. Dust generously with extra cornstarch before storing to prevent sticking. For longer storage, freeze for up to 1 month—thaw at room temperature before serving.
Why You’ll Love This Recipe
- One Bowl Wonder: I just mix the glutinous rice flour, milk, and sugar in a single bowl—no fancy equipment, no mess.
- Rich & Creamy: The whole milk and butter give it that melt-in-your-mouth texture I can’t resist.
- Crowd Pleaser: Honestly, it’s a hit with kids and adults alike, whether it’s a snack or dessert.
- Budget Friendly: A bag of rice flour goes a long way, and the rest is pantry staples I already have.
Step-by-Step Instructions for Milk Mochi
Master the technique for perfectly chewy, pillowy mochi with these precise steps.
Step 1: Combine Wet Ingredients
In a microwave-safe bowl, whisk together the 0.75 cup Whole Milk, 2 tbsp Unsalted Butter, 0.33 cup Granulated Sugar, and 1 tsp Vanilla Extract until the sugar begins to dissolve. This creates a uniform base that prevents graininess in the final texture.
Microwave the mixture for 1-2 minutes until the butter is fully melted and the mixture is warm to the touch but not boiling. The warmth helps activate the glutinous rice flour properly. Stir once halfway through to ensure even heating.
Step 2: Incorporate Dry Components
Gradually add all 2 cups Glutinous Rice Flour to the wet mixture while stirring continuously. This prevents clumping that can lead to uneven texture. The dough will become thick and sticky—this is normal for proper mochi consistency.
Add the 0.25 tsp Salt and 0.25 tsp Food Coloring (if using) at this stage, kneading until the color is evenly distributed. The salt balances the sweetness, while the coloring provides visual appeal without affecting flavor.
Step 3: Microwave and Fold
Cover the bowl with plastic wrap and microwave for 2 minutes. Remove and fold the dough using a silicone spatula—this releases steam and prevents a dense center. The mixture will be extremely hot, so use caution.
Return to the microwave for another 1-2 minutes until the dough becomes translucent and pulls away from the bowl sides. You’ll notice the texture transforms from liquid to stretchy and elastic. This visual change confirms the glutinous rice flour has fully gelatinized.
Step 4: Dust and Shape
Liberally dust a clean surface with 1 tbsp Cornstarch, reserving the remaining 1 tbsp Cornstarch for later. Transfer the hot dough onto the dusted surface. The cornstarch prevents sticking while you work with the sticky dough.
Knead the dough briefly—just until cool enough to handle—then divide into 4 equal portions. Roll each portion into a ball, then flatten slightly into a disc. The dough should be smooth and slightly tacky but not sticking to your hands.
Step 5: Rest and Serve
Dust the shaped mochi with the remaining 1 tbsp Cornstarch and let rest for 10 minutes. This allows the surface to dry slightly, creating that characteristic chewy exterior. The cornstarch coating also prevents the pieces from sticking together.
Serve at room temperature for the best texture. Each piece should have a delicate, slightly resistant bite that gives way to a soft, pillowy center. The flavor should be subtly sweet with a rich milkiness that lingers on the palate.
Pro Tips For Making Milk Mochi Recipe Rice Flour
- Steam Low and Slow: I learned this the hard way—crank the heat too high and your mochi will turn rubbery. Keep it at a gentle simmer for 10-12 minutes, stirring constantly, to get that perfect stretchy texture.
- Sift the Flour: After ending up with lumpy mochi twice, I now always sift the glutinous rice flour and cornstarch together. It takes 30 seconds and guarantees a silky-smooth batter.
- Skip the Substitutes: Whole milk is non-negotiable here—lower-fat versions make the mochi dense and gummy. The fat in whole milk actually changes the outcome, so don’t cheap out.
- Butter Last: Sounds weird, but it works: stir in the unsalted butter after the mixture thickens. Adding it too early can cause separation, and nobody wants oily mochi.
Essential Equipment for This Dish
Microwave-Safe Bowl
A large glass or ceramic bowl (at least 8-cup capacity) is essential for even heating. I use Pyrex because it handles temperature changes well. Avoid metal bowls as they can’t be used in the microwave. 🔥
Plastic Wrap
Use microwave-safe plastic wrap to cover the bowl during cooking. This traps steam for proper gelatinization of the rice flour. I prefer Glad ClingWrap as it stays put better than cheaper brands.
Silicone Spatula
A high-heat silicone spatula helps fold the hot dough safely without sticking. The flexibility lets you scrape every bit from the bowl. Look for one rated to 500°F for durability.
Kitchen Scale
Precise measurements matter for mochi’s delicate texture. I use an OXO digital scale for accuracy. Measure your 2 cups glutinous rice flour by weight when possible for consistency.
Cornstarch Duster
Keep a small sieve handy for dusting cornstarch evenly over surfaces. This prevents sticking during shaping. A fine-mesh sieve works better than a colander for even distribution.
Clean Work Surface
Use a smooth, non-porous surface for kneading and shaping. I prefer my marble pastry board as it stays cool. Ensure it’s generously dusted with cornstarch before starting. ✨
Nutrition Facts
Frequently Asked Questions
Can I use regular rice flour instead of glutinous?
No, regular rice flour won’t work. Glutinous rice flour is essential for that signature chewy texture. It has different starch properties that create the stretchy, elastic quality of mochi.
Why did my mochi turn out hard?
Overcooking or insufficient folding can cause hardness. Microwave in 2-minute intervals, fold between each, and stop when the dough becomes translucent. Rest for 10 minutes before serving.
How do I store leftover mochi?
Keep in an airtight container at room temperature for 2-3 days. Dust with cornstarch to prevent sticking. For longer storage, freeze for up to 1 month and thaw at room temperature.

- Mujadara Rice and Lentils Recipe: Earthy Spiced Lentils With Caramelized Onions - November 1, 2026
- Naija Fried Rice Recipe: Street-Style Spice With Veggie Crunch - November 1, 2026
- Mushy Rice Recipe: Fluffy Grains Transformed in Minutes - November 1, 2026