
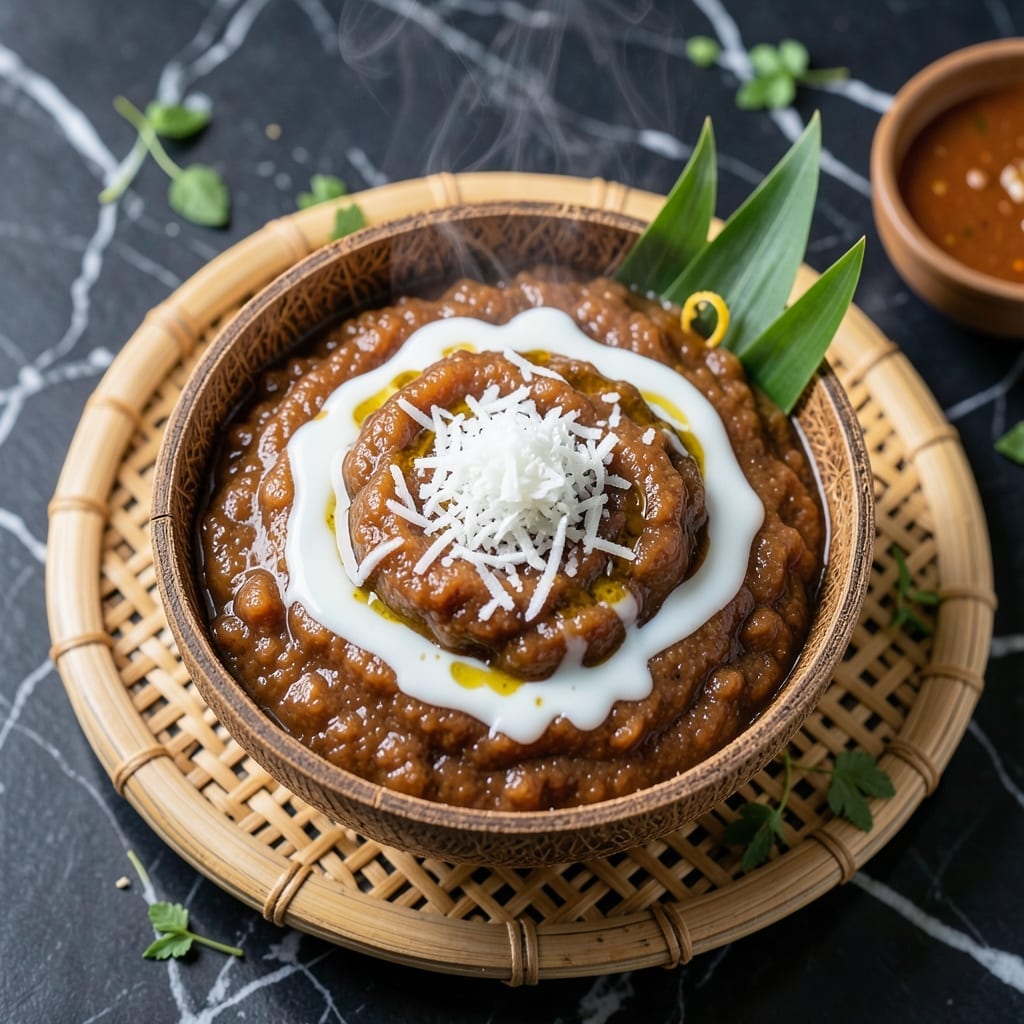
There’s something magical about the way this traditional Filipino treat transforms simple ingredients into a sticky, sweet delight. Glutinous rice flour and coconut milk create a rich, chewy texture that’s impossible to resist.
This recipe honors the classic method while keeping it accessible for home cooks. The result is a dessert that’s both nostalgic and deeply satisfying, with a perfect balance of sweetness and coconut richness.
Ingredients for Glutinous Rice Flour Kalamay
Simple staples create this Filipino dessert with chewy texture and coconut richness beyond compare.
| Ingredient | Amount | Notes |
|---|---|---|
| Glutinous Rice Flour 🌾 | 2 cups | Also called sweet rice flour |
| Coconut Milk 🥥 | 2 cups | Full-fat canned preferred |
| Brown Sugar 🟤 | 1 ½ cups | Packed, for deep sweetness |
| Water 💧 | 1 ½ cups | For adjusting consistency |
| Shredded Coconut 🥥 | ½ cup | Unsweetened, for topping |
| Coconut Oil 🫒 | 2 tbsp | For greasing the pan |
| Vanilla Extract 🌿 | 1 tsp | Pure vanilla for best flavor |
| Salt 🧂 | ¼ tsp | Balances the sweetness |
| Pandan Extract 🌿 | ½ tsp | Optional, for authentic flavor |
| Toasted Sesame Seeds 🌰 | 2 tbsp | For garnish and texture |
Glutinous rice flour is the foundation—look for Bob’s Red Mill or Asian markets for authentic quality. The coconut milk must be full-fat for that signature creaminess; Thai Kitchen or Chaokoh brands are reliable. Brown sugar adds depth, but if you only have white, add a tablespoon of molasses. The shredded coconut should be unsweetened to avoid overwhelming sweetness (the good stuff, not the pre-sweetened kind).
No glutinous rice flour? Mochiko flour is the same thing. Out of coconut milk? Full-fat oat milk with a tablespoon of coconut oil gets close. Pandan extract is traditional but hard to find—vanilla plus a drop of almond extract mimics the floral note. For the topping, toasted coconut flakes work if you’re out of shredded. The sesame seeds? Crushed peanuts add a nice crunch too.
Store leftovers covered at room temperature for 2 days or refrigerated for 1 week. The texture firms up as it cools, so let it sit at room temperature for 30 minutes before serving. Freezing isn’t recommended—it loses that sticky magic (worth the extra minute to make fresh).
Why You’ll Love This Recipe
- One-Bowl Wonder: I just dump the glutinous rice flour, coconut milk, and brown sugar in a single pot—no fancy tools, no fuss.
- Sticky Sweet Heaven: That combo of caramelized brown sugar and creamy coconut milk hits the perfect chewy-sweet spot every time.
- Festive Favorite: I bring this to potlucks and it’s always the first to disappear, but honestly, I make it just for Tuesday cravings too.
- Budget Stretcher: A bag of glutinous rice flour and a can of coconut milk feed my whole family for pennies, and leftovers taste even better the next day.
Step-by-Step Instructions for Glutinous Rice Flour Kalamay
This traditional method ensures a perfectly sticky texture with rich coconut flavor every time.
Step 1: Combine Wet Ingredients
In a large mixing bowl, whisk together the 2 cups Coconut Milk, 1.5 cups Brown Sugar, 1.5 cups Water, 2 tbsp Coconut Oil, 1 tsp Vanilla Extract, 0.25 tsp Salt, and 0.5 tsp Pandan Extract until the brown sugar completely dissolves. The mixture should appear smooth and slightly frothy on top.
This step is crucial for achieving the right sweetness and ensuring all flavors meld properly. If the brown sugar doesn’t dissolve completely, place the bowl in a warm water bath for 2-3 minutes to help it along.
Step 2: Gradually Incorporate Dry Ingredients
Slowly add the 2 cups Glutinous Rice Flour to the wet mixture while whisking continuously. This gradual addition prevents lumps from forming in your batter. The consistency should resemble thin pancake batter—smooth and pourable but not watery.
If the batter appears too thick, add a splash of the reserved Water from your measured amount. Conversely, if it’s too thin, let it sit for 5 minutes to allow the glutinous rice flour to absorb some liquid.
Step 3: Steam to Perfect Consistency
Grease a 9×13-inch baking pan or similar heatproof dish with a bit of the Coconut Oil. Pour the batter into the pan, spreading it evenly with a spatula. The batter should be about ½-inch thick in the pan.
Place the pan in a steamer over vigorously boiling water. Cover with a lid and steam for 45-50 minutes. Check at 45 minutes—the kalamay is done when the center is set and a toothpick inserted comes out clean. The surface should look glossy and slightly jelly-like.
Step 4: Top and Finish
Remove the pan from the steamer and let it cool for 10 minutes. While still warm, sprinkle the top evenly with the 0.5 cup Shredded Coconut and 2 tbsp Toasted Sesame Seeds, pressing them gently into the surface so they adhere.
Allow the kalamay to cool completely at room temperature for 1-2 hours before cutting. This cooling period is essential as it allows the kalamay to achieve its characteristic sticky, chewy texture. Cut into squares or diamonds to serve.
Pro Tips For Making Glutinous Rice Flour Kalamay
- Stir Constantly: Once the mixture thickens, keep stirring non-stop on medium-low heat for 8-10 minutes—I learned this the hard way after my first batch stuck to the pan and turned into a burnt mess.
- Use Full-Fat Coconut Milk: Skip the light versions; the fat in full-fat coconut milk is what gives kalamay its rich, creamy texture that everyone expects.
- Dissolve Sugar First: Mix the brown sugar with warm water before adding it to the pot to prevent grainy lumps in your finished kalamay—sounds obvious, but it’s easy to forget in the rush.
- Toast the Shredded Coconut: Lightly toast the shredded coconut in a dry pan for 2-3 minutes before using it as topping; it adds a nutty depth that raw coconut just can’t match.
Make-Ahead Tips for This Recipe
Prep the Night Before
Mix your dry ingredients the evening before—combine the 2 cups Glutinous Rice Flour with a pinch of salt in an airtight container. This saves 5 minutes on cooking day and ensures even distribution.
Measure Wet Ingredients
Pre-measure the coconut milk, brown sugar, and water in separate containers and store them in the fridge. Cold ingredients blend more smoothly in the morning, and you’ll avoid frantic measuring.
Steam in Batches
If making a double batch, steam in two 9×13-inch pans simultaneously. This works perfectly in a large stockpot with a bamboo steamer insert. Just ensure the water stays at a rolling boil. 🔥
Early Morning Start
Begin steaming the kalamay 2 hours before serving. The 45-50 minute steam plus 1-2 hour cooling time fits perfectly into a relaxed brunch timeline.
Room Temperature Toppings
Toast the shredded coconut and sesame seeds the night before and store at room temperature. This keeps them crisp and ready to sprinkle immediately after steaming.
Portion for Gifts
Cut the kalamay into squares while still slightly warm, then wrap individual pieces in parchment paper. These make lovely gifts that keep well at room temperature for 2 days. 💛
Nutrition Facts
Frequently Asked Questions
Can I use regular rice flour instead?
No, regular rice flour won’t give the same sticky texture. Glutinous rice flour is essential for that signature chewiness. If unavailable, Mochiko flour is a perfect substitute as it’s the same product with a different label.
Why does my kalamay turn out grainy?
Graininess usually means the brown sugar didn’t fully dissolve. Ensure it’s completely incorporated before adding the flour. Also, whisk vigorously during mixing to prevent lumps in the batter.
How do I store leftovers properly?
Keep covered at room temperature for up to 2 days. For longer storage, refrigerate for 1 week in an airtight container. Avoid freezing as it alters the sticky texture.

- Ground Beef Rice and Beans Recipe: Slow-Simmered Savory Harmony - October 17, 2026
- Guyanese Fried Rice Recipe: Caribbean Spice With Wok-Charred Aromatics - October 17, 2026
- Hakka Thunder Tea Rice Recipe: Wok-Charred Herbal Infusion - October 17, 2026