
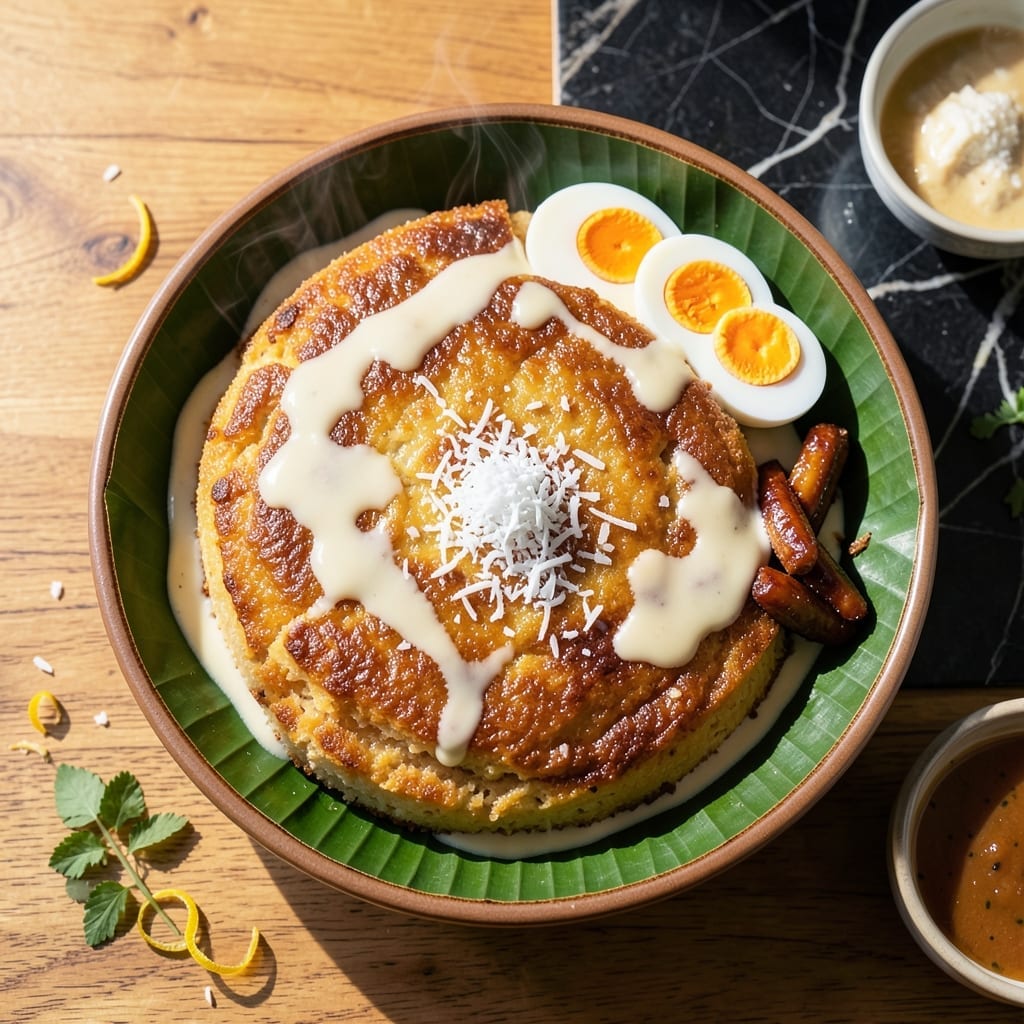
This traditional Filipino dessert brings authentic bibingka texture using glutinous rice flour and coconut milk for its signature richness.
Baked to golden perfection, it delivers the classic soft, slightly chewy layers you expect from this festive treat. The coconut milk creates a velvety consistency that’s both comforting and true to tradition.
Ingredients for Glutinous Rice Flour Bibingka Recipe with Coconut Milk
Traditional Filipino flavors start with these authentic ingredients for rich, chewy layers.
| Ingredient | Amount | Notes |
|---|---|---|
| Glutinous Rice Flour 🌾 | 2 cups | Also called sweet rice flour |
| Granulated Sugar 🍚 | 1 cup | White or coconut sugar |
| Coconut Milk 🥥 | 2 cups | Full-fat canned preferred |
| Large Eggs 🥚 | 4 whole | Room temperature for best texture |
| Unsalted Butter 🧈 | ½ cup | Melted and cooled slightly |
| Baking Powder 🧂 | 1 tbsp | Ensures proper rise |
| Vanilla Extract 💧 | 1 tsp | Pure extract for best flavor |
| Salt 🧂 | ¼ tsp | Balances sweetness |
| Grated Coconut 🥥 | ½ cup | Fresh or desiccated |
| Banana Leaves 🍃 | 2 pieces | Optional for lining pan |
| Edible Salted Duck Eggs 🥚 | 2 whole | Traditional topping, optional |
| Kesong Puti 🧀 | ½ cup | Filipino white cheese, optional |
The glutinous rice flour is non-negotiable here—look for it at Asian markets or the international aisle. Bob’s Red Mill carries it if you’re shopping stateside. Coconut milk should be full-fat (those light versions won’t give you the same velvety texture). I grab mine at Trader Joe’s—consistent quality, no weird additives. The banana leaves add that authentic aroma, but parchment paper works in a pinch.
No banana leaves? Skip ’em—just grease the pan well. Out of coconut milk? Coconut cream thinned with water gets you close. Duck eggs can be swapped for regular eggs (the texture changes slightly but still delicious). The kesong puti is traditional, but feta or ricotta salata work if you’re not near a Filipino market. Sugar can be adjusted to taste—Filipino desserts often lean sweeter.
Bibingka keeps well at room temp for 2 days, or refrigerate for up to 5 days. Reheat gently in a low oven to restore that soft, chewy texture. Freezes beautifully for 3 months—just thaw overnight before serving.
Why You’ll Love This Recipe
- One Bowl Miracle: I just dump the glutinous rice flour, sugar, coconut milk, and eggs in a single bowl—no fuss, no extra dishes.
- Coconut Cloud: That rich, creamy coconut milk gives it this dreamy texture and a subtle sweetness that pairs perfectly with the buttery crust.
- Feeds a Holiday: I make a big batch for Christmas morning, and it disappears faster than the gifts under the tree.
- Stays Soft: Honestly, it tastes just as good the next day—still moist and tender, so I never worry about leftovers going to waste.
Step-by-Step Instructions for Glutinous Rice Flour Bibingka With Coconut Milk
Here’s the traditional method that delivers authentic Filipino flavor and perfect texture.
Step 1: Prepare the Batter Base
In a large mixing bowl, whisk together the 2 cups Glutinous Rice Flour and 1 tbsp Baking Powder until fully combined. I always sift these dry ingredients first to prevent lumps in the final batter. This step ensures your bibingka rises evenly during baking.
Create a well in the center and add the 1 cup Granulated Sugar, 2 cups Coconut Milk, 4 whole Large Eggs, 0.5 cup Unsalted Butter (melted and cooled), 1 tsp Vanilla Extract, and 0.25 tsp Salt. The coconut milk should be full-fat for the richest flavor.
Step 2: Incorporate the Wet Ingredients
Using a whisk or electric mixer on low speed, gradually combine the wet ingredients with the dry mixture. Start from the center and work your way outward, incorporating the flour bit by bit. This prevents flour pockets and ensures a smooth, lump-free batter.
Once mostly combined, switch to a spatula and fold in the 0.5 cup Grated Coconut. The batter should be thick but pourable, similar to pancake batter. If it seems too thick, let it rest for 5 minutes – the glutinous rice flour will absorb some liquid.
Step 3: Prepare the Pan with Banana Leaves
Line your baking pan with the 2 pieces Banana Leaves, slightly overlapping if needed to fully cover the bottom and sides. I prefer to briefly pass the leaves over a low flame first – this softens them and releases their aroma. Secure the leaves with a bit of butter or cooking spray.
Pour the batter into the prepared pan, spreading it evenly with a spatula. The banana leaves not only add traditional flavor but also prevent sticking and create an authentic presentation. If you don’t have banana leaves, parchment paper works in a pinch.
Step 4: Bake and Add Toppings
Preheat your oven to 350°F. Bake the bibingka for 25-30 minutes until the edges start to pull away from the pan and the center looks set but still slightly jiggly. This is when you’ll add the traditional toppings.
Remove from the oven and arrange the 2 whole Edible Salted Duck Eggs (sliced) and crumbled 0.5 cup Kesong Puti evenly across the top. Return to the oven for another 10-15 minutes until the center is firm and a toothpick inserted comes out clean.
Step 5: Finish and Serve
Let the bibingka cool in the pan for 10 minutes before transferring to a wire rack. The banana leaves will have infused the cake with their subtle, earthy aroma. I like to brush the top with a bit of extra melted butter while it’s still warm.
Slice into squares and serve warm. The texture should be dense yet tender, with a slightly crisp top layer from the cheese and duck eggs. The combination of coconut, rice flour, and salted toppings creates that perfect sweet-savory balance traditional bibingka is known for.
Pro Tips For Making Glutinous Rice Flour Bibingka Recipe With Coconut Milk
- Preheat the Pan: Heat your baking pan or clay pot for at least 5 minutes before adding the batter—I learned this the hard way after my first few bibingkas stuck terribly to the pan.
- Use Full-Fat Coconut Milk: Skip the light versions; full-fat coconut milk gives the bibingka its rich, creamy texture and that authentic tropical flavor.
- Don’t Overmix: Stir the batter just until the glutinous rice flour is fully incorporated; overmixing develops gluten, making your bibingka dense instead of tender.
- Add Butter Last: Fold the melted unsalted butter into the batter at the very end to keep the mixture smooth and prevent the fats from separating.
Common Mistakes When Making This Recipe
Skipping the Sift
I always sift my glutinous rice flour and baking powder first—this prevents lumps that ruin the texture. Skipping this step can lead to dense, uneven layers in your finished cake.
Wrong Coconut Milk
Using light coconut milk instead of full-fat will give you a thin, watery batter. The fat content is crucial for that signature velvety richness. Stick with canned full-fat for authentic results.
Overmixing the Batter
Once you add the grated coconut, switch to a spatula and fold gently. Overmixing develops gluten in the rice flour, making your bibingka tough instead of tender. 5-6 folds is all it needs. 💡
Improper Pan Prep
If using banana leaves, briefly pass them over a low flame first to soften and release their aroma. Without this, they won’t infuse the cake properly. Secure with butter to prevent shifting.
Rushing the Bake
Don’t add toppings until the edges pull from the pan and the center is set but still slightly jiggly—usually after 25-30 minutes. Adding them too early can cause sinking.
Skipping the Rest
Let your bibingka cool for at least 10 minutes in the pan. Cutting too soon causes crumbling and the layers won’t set properly. The banana leaves need this time to transfer their flavor. 🌿
Nutrition Facts
Frequently Asked Questions
Can I use regular rice flour instead?
No, regular rice flour won’t give the same chewy texture. Glutinous rice flour is essential for authentic bibingka. It’s the starch that creates the signature dense, tender crumb.
Why does my batter seem too thick?
Let it rest for 5 minutes before adjusting. The flour absorbs liquid as it sits. If still too thick, add 1-2 tablespoons more coconut milk. The batter should resemble pancake batter.
How do I store leftovers?
Keep at room temperature for 2 days or refrigerate for up to 5 days. For longer storage, freeze for up to 3 months. Reheat gently in a low oven to restore texture.
Can I make this without banana leaves?
Yes! Use parchment paper as a substitute. While you’ll miss the aromatic flavor, the texture will still be perfect. Grease the pan well to prevent sticking.

- Fresh Turmeric Rice Recipe: Golden Grains with Earthy Warmth - October 7, 2026
- French Onion Brown Rice Recipe: Umami-Rich Grains With Caramelized Depth - October 7, 2026
- Rice Noodle Soup Recipe: Aromatic Broth with Silky Strands - October 7, 2026