
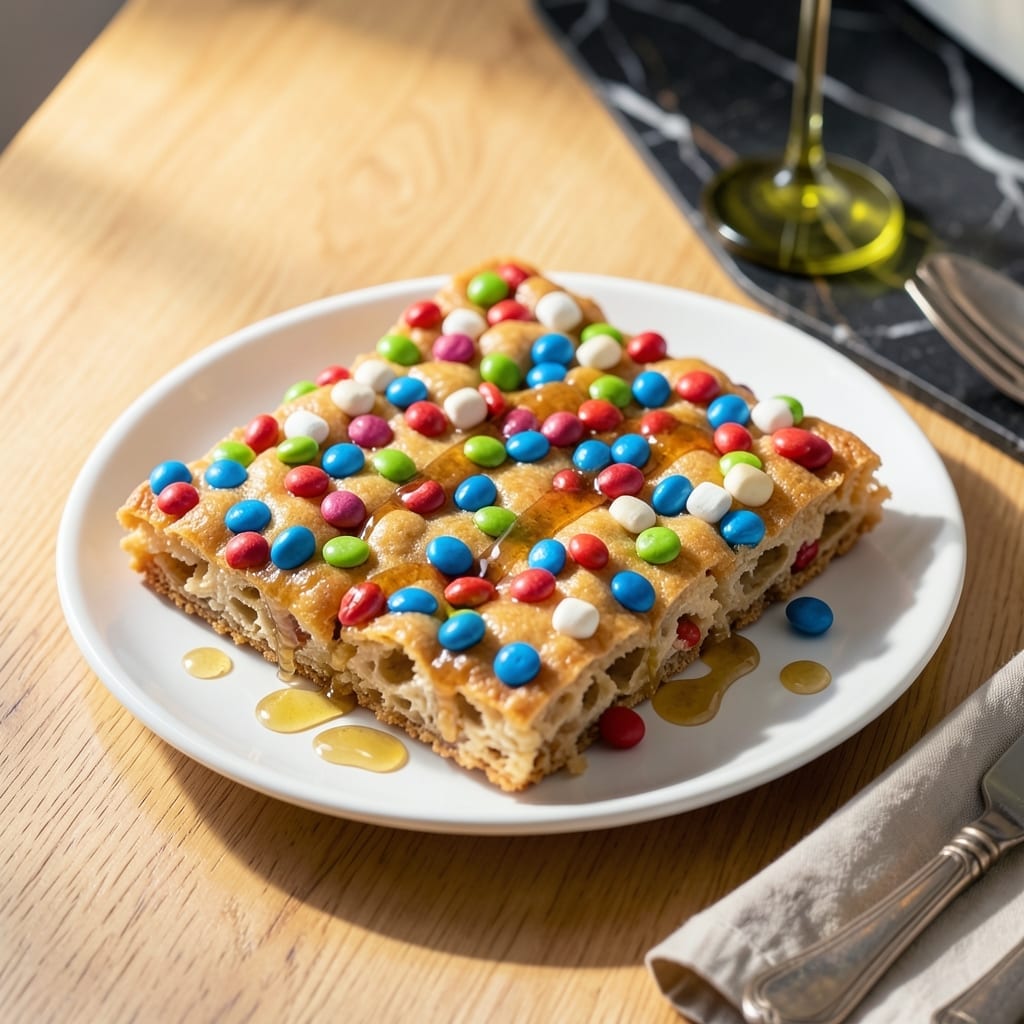
This recipe transforms a classic into a vibrant, fruity twist that’s as fun to make as it is to eat. The addition of colorful cereal pieces brings a cheerful pop to every bite.
With just a handful of ingredients and 10 minutes of prep, you’ll have a batch of these delightful treats ready to enjoy. They’re perfect for parties, lunchboxes, or a sweet afternoon snack.
Ingredients for Fruity Rice Crispy Treats
A handful of colorful ingredients for a fun, fruity twist on a classic treat.
| Ingredient | Amount | Notes |
|---|---|---|
| Rice Krispies Cereal 🥣 | 6 cups | Classic variety, not puffed rice |
| Mini Marshmallows ⚪ | 10 oz | Fresh for best melt |
| Unsalted Butter 🧈 | ¼ cup | For melting with marshmallows |
| Fruity Pebbles Cereal 🌈 | 2 cups | For colorful crunch |
| Vanilla Extract 💧 | 1 tsp | Pure extract preferred |
| Salt 🧂 | ¼ tsp | Fine grain for balance |
| Rainbow Sprinkles 🎨 | ¼ cup | Optional, for extra color |
| Dried Fruit Bits 🍓 | ½ cup | Chopped if large pieces |
| Honey 🍯 | 2 tbsp | For added sweetness |
| Vegetable Oil 🫒 | 1 tsp | For greasing pan |
The cereal is key here. Kellogg’s Rice Krispies and Fruity Pebbles give you that nostalgic crunch and vibrant color. Look for fresh boxes at any major supermarket—Target or Walmart usually have the best selection. The marshmallows should be soft and plump, not hard or stale. I always grab Kraft Jet-Puffed for consistent melt. Don’t skip the vanilla—it rounds out the sweetness beautifully.
No Fruity Pebbles? Trix or Apple Jacks work just as well for that fruity crunch. Vegan marshmallows (like Dandies) can replace regular if needed. The dried fruit can be any mix—raisins, cranberries, or chopped apricots all add great texture. If you’re out of honey, maple syrup works in a pinch. The sprinkles are optional but highly recommended for that party-ready look.
These keep well in an airtight container at room temperature for up to 5 days. Press them into a parchment-lined pan for easy cutting. If stacking, separate layers with parchment to prevent sticking. They freeze beautifully for 2 months if you want to make ahead.
Why You’ll Love This Recipe
- One Pot Magic: I melt the butter and marshmallows in a single pan, dump in the cereals, and it’s done. No fancy equipment, no fuss.
- Fruity Crunch Heaven: The mix of Rice Krispies and Fruity Pebbles gives that perfect sweet snap with a hint of vanilla warmth.
- Party Ready: I’ve taken these to potlucks, packed them in lunchboxes, and even set them out for movie night—always a hit.
- Budget Win: Here’s what sold me—a big batch costs pennies compared to store-bought treats and lasts for days.
Step-by-Step Instructions for Fruity Rice Krispy Treats
This method ensures perfectly chewy treats with vibrant color and texture in every bite.
Step 1: Prepare the Pan and Melt the Base
Lightly grease a 9×13-inch baking pan with the 1 tsp Vegetable Oil, ensuring all surfaces are coated. This prevents sticking and makes cutting easier later. In a large pot, melt the 0.25 cup Unsalted Butter over low heat until just liquid.
Add the 10 oz Mini Marshmallows and stir constantly with a silicone spatula. Watch for the marshmallows to completely melt into a smooth, glossy mixture with no lumps. This usually takes 3-5 minutes. Remove from heat immediately once melted to prevent scorching.
Step 2: Add Flavor and Combine with Cereal
Stir in the 1 tsp Vanilla Extract, 2 tbsp Honey, and 0.25 tsp Salt into the marshmallow mixture. The honey adds depth while the salt balances the sweetness. Mix thoroughly until fully incorporated and uniform in color.
Working quickly, add the 6 cups Rice Krispies Cereal and 2 cups Fruity Pebbles Cereal to the pot. Use the spatula to fold gently until every piece is evenly coated with the marshmallow mixture. The Fruity Pebbles will begin to soften slightly but should retain their vibrant colors.
Step 3: Incorporate Mix-Ins and Press into Pan
Fold in the 0.5 cup Dried Fruit Bits and 0.25 cup Rainbow Sprinkles until distributed throughout the mixture. The dried fruit adds chewy texture while the sprinkles provide bursts of color and crunch. Be careful not to overmix, which can crush the cereal.
Transfer the mixture to your prepared pan. Use the spatula or lightly greased hands to press it evenly into the pan. Apply firm, consistent pressure to create a uniform layer without compacting too tightly—this ensures the treats stay chewy rather than dense.
Step 4: Cool and Cut into Servings
Let the mixture cool at room temperature for 30 minutes until set but still slightly warm. This allows the marshmallow to firm up enough to hold its shape when cut. Avoid refrigerating, as this can make the treats too hard.
Using a sharp knife, cut into 12-16 squares for even servings. Wipe the knife between cuts for clean edges. The treats should hold together easily but still have a slight give when pressed. Serve immediately or store in an airtight container at room temperature for up to 3 days.
Pro Tips For Making Fruity Rice Crispy Treats
- Melt Butter Low: Keep the heat on medium-low when melting the butter and marshmallows—I learned this the hard way after scorching a batch that turned bitter and ruined the fruity flavor.
- Mix While Warm: Fold in the Rice Krispies and Fruity Pebbles as soon as the marshmallow mixture is smooth, while it’s still hot enough to coat everything evenly but not so hot it makes the cereal soggy.
- Use Fresh Marshmallows: Skip the stale mini marshmallows; they won’t melt as smoothly and can leave your treats grainy instead of perfectly chewy.
- Press Lightly: When pressing the mixture into the pan, use a buttered spatula and press just enough to shape it—pack too hard and you’ll crush the Fruity Pebbles, losing their fun crunch.
Essential Equipment for This Recipe
Large Pot Essentials
A heavy-bottomed 5-6 quart pot is crucial for even melting. I use my Le Creuset Dutch oven—it distributes heat perfectly and prevents hot spots that can scorch marshmallows. Avoid thin aluminum pots that can burn the mixture.
Silicone Spatula
Invest in a high-heat silicone spatula with a stiff edge. It scrapes every last bit of marshmallow from the pot and folds cereal without crushing. I prefer OXO Good Grips—they’re affordable and last forever. 💛
Baking Pan
A 9×13-inch baking pan gives the perfect thickness for these treats. Glass or ceramic pans work best since they retain heat evenly. Line it with parchment paper for easy removal—just leave an overhang on two sides for handles.
Measuring Tools
Use dry measuring cups for cereals and a kitchen scale for marshmallows. Precision matters—too much cereal makes them dry, too few marshmallows makes them crumbly. I keep my OXO nesting cups and Escali scale handy.
Cooling Rack
Place your pan on a wire cooling rack after pressing in the mixture. This allows air circulation underneath, preventing condensation that can make the bottom soggy. Don’t skip this—it makes a noticeable difference in texture.
Sharp Knife
A long 8-10 inch chef’s knife cuts cleanly through the treats. Dip it in warm water between cuts for smooth edges. I use my Wüsthof—it glides through without crushing the cereal pieces. 🔥
Nutrition Facts
Frequently Asked Questions
Can I use regular marshmallows instead of mini?
Yes, you can substitute 10 oz of regular marshmallows. They’ll take slightly longer to melt (5-7 minutes), so keep the heat on low and stir frequently to avoid burning.
How do I keep the treats from getting hard?
Press the mixture lightly into the pan—don’t compact it too tightly. Store in an airtight container at room temperature for up to 3 days. Avoid refrigerating, as it makes them dense.
Can I make these vegan?
Swap in vegan marshmallows (like Dandies) and use plant-based butter. Replace honey with maple syrup for the same sweetness. The texture and taste stay just as good!

- Fresh Turmeric Rice Recipe: Golden Grains with Earthy Warmth - October 7, 2026
- French Onion Brown Rice Recipe: Umami-Rich Grains With Caramelized Depth - October 7, 2026
- Rice Noodle Soup Recipe: Aromatic Broth with Silky Strands - October 7, 2026