
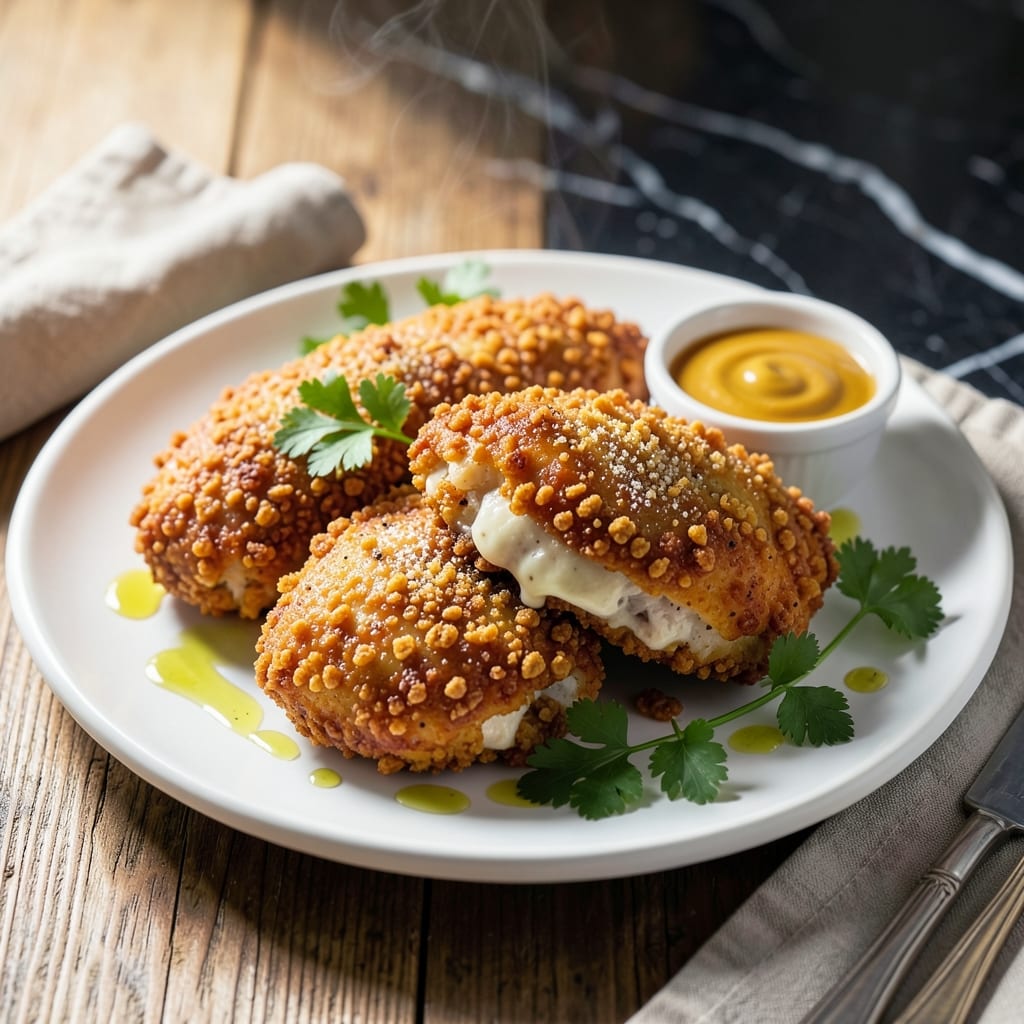
This recipe transforms a childhood cereal into a crispy, golden coating that elevates simple chicken to new heights. The secret lies in crushing Rice Krispies to create a breading that delivers unmatched crunch and a subtle sweetness that pairs perfectly with savory chicken.
I developed this method after realizing traditional breadcrumbs couldn’t match the texture this cereal provides. The process is straightforward: crush, coat, and bake or fry until golden brown. The result is chicken so crispy you’ll hear it from across the room.
Each bite offers a satisfying crunch followed by tender, juicy meat. The coating adheres beautifully, ensuring no piece goes unseasoned. It’s a foolproof way to turn an ordinary meal into something memorable.
Serve with your favorite dipping sauce or as a main dish with sides. The versatility of this technique makes it a go-to for quick, impressive dinners.
Ingredients for Rice Krispies Breaded Chicken
Pantry staples and a box of cereal create the crispiest chicken you’ll ever make.
| Ingredient | Amount | Notes |
|---|---|---|
| Boneless Skinless Chicken Breasts 🍗 | 1 ½ lb | Pounded to even thickness |
| Rice Krispies Cereal 🥣 | 4 cups | Crushed to fine crumbs |
| All-Purpose Flour 🌾 | ½ cup | For initial dredging |
| Large Eggs 🥚 | 2 whole | Beaten for egg wash |
| Buttermilk 🥛 | ½ cup | For tenderizing chicken |
| Garlic Powder 🧄 | 1 tsp | For savory depth |
| Onion Powder 🧅 | 1 tsp | Complements the garlic |
| Paprika 🌶️ | 1 tsp | Sweet or smoked variety |
| Salt 🧂 | 1 tsp | Kosher or sea salt |
| Black Pepper 🌶️ | ½ tsp | Freshly ground preferred |
| Vegetable Oil 🫒 | ½ cup | For frying or baking |
| Cornstarch 🌾 | 2 tbsp | For extra crispiness |
| Dijon Mustard 🟡 | 1 tbsp | Optional for dipping sauce |
| Honey 🍯 | 2 tbsp | Optional for dipping sauce |
The Rice Krispies are non-negotiable here—Kellogg’s original is what I use. Don’t bother with off-brand; the texture isn’t the same. Fresh chicken breasts work best (not frozen), and pounding them to an even thickness ensures even cooking. Costco has great bulk packs if you’re meal prepping. The buttermilk tenderizes the meat, so don’t skip it (or swap in regular milk with a splash of vinegar).
No buttermilk? Plain yogurt thinned with milk works in a pinch. Want extra crunch? Add 1/4 cup crushed cornflakes to the Rice Krispies. The paprika can be swapped for cayenne if you want heat. For a gluten-free version, use almond flour instead of all-purpose. The cornstarch helps the coating stick, but you can leave it out if needed.
Uncooked breaded chicken stays fresh in the fridge for 1 day. Cooked leftovers keep for 3-4 days—reheat in the oven to maintain crispiness. Freeze uncooked portions for up to 3 months, but fry from frozen for best texture.
Why You’ll Love This Recipe
- One Pan Magic: I just crush the Rice Krispies, dip the chicken in buttermilk and egg, and coat—no fancy tools, no mess.
- Crunchy Perfection: That snap from the cereal coating with the juicy chicken inside? I make extra just to snack on the crispy bits.
- Kid-Approved Winner: Even my picky nephew cleans his plate when I serve this—it’s the Rice Krispies, honestly.
- Budget Stretch: A box of cereal and chicken breasts feed my family twice, with leftovers that reheat crispy in the toaster oven.
Step-by-Step Instructions for Rice Krispies Breaded Chicken
This method guarantees extra-crispy coating with minimal effort and maximum crunch.
Step 1: Prep the Chicken and Seasoning Station
Start by pounding the 1.5 lb boneless skinless chicken breasts to an even ½-inch thickness between plastic wrap. This ensures even cooking and prevents dry spots. Season both sides with the 1 tsp salt, ½ tsp black pepper, 1 tsp garlic powder, 1 tsp onion powder, and 1 tsp paprika. I rub the spices in with my fingers so they adhere well.
Let the chicken rest while you set up your breading station. The seasoning will penetrate slightly, boosting flavor in every bite. Don’t skip this resting period—it makes a noticeable difference in the final taste.
Step 2: Create the Breading Assembly Line
Place the ½ cup all-purpose flour in a shallow dish. In another dish, whisk together the 2 whole large eggs and ½ cup buttermilk until smooth. For the final coating, pulse the 4 cups Rice Krispies cereal in a food processor until you have fine crumbs—about the texture of panko. Mix these with the 2 tbsp cornstarch in a third dish.
The cornstarch in the cereal mixture is the secret to extra crunch. It creates a lighter, crispier texture that holds up better than plain breadcrumbs. Trust me, this small addition elevates the whole dish.
Step 3: Coat the Chicken Thoroughly
Dredge each piece of chicken in the flour, shaking off any excess. Then dip it into the egg-buttermilk mixture, letting any extra drip off. Finally, press the chicken firmly into the Rice Krispies-cornstarch mixture, coating all sides completely. I like to press down hard to ensure the crumbs really stick.
Place the breaded chicken on a wire rack set over a baking sheet. This setup allows air to circulate underneath, which prevents sogginess on the bottom side. Let the chicken rest for 5-10 minutes to help the coating set before cooking.
Step 4: Cook to Golden Perfection
Heat the ½ cup vegetable oil in a large skillet over medium-high heat until shimmering. Carefully add the chicken pieces, working in batches if needed to avoid crowding. Cook for 4-5 minutes per side until the coating is deep golden brown and the internal temperature reaches 165°F.
Don’t turn the chicken too soon—the coating needs time to crisp and adhere. You’ll know it’s ready to flip when it releases easily from the pan. Drain the cooked chicken on a paper towel-lined plate to remove excess oil.
Step 5: Serve with Optional Dipping Sauce
While the chicken is still hot, it’s time to serve. For a quick dipping sauce, whisk together the 1 tbsp Dijon mustard and 2 tbsp honey until smooth. The sweet and tangy combo pairs perfectly with the savory, crispy chicken.
Serve immediately while the coating is at its crispiest. The contrast between the crunchy exterior and tender, juicy chicken inside is what makes this dish so satisfying. I promise, the Rice Krispies coating will surprise you with its texture and flavor.
Pro Tips For Making Rice Krispies Breaded Chicken
- Crush the Cereal Fine: Pulse the Rice Krispies in a food processor until they’re almost powder—this makes the coating stick better and gives a more even crunch than smashing them by hand.
- Soak the Chicken Longer: Let the chicken breasts bathe in the buttermilk for at least 30 minutes (60 if you’ve got time)—I learned this the hard way after my first batch turned out dry and bland.
- Double Dredge for Crisp: Dip each piece in flour, then egg, then cereal, then back in the egg and cereal again—it sounds like overkill but it’s the only way to get that thick, shattery crust.
- Rest Before Frying: After breading, let the chicken sit for 10 minutes on a wire rack—this keeps the coating from sliding off in the pan, which happened to me more times than I’d like to admit.
Common Mistakes When Making rice krispies breaded chicken
Overcrowding the Pan
Never crowd your skillet when frying. Each piece needs space for proper heat circulation. I cook in batches, adding only what fits comfortably. Crowding lowers oil temperature, creating a steamed, soggy coating instead of the desired crispy texture. 🔥
Skipping the Rest Step
Let your breaded chicken rest for 5-10 minutes before cooking. This helps the coating adhere properly. I learned this the hard way—rushing leads to cereal falling off during frying.
Uneven Chicken Thickness
Pound your chicken to an even ½-inch thickness. Uneven pieces cook inconsistently, leaving some areas dry while others stay undercooked. I use a meat mallet between plastic wrap for best results.
Wrong Oil Temperature
Test your oil at medium-high heat before adding chicken. If it’s not shimmering, it’s not hot enough. Too cool, and you’ll get greasy breading. Too hot, and it burns before the meat cooks through.
Insufficient Pressing
Press firmly when coating to ensure the Rice Krispies stick. I use the heel of my hand to really work the crumbs into the chicken. Light pressing means loose breading that won’t stay put during cooking.
Neglecting Internal Temp
Always check internal temperature with a meat thermometer. The coating might look done at 165°F, but the chicken could still be raw inside. I pull mine at exactly 165°F for perfect doneness. 🌡️
Nutrition Facts
Frequently Asked Questions
Can I bake instead of fry?
Yes! Bake at 400°F for 20-25 minutes, flipping halfway. Use a wire rack on a baking sheet for crispiness. The texture will be slightly different but still delicious.
Can I use other cereals?
Corn Flakes work well, but avoid sugary cereals. The neutral flavor of Rice Krispies lets the chicken shine. For extra crunch, mix in 1/4 cup crushed cornflakes.
How do I keep it crispy?
Drain on a wire rack, not paper towels. This prevents steam from making the coating soggy. Serve immediately for maximum crunch.
Can I make this gluten-free?
Yes! Swap all-purpose flour for almond flour or gluten-free flour blend. Ensure your cereal is certified gluten-free. The method remains the same.

- Jollof Rice Sauce Recipe: West African Tomato and Spice Infusion - September 25, 2026
- Japanese Rice Soup Recipe: Umami-Rich Comfort in a Bowl - September 25, 2026
- Homemade Cream Of Rice Recipe: Silk-Smooth Breakfast in Minutes - September 25, 2026