
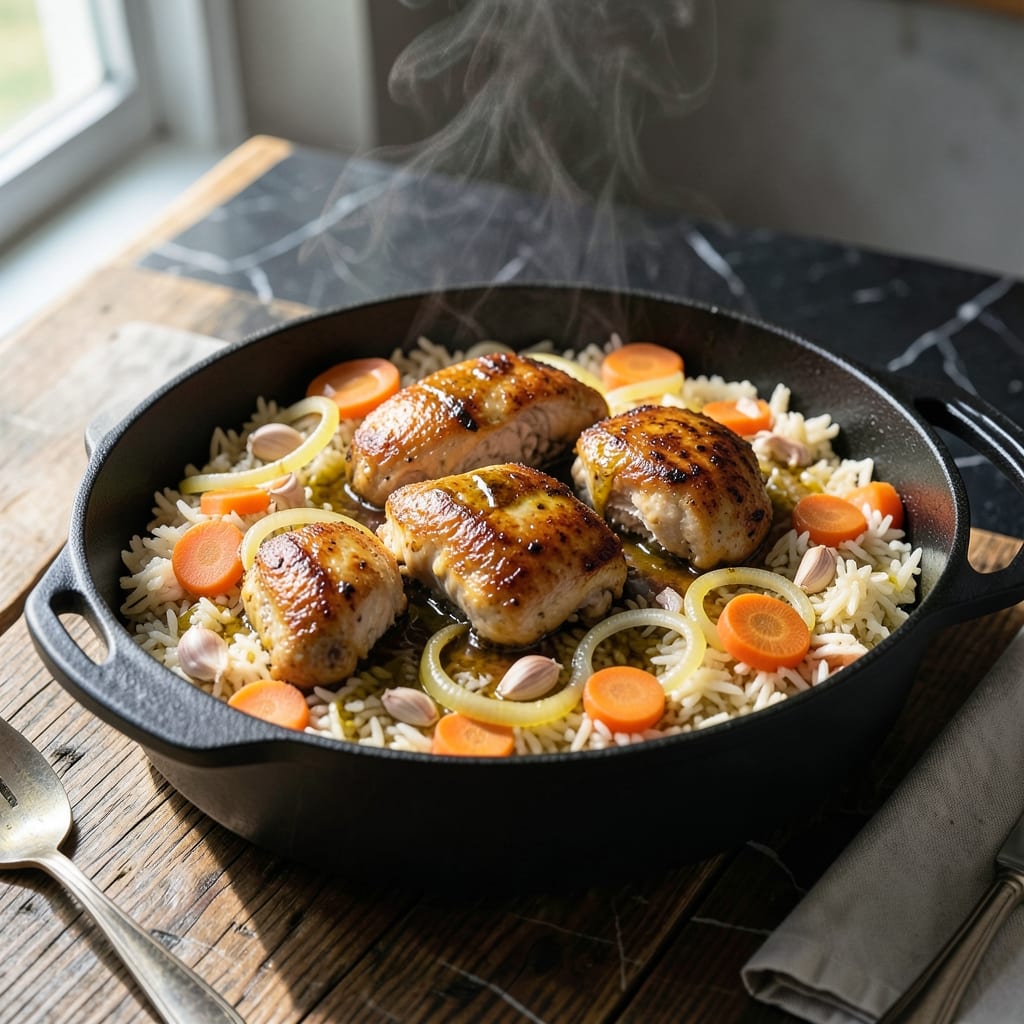
This one-pot creation transforms simple ingredients into a complete meal with minimal effort. The Dutch oven works magic, turning chicken and rice into a golden-crusted masterpiece.
I’ve perfected this method to ensure tender chicken and fluffy rice every time, with a crispy top layer that seals in flavor. No extra pans, no fuss—just a satisfying, self-contained dish.
Ingredients for Chicken Rice Dutch Oven
Simple ingredients transform into a golden-crusted one-pot masterpiece with minimal effort required here.
| Ingredient | Amount | Notes |
|---|---|---|
| Chicken Thighs 🍗 | 1 ½ lb | Boneless, skin-on preferred |
| Long-Grain White Rice 🍚 | 1 ½ cups | Uncooked, rinsed until clear |
| Chicken Stock 🥣 | 2 ½ cups | Low-sodium preferred |
| Yellow Onion 🧅 | 1 whole | Medium, finely diced |
| Garlic Cloves 🧄 | 4 cloves | Minced for depth of flavor |
| Carrots 🥕 | 2 whole | Medium, peeled and diced |
| Celery Stalks 🌿 | 2 whole | Diced for aromatic base |
| Dried Thyme 🍃 | 1 tsp | Crushed for better distribution |
| Dried Rosemary 🌿 | 1 tsp | Crushed for better distribution |
| Bay Leaf 🍃 | 1 whole | Removed before serving |
| Olive Oil 🫒 | 2 tbsp | Extra-virgin for richness |
| Unsalted Butter 🧈 | 2 tbsp | For golden crust formation |
| Kosher Salt 🧂 | 1 ½ tsp | Diamond Crystal preferred |
| Black Pepper 🌶️ | ½ tsp | Freshly ground for best flavor |
The chicken thighs are non-negotiable for this method—bone-in, skin-on provides the best texture and renders fat for the crust. Whole Foods or ButcherBox offer excellent quality, but standard supermarket brands work if fresh. The rice must be long-grain white for proper absorption; jasmine or basmati are ideal. Rinsing until water runs clear removes excess starch, preventing gumminess.
No chicken stock? Water with bouillon cubes works in a pinch, but flavor suffers. Short on fresh aromatics? Frozen mirepoix (onion, carrot, celery) from Trader Joe’s saves time. For herbs, fresh thyme and rosemary at triple the amount can replace dried. The butter is key for the crust—do not substitute oil here, as it lacks the milk solids needed for browning.
This keeps well in the fridge for 4 days—the flavors actually deepen overnight. Reheat covered with foil at 350°F until warmed through. The crust won’t stay crisp, but the texture remains satisfying. Freezes for up to 3 months if needed, though best fresh.
Why You’ll Love This Recipe
- One Pot Magic: I toss everything in the Dutch oven and let it do the work—no extra pans, no fuss.
- Garlic Infused: The garlic and onion cook right into the rice, making every bite rich and savory.
- Weeknight Hero: Between us, this is my go-to for busy evenings when I need dinner fast.
- Budget Stretcher: Chicken thighs and rice feed my family for days without breaking the bank.
Step-by-Step Instructions for Chicken Rice Dutch Oven
This one-pot method delivers perfectly cooked rice with a golden crust and tender chicken thighs.
Step 1: Brown the Chicken Thighs
Heat the 2 tbsp olive oil in a Dutch oven over medium-high heat until shimmering. Pat the 1.5 lb chicken thighs dry with paper towels and season both sides with 1.5 tsp kosher salt and 0.5 tsp black pepper. This ensures a flavorful crust and prevents steaming.
Add the chicken thighs skin-side down and cook undisturbed for 6-7 minutes until the skin is deep golden brown and crisp. Flip and cook for another 4-5 minutes until the other side is equally browned. Remove the chicken and set aside—it will finish cooking in the rice.
Step 2: Sauté the Aromatics
In the same Dutch oven, reduce heat to medium. Add the 2 tbsp unsalted butter, then stir in the finely diced yellow onion, diced carrots, and diced celery stalks. Cook for 5-6 minutes until the onion is translucent and the vegetables soften slightly.
Add the minced 4 cloves garlic cloves, 1 tsp dried thyme, and 1 tsp dried rosemary. Stir constantly for 30 seconds until fragrant—this builds the flavor base for the rice. Be careful not to let the garlic burn, as it can turn bitter.
Step 3: Toast the Rice and Add Liquids
Stir in the 1.5 cups long-grain white rice and cook for 1-2 minutes until the grains are slightly toasted and smell nutty. This step enhances the rice’s texture and prevents mushiness.
Pour in the 2.5 cups chicken stock and add the 1 whole bay leaf. Stir to combine, scraping up any browned bits from the bottom of the pot—these add depth to the dish. Bring the mixture to a boil, then reduce heat to low.
Step 4: Cook and Crisp
Return the chicken thighs to the Dutch oven, nestling them into the rice. Cover and cook on low heat for 20 minutes until the rice absorbs most of the liquid. Remove the lid, increase heat to medium-low, and cook uncovered for another 5-7 minutes to develop the golden crust.
You’ll know it’s done when the rice is tender, the liquid has been absorbed, and a crisp, golden-brown layer forms on the bottom and edges. The chicken should register 165°F internally when checked with a thermometer.
Remove the bay leaf before serving. Let rest for 5 minutes to allow the flavors to meld, then serve directly from the Dutch oven.
Pro Tips For Making Chicken Rice Dutch Oven
- Brown the Thighs First: Sear the chicken thighs skin-side down in the Dutch oven for 5-7 minutes until golden—this builds flavor and keeps the meat juicy. I learned this the hard way after skipping it and ending up with bland rice.
- Toast the Rice: After removing the chicken, cook the rice in the same pot for 2 minutes, stirring often. Sounds weird, but it works: this prevents gummy rice and adds a nutty depth.
- Use Warm Stock: Pour in chicken stock straight from the fridge and the rice takes forever to cook. I now heat my stock first—it cuts 10 minutes off the simmer time.
- Skip the Peeking: Resist the urge to stir once the rice is in. Every time you lift the lid, you lose heat and steam, and the rice won’t cook evenly—my grandmother swore by this, and she was right.
Wine and Beer Pairings for This Dish
White Wine Pairings
A crisp Sauvignon Blanc from New Zealand cuts through the richness with its bright acidity and citrus notes. I love how the grapefruit and lime flavors complement the golden crust. Kim Crawford is a reliable choice at $12-15 per bottle. 🍷
Red Wine Options
For red lovers, a light-bodied Pinot Noir from Oregon works beautifully. The earthy, berry notes won’t overpower the dish. Eyrie Vineyards offers excellent value at $20-25. Avoid heavy Cabernets—they’ll clash with the chicken’s delicate flavor.
Beer Pairings
A crisp German Pilsner like Warsteiner provides refreshing contrast to the savory rice. The clean, slightly bitter finish cleanses your palate. For craft beer fans, Allagash Saison offers peppery notes that elevate the herbs. 🍺
Non-Alcoholic Choices
Sparkling water with lemon or lime is my go-to for a refreshing non-alcoholic option. The bubbles and citrus mirror wine’s acidity. San Pellegrino with a squeeze of fresh lemon is particularly satisfying.
Temperature Tips
Serve whites slightly chilled at 45-50°F and reds at 55-60°F. For beer, 40-45°F is ideal. I keep a wine thermometer handy to ensure perfect serving temperatures.
Nutrition Facts
Frequently Asked Questions
Can I use chicken breasts instead of thighs?
Thighs are ideal for their fat content and flavor, but boneless breasts work if cooked carefully. Reduce cooking time to 15-18 minutes to prevent dryness. Brining them first helps retain moisture.
Why is my rice mushy?
This usually happens from too much liquid or not toasting the rice first. Use exactly 2.5 cups stock and toast the rice for 1-2 minutes before adding liquids. Stirring during cooking can also cause mushiness.
How do I get a crispier crust?
Uncover the pot for the last 5-7 minutes of cooking and increase heat to medium-low. Let it rest 5 minutes after cooking to set the crust before serving.

- Jollof Rice Sauce Recipe: West African Tomato and Spice Infusion - September 25, 2026
- Japanese Rice Soup Recipe: Umami-Rich Comfort in a Bowl - September 25, 2026
- Homemade Cream Of Rice Recipe: Silk-Smooth Breakfast in Minutes - September 25, 2026