
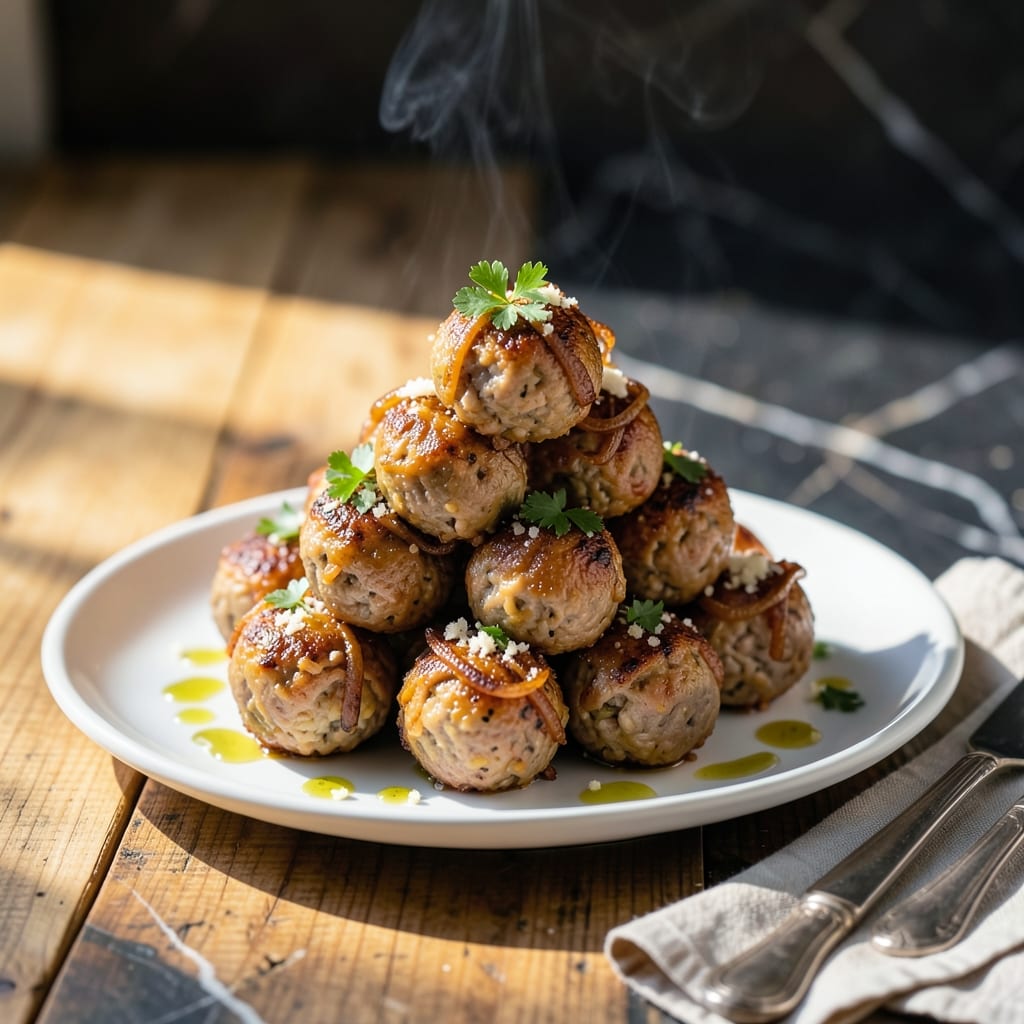
These golden meat and rice balls deliver a satisfying combination of crispy exterior and savory filling in every bite. I developed this method to ensure perfectly even cooking and consistent texture throughout the batch.
The secret lies in using cold cooked rice, which binds better and creates that crispy coating when fried. Seasoning both the filling and breading layers builds complex flavor that shines through with each mouthful.
You’ll achieve a shatteringly thin crust that gives way to a well-seasoned center. The contrast between outer crunch and tender interior makes these impossible to resist, whether served as appetizers or a hearty side.
This technique produces uniform results every time with minimal effort. The key is maintaining proper oil temperature throughout the frying process.
Ingredients for Meat and Rice Balls
Cold rice and well-seasoned pork create these crispy, golden bites with savory centers.
| Ingredient | Amount | Notes |
|---|---|---|
| Cooked Long-Grain White Rice 🍚 | 3 cups | Cold, day-old preferred for binding |
| Ground Pork 🥩 | 1 lb | Or substitute ground beef or turkey |
| Onion 🧅 | 1 whole | Finely minced for filling |
| Garlic Cloves 🧄 | 3 cloves | Minced for depth of flavor |
| Fresh Parsley 🌿 | ¼ cup | Chopped, for freshness in filling |
| Parmesan Cheese 🧀 | ½ cup | Freshly grated for best texture |
| Breadcrumbs 🍞 | 1 ½ cups | Panko for extra crispiness |
| Large Eggs 🥚 | 2 whole | Beaten, for binding breading |
| All-Purpose Flour 🌾 | ½ cup | For initial dredging layer |
| Olive Oil 🫒 | 2 cups | For deep frying, neutral oil works too |
| Salt 🧂 | 1 ½ tsp | Divided, for seasoning layers |
| Ground Black Pepper 🌶️ | ½ tsp | Freshly cracked for best flavor |
| Dried Oregano 🍃 | 1 tsp | For aromatic depth in filling |
| Red Pepper Flakes 🔥 | ¼ tsp | Optional, for subtle heat |
The rice must be cold—freshly cooked rice lacks the starch cohesion needed to maintain structure. Day-old rice from the fridge works perfectly. For the pork, ground shoulder offers superior fat content for juicier fillings compared to leaner cuts. Whole Foods or a trusted butcher provides quality meat. Panko breadcrumbs, available at most Asian markets, deliver the characteristic crunch that defines this dish.
Ground turkey or beef can replace pork without textural compromise. For a gluten-free version, cornstarch or almond flour substitutes for the all-purpose flour in dredging. Dried parsley at one-third the amount works if fresh isn’t available, though the bright flavor will be less pronounced. The eggs are essential for breading adhesion—flax eggs won’t provide the same binding strength for this application.
Assembled balls can rest 30 minutes before frying to set the breading. Leftovers keep 3-4 days refrigerated, though they’re best served immediately for maximum crispness. Reheat in a 350°F oven for 10-12 minutes to revive texture.
Why You’ll Love This Recipe
- One Pan Wonder: I just mix the rice, pork, and chopped onion, shape, and bake—no fancy techniques, no mess.
- Savory Bite: The garlic and parsley give these an irresistible depth that makes them disappear fast.
- Freezer Friendly: I make a double batch and freeze half for those nights I need dinner in 10 minutes flat.
- Budget Stretcher: Ground pork and rice feed my family of four for under ten bucks, and nobody complains.
Step-by-Step Instructions for Meat and Rice Balls
Master the technique for achieving perfectly crispy exteriors with savory, well-seasoned fillings every time.
Step 1: Prepare the Savory Filling
In a skillet over medium heat, cook the 1 lb Ground Pork until browned, breaking it into small pieces as it cooks. Add the finely minced 1 whole Onion and continue cooking until the onion softens and becomes translucent, about 5-6 minutes.
Stir in the 3 cloves minced Garlic Cloves, 1 tsp Dried Oregano, 0.25 tsp Red Pepper Flakes, 1 tsp Salt, and 0.5 tsp Ground Black Pepper. Cook for 1 minute until fragrant. Remove from heat and stir in the 3 cups Cooked Long-Grain White Rice, 0.25 cup Fresh Parsley, and 0.5 cup Parmesan Cheese. The filling should hold together when pressed.
Step 2: Form and Bread the Balls
Once the filling is cool enough to handle, shape it into 1.5-inch balls using your hands. I find that slightly moist hands prevent sticking while maintaining the shape. Set the formed balls aside on a tray.
Set up a breading station with three shallow dishes. Place the 0.5 cup All-Purpose Flour in the first, beat the 2 whole Large Eggs in the second, and spread the 1.5 cups Breadcrumbs in the third. Roll each ball first in the flour, shaking off excess, then dip in the beaten eggs, and finally coat thoroughly in breadcrumbs. Press the breadcrumbs gently to ensure they adhere.
Step 3: Fry to Golden Perfection
Heat the 2 cups Olive Oil in a deep, heavy-bottomed pot over medium-high heat until it reaches 350°F. Use a kitchen thermometer for accuracy—this temperature ensures even cooking without burning the exterior.
Working in batches to avoid overcrowding, carefully lower the breaded balls into the oil. Fry for 3-4 minutes, turning occasionally, until they are golden brown on all sides. The breadcrumbs should be crisp and the filling hot throughout. Transfer to a paper towel-lined plate to drain excess oil.
Step 4: Rest and Serve Warm
Allow the fried balls to rest for 2-3 minutes before serving. This brief rest helps the filling set, preventing it from oozing out when bitten into. The exterior should remain crispy while the inside stays moist and flavorful.
Serve immediately while hot. The contrast between the crispy breadcrumb coating and the savory, tender filling is what makes this dish irresistible. If needed, keep them warm in a 200°F oven, but they’re best enjoyed fresh from the fryer.
Pro Tips For Making Meat And Rice Balls
- Chill the Rice: Use cold, day-old rice—it’s drier and sticks together better than fresh, preventing your meatballs from falling apart in the pan.
- Sauté the Onions First: Cook the onions until translucent before adding garlic to mellow their bite, or your rice balls will taste harsh and raw.
- Don’t Overmix: Combine the rice, pork, and herbs just until they hold together; overworking makes them dense and tough.
- Use a Scoop: A small ice cream scoop keeps portions even and speeds up shaping—no more lopsided meat and rice balls.
Make-Ahead Tips for This Recipe
Prep Ahead Strategy
You can make the filling up to 2 days ahead and store it in an airtight container in the fridge. This actually improves the flavors as they meld together. I often prep the filling the night before to save time on the day of serving.
Breading Station Setup
Set up your breading station with flour, beaten eggs, and breadcrumbs in separate shallow dishes. Keep it covered with plastic wrap in the fridge for up to 24 hours. The breading stays fresh and ready for quick assembly. 💡
Form and Chill
Shape all your balls and place them on a parchment-lined tray. Cover with plastic wrap and refrigerate for 1-2 hours before frying. This helps them hold their shape and makes the breading adhere better.
Freezing for Later
After breading, freeze the uncooked balls on a tray for 1 hour, then transfer to a freezer bag. They’ll keep for up to 1 month. Fry from frozen, adding 1-2 extra minutes to the cooking time. ❄️
Day-Of Efficiency
If making for a party, fry in batches and keep warm in a 200°F oven on a wire rack. This maintains crispiness while you finish the rest. I never crowd the pot—it drops the oil temp and leads to soggy results.
Reheating Leftovers
Revive leftovers in a 350°F oven for 10-12 minutes to restore crispness. Microwaving works in a pinch but sacrifices texture. Serve with a fresh lemon wedge for brightness.
Nutrition Facts
Frequently Asked Questions
Can I use fresh rice instead of day-old?
No, fresh rice won’t bind properly. Cold, day-old rice has the right starch structure to hold shape during frying.
What’s the best oil temperature for frying?
Maintain 350°F for even cooking. Use a thermometer to monitor—too low causes sogginess, too high burns the coating.
How do I prevent them from falling apart?
Chill breaded balls for 30 minutes before frying. This sets the coating and helps maintain structure.
Can I bake instead of fry?
Yes! Bake at 400°F for 20-25 minutes, turning halfway. They won’t be as crispy but will still be delicious.

- Mujadara Rice and Lentils Recipe: Earthy Spiced Lentils With Caramelized Onions - November 1, 2026
- Naija Fried Rice Recipe: Street-Style Spice With Veggie Crunch - November 1, 2026
- Mushy Rice Recipe: Fluffy Grains Transformed in Minutes - November 1, 2026