
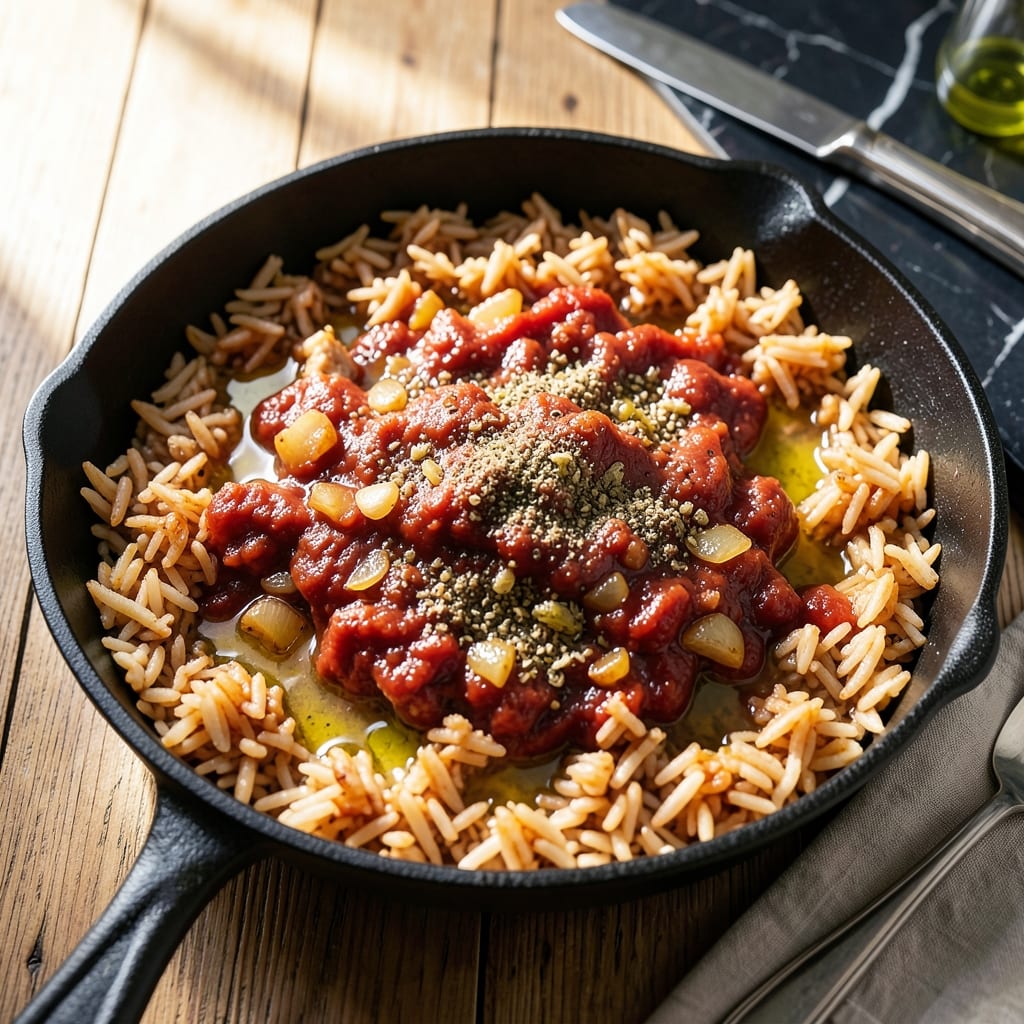
This oven-baked Mexican rice delivers bold flavor with minimal effort, letting your oven do the work for a perfectly seasoned side.
I developed this hands-free method after years of stirring pots on the stovetop, and the results are just as authentic. The rice cooks evenly in the dry heat, absorbing all the spices and tomatoes for a fluffy texture without any burning.
What you get is a vibrant, one-pan dish that pairs perfectly with tacos, burritos, or grilled meats. The spices toast in the oven, deepening their aroma as the rice cooks.
No stirring, no watching—just set it and forget it for 30 minutes. This method ensures consistent results every time.
Ingredients for Mexican Rice Oven
Pantry staples plus a few fresh touches for bold, hands-off flavor.
| Ingredient | Amount | Notes |
|---|---|---|
| Long-Grain White Rice 🌾 | 1 ½ cups | Rinsed until water runs clear |
| Tomato Sauce 🍅 | 1 cup | Plain, no added seasoning |
| Chicken Broth 🥣 | 2 ½ cups | Substitute vegetable broth for vegetarian |
| Yellow Onion 🧅 | 1 whole | Finely diced for even distribution |
| Garlic Cloves 🧄 | 3 cloves | Minced for maximum flavor |
| Ground Cumin 🌿 | 1 ½ tsp | Toasted for deeper aroma |
| Chili Powder 🌶️ | 1 tsp | Mild or hot variety |
| Dried Oregano 🍃 | 1 tsp | Mexican oregano preferred |
| Bay Leaf 🌿 | 1 whole | Removed before serving |
| Salt 🧂 | 1 tsp | Diamond Crystal kosher preferred |
| Black Pepper 🌶️ | ½ tsp | Freshly ground for best flavor |
| Olive Oil 🫒 | 2 tbsp | Extra-virgin for richness |
| Frozen Peas 🌱 | ½ cup | Optional, for color and texture |
| Lime 🍋 | 1 whole | Zested and juiced for brightness |
The rice is key here—long-grain white gives you that fluffy texture. I grab mine from Costco in bulk (cheaper and stays fresh for months). The broth matters too: vegetable broth keeps it vegetarian, but chicken broth works if that’s what you’ve got. Look for low-sodium so you can control the seasoning. Mexican oregano (found at Latin markets) has a more citrusy kick than regular, but either works.
No tomato sauce? Blitz a can of tomatoes in the blender for a quick substitute. Out of cumin? Coriander at half the amount adds a similar earthy note. Skip the peas? No problem—add diced bell peppers instead (or just leave them out). The lime zest is optional but adds a bright finish that balances the richness. Fresh is best, but bottled juice works in a pinch.
Rice keeps in the fridge for 4-5 days—reheat with a splash of water to fluff it up. Freeze for up to 3 months (portion first for easy thawing). The spices toast as it bakes, so don’t skip the oven step—it’s worth the wait.
Why You’ll Love This Recipe
- Hands-Off Cooking: I toss everything in one dish and let the oven do the work—no stirring, no fuss.
- Rich, Savory Depth: The chicken broth and tomato sauce soak into the rice, creating layers of flavor with every bite.
- Meal Prep Magic: It reheats beautifully, so I make a big batch for lunches all week.
- Budget-Friendly Feast: A pound of rice, a few pantry staples, and I’ve got a hearty side for pennies per serving.
Step-by-Step Instructions for Mexican Rice in the Oven
This hands-free method delivers perfectly fluffy rice with bold Mexican flavors every time.
Step 1: Sauté Aromatics and Toast the Spices
Heat the 2 tbsp olive oil in a large oven-safe skillet or Dutch oven over medium heat. Add the finely diced yellow onion and cook for 5-6 minutes until it turns translucent and just starts to brown at the edges.
Stir in the minced garlic cloves, 1.5 tsp ground cumin, 1 tsp chili powder, and 1 tsp dried oregano. Toast for 30-45 seconds until the spices become fragrant—this deepens their flavor and prevents a raw taste in the finished dish.
Step 2: Build the Flavor Base with Liquids and Rice
Add the 1.5 cups long-grain white rice to the skillet and stir to coat it in the spiced oil. Pour in the 1 cup tomato sauce and 2.5 cups chicken broth, then stir to combine.
Add the 1 whole bay leaf, 1 tsp salt, and 0.5 tsp black pepper. Bring the mixture to a gentle boil, then remove it from the heat immediately. This ensures the rice starts cooking evenly before it goes into the oven.
Step 3: Bake Until Rice Is Tender
Cover the skillet tightly with a lid or foil and transfer it to a preheated 375°F oven. Bake for 25-30 minutes until the rice is tender and the liquid has been fully absorbed.
Resist the urge to stir the rice during baking—this can break the grains and create a mushy texture. Instead, check for doneness by tilting the skillet slightly to see if any liquid remains at the edges.
Step 4: Finish with Peas and Lime
Remove the skillet from the oven and let it sit, covered, for 5 minutes. This resting period allows the rice to steam and become even more tender.
Discard the bay leaf, then gently fold in the 0.5 cup frozen peas. The residual heat will thaw them perfectly. Finally, zest the lime over the rice, then cut it in half and squeeze the juice evenly across the top. Fluff with a fork before serving.
Pro Tips For Making Mexican Rice Oven
- Cover Tightly: Use foil to seal the baking dish completely—I learned this the hard way after my rice came out dry and undercooked when I left a gap.
- Toast the Rice: Sauté the rice in oil for 2-3 minutes until lightly golden before adding liquids; it adds a nutty depth that plain rice just can’t match.
- Skip the Rinse: Don’t rinse the long-grain white rice—you want the starch to help thicken the dish and give it that classic Mexican rice texture.
- Use Warm Broth: Heat the chicken broth before mixing it in; cold broth slows the cooking and can make the rice gummy instead of fluffy.
Essential Equipment for This Recipe
Oven-Safe Skillet
An oven-safe skillet is non-negotiable for this recipe. I use my 12-inch Lodge cast iron because it holds heat evenly and transitions perfectly from stovetop to oven. A stainless steel skillet with an oven-safe handle works too. 🔥
Tight-Fitting Lid
Steam is key to fluffy rice, so you need a tight-fitting lid or heavy-duty foil to seal in moisture. My Lodge has a cast iron lid that creates the perfect seal. If using foil, press it tightly over the skillet edges.
Dutch Oven Option
A 5-6 quart Dutch oven is another great choice. I love my Le Creuset for its even heat distribution and beautiful finish. The heavy lid ensures no steam escapes during baking. It’s ideal if you’re doubling the recipe.
Mixing and Serving Tools
Use a wooden spoon for stirring the initial aromatics to avoid scratching your skillet. For fluffing the finished rice, a rice paddle or fork works best. I keep both near the stove for easy access.
Measuring Essentials
Accurate measurements matter for perfect texture. I use OXO Good Grips measuring cups and spoons for the rice and spices. A liquid measuring cup ensures precise broth and tomato sauce amounts.
Oven Thermometer
For consistent results, verify your oven temperature with a hanging oven thermometer. I check mine monthly and adjust as needed. This prevents undercooked or burnt rice and ensures even cooking every time. 💡
Nutrition Facts
Frequently Asked Questions
Can I use brown rice instead of white?
Yes, but increase liquid to 3 cups and bake for 45-50 minutes. Brown rice needs more moisture and time.
Why is my rice mushy?
Over-stirring or too much liquid causes this. Use exact measurements and resist stirring during baking. Let it rest 5 minutes after cooking.
Can I double the recipe?
Use a larger Dutch oven and keep the same 375°F temperature. Baking time may increase by 5 minutes.
How do I make it spicier?
Add 1/2 tsp cayenne or diced jalapeños with the onion. For extra heat, stir in hot sauce after baking.

- Mujadara Rice and Lentils Recipe: Earthy Spiced Lentils With Caramelized Onions - November 1, 2026
- Naija Fried Rice Recipe: Street-Style Spice With Veggie Crunch - November 1, 2026
- Mushy Rice Recipe: Fluffy Grains Transformed in Minutes - November 1, 2026