
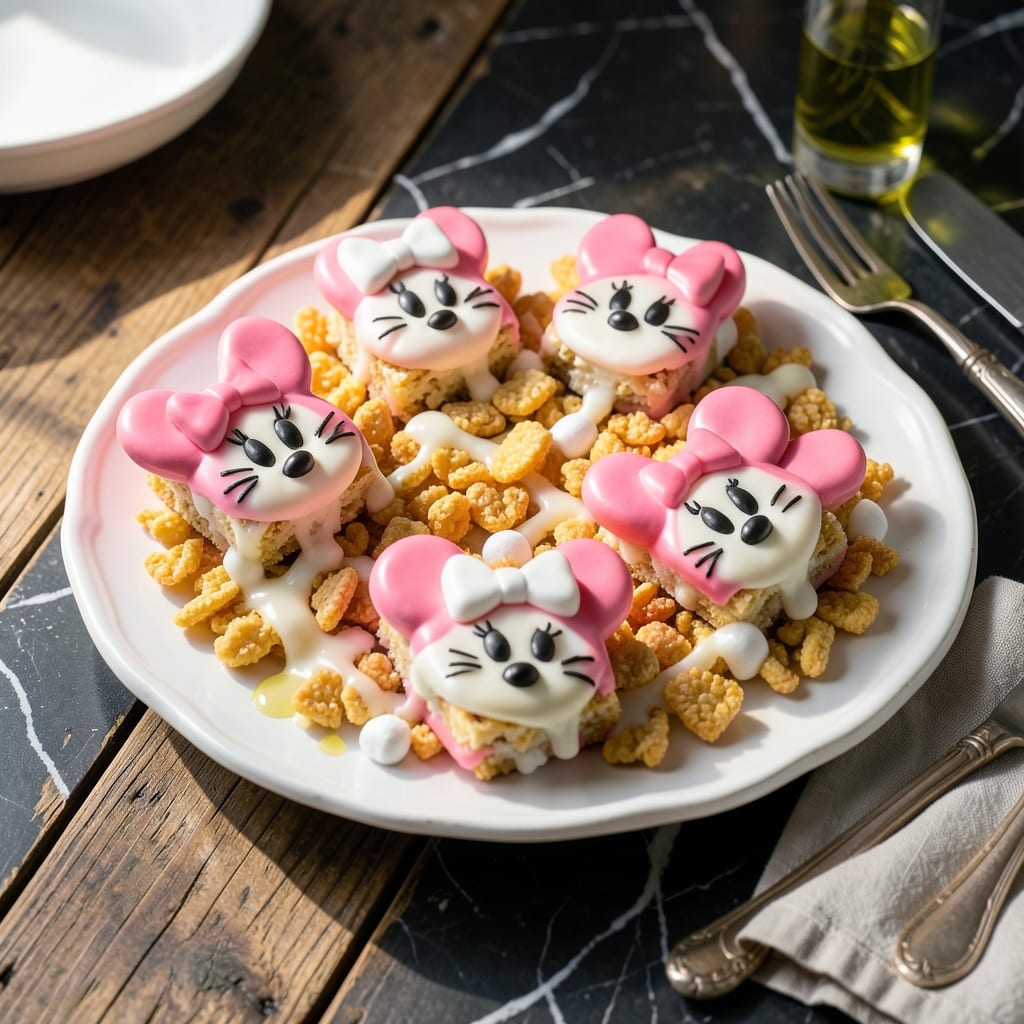
These treats bring playful charm to any celebration without turning on the oven. The classic Rice Krispies base gets a magical twist with simple shaping and decorations that capture Minnie’s iconic look.
What makes this creation special is its no-bake simplicity—just melt, mix, and mold. The crispy texture stays intact while you shape the treats into perfect circles, adding signature ears and details.
You’ll end up with a batch of cheerful, crispy treats that look as delightful as they taste. Each one is a fun, edible centerpiece that guests of all ages will adore.
Perfect for parties, birthdays, or whenever you need a whimsical touch. Here’s how to make them.
Ingredients for Minnie Mouse Rice Crispy Treats
No oven needed for these cheerful, crispy party treats that capture Minnie’s iconic look perfectly.
| Ingredient | Amount | Notes |
|---|---|---|
| Rice Krispies Cereal 🥣 | 6 cups | Standard variety, not puffed |
| Mini Marshmallows 🍬 | 10 oz | About 4 cups unpacked |
| Unsalted Butter 🧈 | 4 tbsp | Cut into pieces for melting |
| Pink Candy Melts 🎀 | 1 cup | For Minnie’s signature color |
| Black Food Gel ⚫ | ½ tsp | For facial details |
| White Chocolate Chips ⚪ | ½ cup | For ear decorations |
| Red Licorice Strings 🎀 | 12 pieces | For Minnie’s bow |
| Vanilla Extract 🌿 | ½ tsp | Pure extract preferred |
| Pinch of Salt 🧂 | 1 pinch | Balances sweetness |
| Powdered Sugar 🍚 | ¼ cup | Optional for dusting |
The marshmallows are the glue here—Jet-Puffed or store brand both work, but avoid stale ones (they won’t melt smoothly). Kellogg’s Rice Krispies are the classic choice, but any crispy rice cereal will do in a pinch. For the butter, unsalted is key so you control the salt level. I grab mine from Walmart or Target for convenience.
No pink candy melts? White chocolate chips plus a drop of pink food coloring gets you close. Black food gel can be swapped for edible ink markers if you’re decorating post-baking. Short on red licorice? Twizzlers or fruit leather strips work for the bow. The vanilla extract is optional but adds depth—imitation vanilla works too.
Store treats in an airtight container at room temp for up to 3 days. They’ll soften slightly but stay edible for 1 week. Freeze for up to 1 month if making ahead (thaw before decorating).
Why You’ll Love This Recipe
- One Pot Magic: I melt the butter and marshmallows in a single saucepan, stir in the Rice Krispies, and we’re done—no fancy equipment, no mess.
- That Nostalgic Crunch: The buttery, toasted cereal mixed with gooey mini marshmallows tastes like childhood in every bite, but with a fun Minnie twist.
- Party Hit Every Time: Birthdays, playdates, class parties—these pink and black treats disappear faster than I can snap a photo.
- Budget-Friendly Batch: A box of cereal and a bag of marshmallows make dozens, and the candy melts stretch further than you’d think.
Step-by-Step Instructions for Minnie Mouse Rice Crispy Treats
Here’s the method. Straightforward, tested, works every time.
Step 1: Melt and Combine the Base
In a large pot, melt the 4 tbsp unsalted butter over low heat. I cut the butter into pieces first so it melts evenly without burning. Once fully melted, add all 10 oz mini marshmallows and stir constantly with a silicone spatula.
The marshmallows will start to collapse and melt within 2-3 minutes. Keep stirring until the mixture is completely smooth. Here’s the thing—don’t rush this step with high heat or the marshmallows will scorch. Add the 0.5 tsp vanilla extract and pinch of salt, stirring to combine.
Step 2: Fold in the Cereal
Remove the pot from heat and immediately add all 6 cups Rice Krispies Cereal. I like to pour it in gradually while folding gently with the spatula. This ensures every piece gets coated in that glossy marshmallow mixture without crushing the cereal.
You’ll notice the cereal starts to soften slightly as it absorbs the warmth. Stop folding once the cereal is evenly coated—the mixture should hold together when pressed but not be sticky. Real talk: if it’s too sticky, your heat was too high in the previous step.
Step 3: Shape and Decorate Like Minnie
Lightly grease your hands with butter or oil and divide the mixture into 12 equal portions. Roll each into a ball and place them on a parchment-lined tray. Press the top of each ball gently to create a flat surface for Minnie’s iconic face.
While the treats cool slightly, melt the 1 cup pink candy melts in a microwave-safe bowl in 30-second intervals, stirring between each until smooth. Dip the top of each treat into the pink candy melts to create Minnie’s face color. Let them set for 5 minutes before adding details.
Step 4: Add Facial Details and Bow
Use a toothpick to apply the 0.5 tsp black food gel for Minnie’s eyes and nose. I know it seems weird, but a tiny dot for the nose and two slightly larger dots for the eyes work perfectly. For the ears, melt the 0.5 cup white chocolate chips and pipe two small circles on either side of the head.
Cut the 12 pieces red licorice strings into 1-inch segments and arrange them into a bow shape on top of Minnie’s head. Press gently so they stick to the pink candy melt base. Let everything set completely at room temperature for 20-30 minutes.
For a finishing touch, dust lightly with 0.25 cup powdered sugar using a fine-mesh sieve. This step is optional but adds a magical sparkle to your creation.
Pro Tips For Making Minnie Mouse Rice Crispy Treats
- Melt Butter Low: Use low heat when melting the butter for your marshmallows—I learned this the hard way after burning two batches. It keeps the mixture smooth and prevents that bitter, scorched taste.
- Use Fresh Marshmallows: Skip the stale mini marshmallows; they won’t melt as easily and can make your treats grainy. Fresh ones blend seamlessly with the butter and cereal for that perfect gooey texture.
- Press Gently: When shaping the treats, resist the urge to compact them too tightly. Press just enough to hold the shape, or they’ll turn dense instead of light and crispy.
- Chill Before Dipping: Let the treats cool completely before dipping in pink candy melts—about 20 minutes in the fridge. This keeps them from falling apart or melting into the coating.
Pro Cooking Tips for This Dish
Melting Perfection
Always melt the 4 tbsp butter over low heat to prevent burning. I cut the butter into small pieces first for even melting. Once melted, add the 10 oz marshmallows and stir constantly with a silicone spatula until completely smooth.
Avoiding Sticky Mess
If your mixture feels too sticky, you likely used too high heat. Remove from heat immediately when adding the 6 cups Rice Krispies and fold gently. The cereal should be fully coated but not soggy—this ensures the treats hold their shape when forming Minnie’s face. 💡
Shaping Like a Pro
Lightly grease your hands with butter or oil before dividing and rolling the mixture. Press each ball gently to create a flat surface for Minnie’s face—this helps the pink candy melts adhere better. I use a cooking spray for quick greasing.
Decorating Efficiency
Melt the 1 cup pink candy melts in 30-second microwave intervals, stirring between each. Dip the treats quickly while the candy melts are still warm for a smooth finish. Let them set for 5 minutes before adding facial details to prevent smudging.
Precision Detailing
Use a toothpick for the 0.5 tsp black food gel to create precise eyes and nose. For the ears, pipe melted 0.5 cup white chocolate in small circles. The red licorice bow sticks best when pressed gently into the still-tacky pink candy layer.
Final Setting
Allow the treats to set completely at room temperature for 20-30 minutes. Dust with 0.25 cup powdered sugar using a fine-mesh sieve for an extra touch of magic. This step is optional but adds a delightful finish. ✨
Nutrition Facts
Frequently Asked Questions
Can I use regular marshmallows instead of mini?
Yes! Use 40 regular marshmallows (about 10 oz) as a substitute. They’ll take slightly longer to melt, so stir patiently over low heat.
How do I keep the treats from sticking?
Lightly grease your hands with butter or oil before shaping. For the tray, use parchment paper to prevent sticking during cooling.
Can I make these ahead of time?
Store undecorated treats in an airtight container for up to 3 days. Add decorations the day of serving for the best appearance.
What if my candy melts seize up?
Add 1 tsp vegetable oil and stir until smooth. Avoid water—it will make the mixture lumpy.

- Mujadara Rice and Lentils Recipe: Earthy Spiced Lentils With Caramelized Onions - November 1, 2026
- Naija Fried Rice Recipe: Street-Style Spice With Veggie Crunch - November 1, 2026
- Mushy Rice Recipe: Fluffy Grains Transformed in Minutes - November 1, 2026