
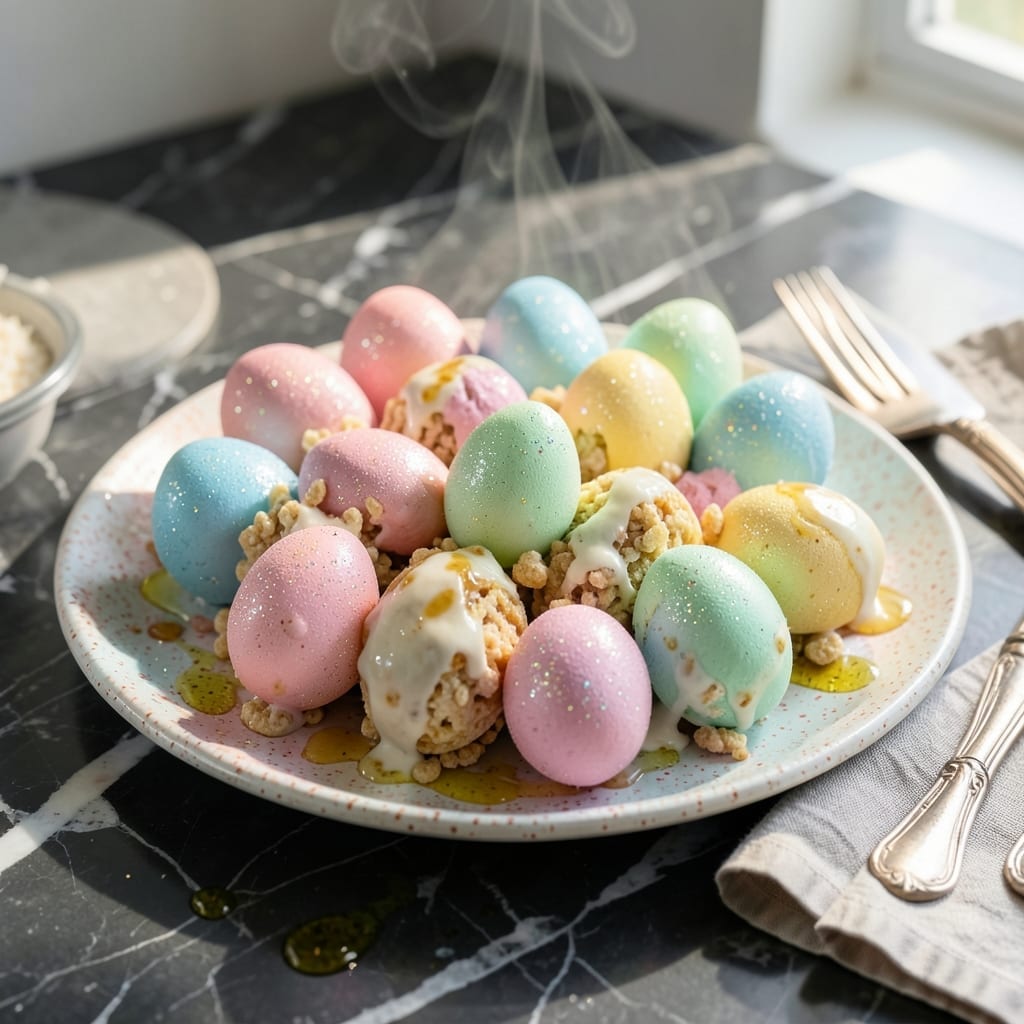
Spring baking just got easier with this no-bake treat that transforms classic Rice Krispies into festive Easter eggs. I developed this after years of testing in my tiny Boston kitchen, ensuring it works every time.
The secret is in the shaping—use slightly buttered hands to form the mixture into egg shapes while still warm. This creates crispy edges with that signature snap we all love.
What you get are vibrant, egg-shaped treats that look as good as they taste. The marshmallow and cereal base stays perfectly chewy, while the festive shape makes them irresistible for holiday gatherings.
Decorate with pastel icing or sprinkles for extra flair. This method guarantees consistent results without turning on the oven.
Ingredients for Rice Crispy Treats Easter Eggs
Transform simple cereal and marshmallows into these cheerful, no-bake spring treats everyone will love.
| Ingredient | Amount | Notes |
|---|---|---|
| Rice Krispies Cereal 🥣 | 6 cups | Classic crispy rice cereal |
| Mini Marshmallows 🍬 | 10 oz | Or 40 regular marshmallows |
| Unsalted Butter 🧈 | 3 tbsp | For melting with marshmallows |
| Vanilla Extract 💧 | 1 tsp | Pure extract for best flavor |
| Salt 🧂 | ¼ tsp | Fine grain for balance |
| Pastel Food Coloring 🎨 | 4 drops | Optional for vibrant eggs |
| Pastel Icing 🧁 | ½ cup | For decorating finished eggs |
| Colorful Sprinkles 🌈 | ¼ cup | Optional topping for flair |
| Cooking Spray 🧴 | 1 piece | For greasing hands and surfaces |
| Wax Paper 📜 | 1 sheet | For shaping and cooling |
The marshmallows are key here—Jet-Puffed or Kraft brands melt the smoothest. Use fresh cereal (the stuff at the bottom of the box gets stale and won’t crisp up right). I grab my Rice Krispies from Stop & Shop in Boston—they always have the freshest stock. For the butter, Land O’Lakes is my go-to, but any unsalted works. The vanilla? Pure extract, not imitation.
Out of mini marshmallows? Regular ones work—just count out about 40. No food coloring? Skip it, the natural color still looks great. Want extra flavor? Add a pinch of cinnamon or almond extract. The pastel icing can be store-bought (I like Betty Crocker) or homemade with powdered sugar and milk. Sprinkles are totally optional but make them look extra festive.
These keep beautifully at room temperature for 3-4 days in an airtight container. If it’s humid, store them in the fridge to prevent sticking. They’re best the same day though—that crispy snap is hardest to resist right after cooling.
Why You’ll Love This Recipe
- No-Stove Needed: I melt everything in the microwave—butter, marshmallows, and vanilla come together in one bowl, no fancy equipment.
- Buttery Sweetness: The combo of melted butter and mini marshmallows creates this rich, gooey base that clings to every crispy bite.
- Holiday Crowd-Pleaser: Honestly, these shaped eggs disappear faster than any other treat I’ve made for Easter gatherings.
Step-by-Step Instructions for Rice Crispy Treats Easter Eggs
Here’s how I make these festive treats with minimal effort and maximum fun.
Step 1: Melt Butter and Marshmallows for the Base
In a large pot over low heat, melt the 3 tbsp Unsalted Butter completely. I keep the heat gentle to prevent burning. Once melted, add all 10 oz Mini Marshmallows and stir constantly with a silicone spatula.
The mixture will begin to melt and become smooth after about 5-7 minutes. Remove from heat when it’s fully melted and uniform. Stir in the 1 tsp Vanilla Extract and 0.25 tsp Salt immediately—this adds depth to the sweetness.
If using, add the 4 drops Pastel Food Coloring now and stir until the color is evenly distributed. The mixture should be glossy and stretchy when you lift the spatula.
Step 2: Combine with Rice Krispies Cereal
Working quickly while the marshmallow mixture is still warm, add all 6 cups Rice Krispies Cereal to the pot. Fold gently with the spatula until every piece is evenly coated. The cereal will begin to soften slightly as it absorbs the warmth.
You’ll know it’s ready when the mixture holds together when pressed and has a uniform appearance. Don’t overmix—this can make the treats dense rather than light and crispy. The cereal should still have some snap to it.
Step 3: Shape into Easter Eggs
Spray your hands lightly with the Cooking Spray to prevent sticking. This is essential—without it, the mixture will cling to your fingers. Take about ½ cup portions of the mixture and shape them into egg forms with your palms.
Place each formed egg onto the Wax Paper to cool. I press gently to create a slightly elongated oval shape. Work efficiently—the mixture sets quickly as it cools. If it becomes too stiff to shape, warm it briefly in the microwave for 10-15 seconds.
Step 4: Decorate with Icing and Sprinkles
Once the eggs are completely cool and firm (about 30 minutes), it’s time to decorate. Transfer the 0.5 cup Pastel Icing to a small piping bag or plastic bag with a tiny corner snipped off. Pipe thin lines or dots onto each egg to create patterns.
Immediately after piping, sprinkle with the 0.25 cup Colorful Sprinkles while the icing is still wet. This ensures the sprinkles adhere properly. I like to press them lightly into the icing for extra hold. Let the icing set for another 15-20 minutes before serving.
Pro Tips For Making Rice Crispy Treats Easter Eggs
- Melt Low and Slow: Keep the heat on medium-low when melting the butter and marshmallows—I learned this the hard way after scorching two batches that turned bitter and grainy.
- Use Fresh Marshmallows: Skip the stale mini marshmallows; they won’t melt as smoothly and can leave your treats with a weird, rubbery texture.
- Press While Warm: Shape the rice crispy mixture into eggs right after mixing, while it’s still pliable—wait too long and it hardens into a sticky, unworkable lump.
- Butter Your Hands: Lightly coat your hands with butter before shaping to prevent sticking, so you can form the eggs without half the mixture clinging to your fingers.
Serving Suggestions for This Recipe
Platter Presentation
Arrange the eggs on a white platter lined with green coconut flakes to mimic grass. I use Stop & Shop’s shredded coconut—it’s finely cut and looks natural. Space the eggs in clusters of three for visual appeal. 💛
Easter Basket Display
Fill mini Easter baskets with plastic grass and nestle 2-3 eggs in each. These make adorable place settings for a spring brunch. I found cute baskets at my local Boston dollar store last year.
Cupcake Stand Elevation
Use a tiered cupcake stand to create height. Place the most colorful eggs on top and simpler ones at the base. This draws the eye upward and makes the display feel abundant. Works great for potlucks.
Individual Wrapping
Cut 4×4 inch squares of pastel cellophane and wrap each egg like a candy. Secure with a twist tie or ribbon. Kids love unwrapping their own treat—it feels like a special gift.
Table Centerpiece
Surround a small vase of tulips with a ring of eggs on a cake stand. The flowers add freshness while the treats provide whimsy. I do this every year—it’s become a family tradition in my tiny kitchen. ✨
Nutrition Facts
Frequently Asked Questions
Can I use regular marshmallows instead of mini?
Yes, use about 40 regular marshmallows as a substitute. They melt the same way but may take slightly longer to fully dissolve.
How do I keep the treats from sticking to my hands?
Lightly spray or butter your hands before shaping each egg. This prevents the warm mixture from clinging as you work.
Can I make these ahead of time?
Store in an airtight container at room temperature for up to 3-4 days. In humid weather, refrigerate to maintain crispness.
What if my mixture gets too stiff to shape?
Microwave the mixture for 10-15 seconds to soften it. Work quickly—the warmth makes it pliable again.

- Jollof Rice Sauce Recipe: West African Tomato and Spice Infusion - September 25, 2026
- Japanese Rice Soup Recipe: Umami-Rich Comfort in a Bowl - September 25, 2026
- Homemade Cream Of Rice Recipe: Silk-Smooth Breakfast in Minutes - September 25, 2026