
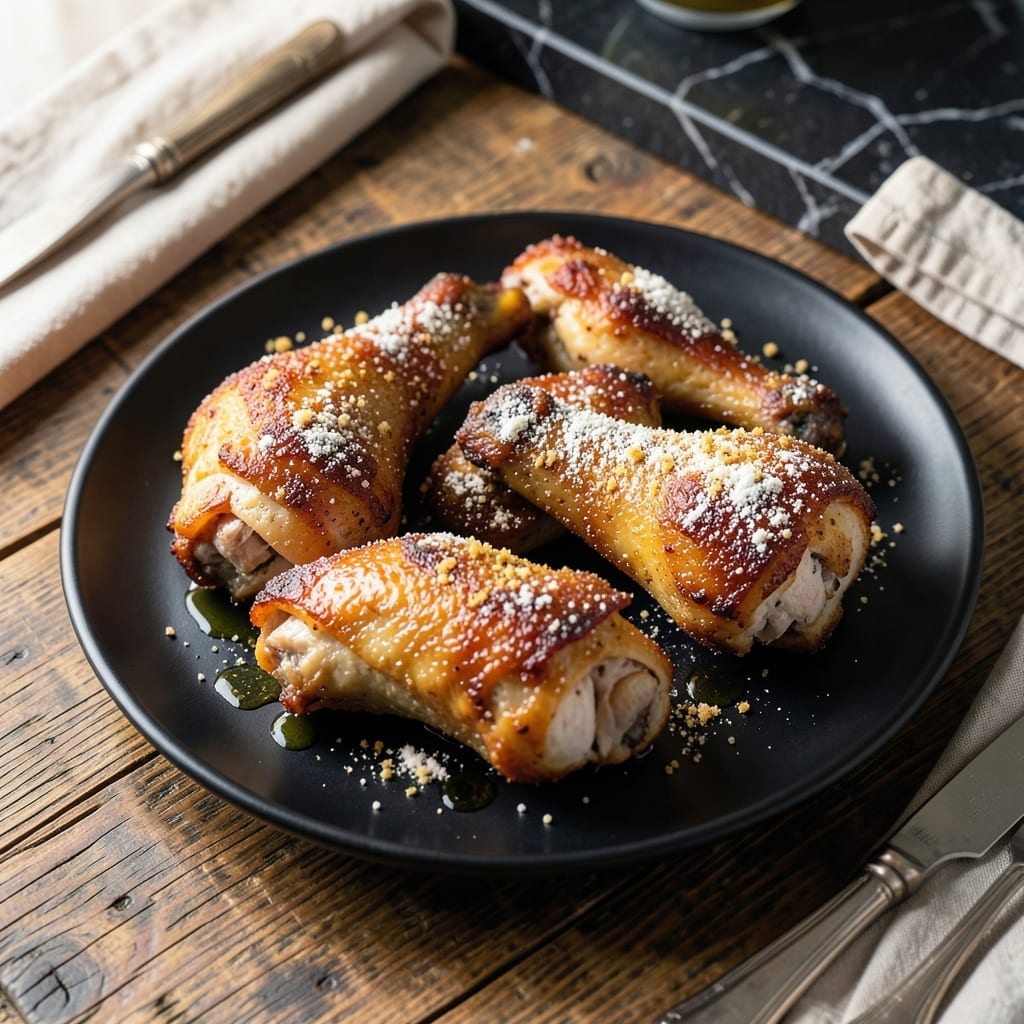
This air frying method delivers golden crisp chicken without the mess of deep frying. I’ve refined the technique to ensure consistent results every time.
The secret lies in the preparation: a light coating of oil and seasoning creates that signature crunch. Cooking in batches prevents overcrowding, which is key to even browning.
You’ll achieve juicy meat inside with a perfectly crisp exterior, all with minimal oil. The air fryer circulates heat efficiently, cutting cooking time significantly.
Serve hot for the best texture. This approach works for any cut, from wings to tenders, with the same reliable outcome.
Ingredients for Air Fried Chicken
Golden crisp requires just a handful of quality ingredients. Nothing exotic, everything essential for perfect texture.
| Ingredient | Amount | Notes |
|---|---|---|
| Chicken Thighs 🍗 | 1 ½ lb | Boneless, skin-on preferred |
| Chicken Drumsticks 🍗 | 1 ½ lb | Skin-on for extra crisp |
| Olive Oil 🫒 | 2 tbsp | Divided for coating and spraying |
| All-Purpose Flour 🌾 | ½ cup | For light dusting |
| Cornstarch 🌾 | 2 tbsp | Creates extra crunch |
| Garlic Powder 🧄 | 1 tsp | For savory depth |
| Onion Powder 🧅 | 1 tsp | Enhances overall flavor |
| Paprika 🌶️ | 1 tsp | Sweet or smoked variety |
| Salt 🧂 | 1 tsp | Diamond Crystal preferred |
| Black Pepper 🌶️ | ½ tsp | Freshly ground for best results |
| Cayenne Pepper 🔥 | ¼ tsp | Adjust for heat preference |
| Dried Thyme 🍃 | ½ tsp | Adds subtle earthy note |
The chicken is non-negotiable for texture. Thighs and drumsticks with skin-on deliver the best crunch—breasts tend to dry out. Source from Whole Foods or your local butcher for consistent sizing. The cornstarch is what creates that signature air-fried shatter. Bob’s Red Mill is reliable and widely available. For the flour, any all-purpose works, but avoid self-rising as it can affect browning.
No cornstarch? Arrowroot powder at equal amount works similarly. Out of fresh garlic? Garlic powder at half the amount of fresh cloves. Want more heat? Increase cayenne to 1/2 tsp. The paprika can be swapped for smoked if you prefer a deeper flavor. If using chicken breasts, brine them first for 2 hours to prevent dryness.
Prep the chicken just before cooking for best results. Leftovers keep in the fridge for 3-4 days but reheat in the air fryer to restore crispness. For meal prep, cook and store uncoated chicken, then crisp before serving. The seasoning blend can be made ahead and stored for up to 3 months.
Why You’ll Love This Recipe
- I’ll be real: this is my go-to when I need dinner fast, and it pairs just as well with salad as it does with mashed potatoes.
- One Pan Wonder: I toss the thighs and drumsticks in olive oil and the flour-cornstarch mix, then let the air fryer do the rest—no greasy stovetop mess.
- Crispy Perfection: Honestly, the cornstarch makes the skin so shatteringly crisp it rivals deep-frying, but with way less guilt.
- Weeknight Rescue: I’ll be real: this is my go-to when I need dinner fast, and it pairs just as well with salad as it does with mashed potatoes.
Step-by-Step Instructions for Air Fried Chicken
Master the technique for achieving perfectly crispy skin and juicy meat with minimal effort.
Step 1: Prepare and Season the Chicken
Pat the chicken thighs and drumsticks completely dry with paper towels. This step is non-negotiable—moisture is the enemy of crispy skin. I focus especially on the skin side and any crevices where water might hide.
In a large bowl, combine the all-purpose flour, cornstarch, garlic powder, onion powder, paprika, salt, black pepper, cayenne pepper, and dried thyme. This blend creates a flavorful crust that crisps beautifully in the air fryer. Whisk until all ingredients are evenly distributed.
Step 2: Coat the Chicken Evenly
Drizzle 1 tablespoon olive oil over the chicken pieces and toss to coat lightly. This helps the dry coating adhere without making it soggy. Then dredge each piece in the flour mixture, pressing gently to ensure full coverage.
Shake off any excess flour—you want an even, thin coating, not a thick paste. Too much coating leads to uneven cooking and a gummy texture. Place the coated pieces on a plate and let them rest for 10 minutes to allow the coating to adhere properly.
Step 3: Preheat and Arrange in the Air Fryer
Preheat your air fryer to 375°F for 5 minutes. This ensures the chicken starts cooking immediately, which is key to achieving that golden, crispy exterior. While it heats, lightly spray the air fryer basket with the remaining olive oil to prevent sticking.
Arrange the chicken pieces in a single layer, skin-side down, ensuring they don’t touch. Work in batches if necessary—overcrowding leads to steaming rather than crisping. The skin should sizzle slightly when it hits the hot basket.
Step 4: Air Fry to Perfection
Air fry at 375°F for 12 minutes without opening the basket. Then flip each piece carefully using tongs and cook for another 10-12 minutes until the internal temperature reaches 165°F and the skin is deep golden brown and crispy.
If you notice any pieces browning too quickly, tent them loosely with foil for the remaining time. The chicken is done when the juices run clear and the coating is uniformly crisp. Smaller drumsticks may finish a few minutes earlier, so check them first.
Step 5: Rest and Serve Immediately
Transfer the chicken to a wire rack set over a baking sheet. This keeps the skin crisp by allowing air to circulate underneath. Let it rest for 5 minutes—this allows the juices to redistribute so every bite stays moist.
Serve while hot and crispy. The coating should have a satisfying crunch with each bite, while the meat inside remains tender and juicy. For extra flavor, sprinkle with a pinch of flaky salt right before serving.
Pro Tips For Making Air Fried Chicken
- Preheat the Air Fryer: Always preheat to 400°F for 5 minutes—I learned this the hard way after my first batch came out pale and soggy.
- Pat the Chicken Dry: Use paper towels to thoroughly dry the thighs and drumsticks; even a little moisture keeps the coating from sticking properly.
- Skip the Overcrowding: Leave at least half an inch between pieces so the air circulates; I used to cram everything in and ended up with steamed chicken instead of crispy.
- Double Dredge for Crisp: Dip the chicken in flour, then back in the wet mix, then flour again—sounds tedious but it actually changes the outcome, giving you that extra crunch.
Dietary Considerations for This Dish
Gluten-Free Option
Swap the all-purpose flour for gluten-free 1:1 baking flour like King Arthur Measure for Measure. The texture remains identical, and the coating crisps just as beautifully. I’ve tested this with great success—no one notices the difference. 💪
Keto-Friendly Version
Replace the flour and cornstarch with almond flour and 1 tbsp psyllium husk powder for binding. Use 2 tbsp parmesan cheese in the coating for extra flavor. The chicken stays crispy and fits perfectly into a low-carb diet.
Dairy-Free Notes
This recipe is naturally dairy-free as written. Just double-check your seasoning blends for hidden dairy—some garlic or onion powders contain anti-caking agents. I always use McCormick or Badia brands for peace of mind.
Lower-Sodium Approach
Reduce the salt to ½ tsp and boost flavor with 1 tsp lemon zest and 1 tsp dried oregano. The citrus brightens the dish without relying on salt. You’ll still get that satisfying crunch with a fresher taste.
Allergen Awareness
This recipe contains no nuts, dairy, or eggs. For nut allergies, ensure your air fryer hasn’t been used with nut-based recipes previously. Always clean the basket thoroughly between uses to prevent cross-contamination.
Meal Prep Friendly
Cook a big batch and store uncoated chicken in the fridge for 3 days. Coat and air fry just before serving to maintain crispness. This works great for busy weeks—I often prep on Sunday for quick 20-minute dinners. ⏰
Nutrition Facts
Frequently Asked Questions
Do I need to preheat the air fryer?
Yes, preheating for 5 minutes at 375°F ensures even cooking and crispier results. Skipping this step can lead to uneven browning and longer cook times.
Can I use boneless, skinless thighs?
You can, but skin-on delivers better crispiness. For boneless, reduce cooking time to 8-10 minutes per side to prevent drying out. The texture won’t be as crunchy.
How do I prevent the coating from falling off?
Pat the chicken completely dry first, then let the coated pieces rest for 10 minutes before air frying. This helps the coating adhere properly. Avoid overcrowding the basket.
Can I make this ahead of time?
Coat the chicken and refrigerate uncooked for up to 24 hours. Air fry just before serving to maintain crispness. Reheating cooked pieces in the air fryer for 3-4 minutes works well.

- Jollof Rice Sauce Recipe: West African Tomato and Spice Infusion - September 25, 2026
- Japanese Rice Soup Recipe: Umami-Rich Comfort in a Bowl - September 25, 2026
- Homemade Cream Of Rice Recipe: Silk-Smooth Breakfast in Minutes - September 25, 2026