
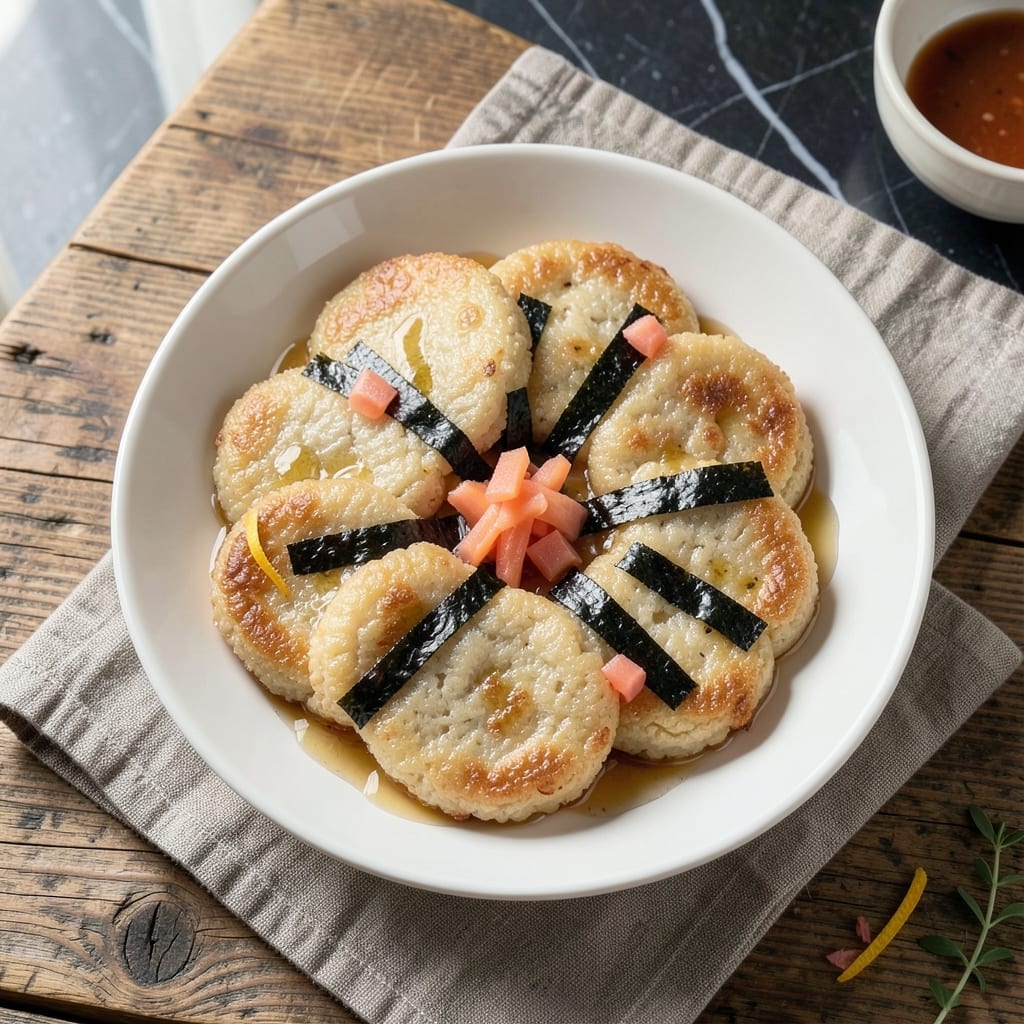
Achieving crispy edges and light centers in rice cakes requires precise air fryer technique. This method transforms simple ingredients into perfectly textured results every time.
With the right temperature and timing, the air fryer creates an ideal environment for developing a golden crust while maintaining a tender interior. The process is straightforward yet delivers professional-quality outcomes.
Ingredients for Air Fryer Rice Cake
Transform simple rice into golden, crispy-edged cakes with tender centers using these ingredients.
| Ingredient | Amount | Notes |
|---|---|---|
| Sushi Rice 🍚 | 2 cups | Short-grain, rinsed thoroughly |
| Water 💧 | 2 ½ cups | For cooking rice |
| Rice Vinegar 🍶 | 2 tbsp | Seasoned or unseasoned |
| Granulated Sugar 🍚 | 1 tbsp | Dissolved in vinegar |
| Salt 🧂 | ½ tsp | Fine sea salt preferred |
| Neutral Oil 🫒 | 1 tbsp | Avocado or vegetable oil |
| Cornstarch 🌾 | 2 tbsp | For crispy coating |
| Sesame Seeds 🌰 | 1 tbsp | Toasted, for garnish |
| Green Onions 🧅 | 2 whole | Thinly sliced, for garnish |
| Soy Sauce 🥢 | 1 tbsp | For dipping or brushing |
| Nori Sheets 🌿 | 2 sheets | Cut into strips for garnish |
| Sesame Oil 🫒 | ½ tsp | For finishing drizzle |
The rice quality is paramount. Short-grain sushi rice provides the ideal sticky texture for holding shape while achieving crispiness. Rinsing thoroughly removes excess starch, preventing gummy results. For optimal flavor, use Japanese rice vinegar—Mizkan or Marukan are reliable brands available at most Asian markets or the international aisle of major grocery chains.
No sushi rice? Arborio rice works in a pinch, though the texture differs slightly. White vinegar plus a pinch of sugar can substitute for rice vinegar. For a gluten-free option, ensure your soy sauce is labeled as such—Tamari is an excellent alternative. The cornstarch coating is non-negotiable for achieving that professional golden crust.
Cooked rice cakes keep in the fridge for 2-3 days in an airtight container. Re-crisp in the air fryer at 350°F for 3-4 minutes. For longer storage, freeze uncooked rice cakes on a tray before transferring to a bag—they’ll keep for 1 month. Always bring rice to room temperature before shaping for best results.
Why You’ll Love This Recipe
- Set and Forget: The air fryer does all the work—just toss in the seasoned sushi rice and walk away.
- Sweet-Tangy Bite: That perfect balance of rice vinegar and sugar gives it a flavor that’s addictive in the best way.
- Snack or Side: I serve these as a quick snack, a party appetizer, or even alongside soup for dinner.
- Budget Stretch: A bag of sushi rice makes a ton, and leftovers crisp up just as well the next day.
Step-by-Step Instructions for Air Fryer Rice Cake
This method ensures a perfect contrast of textures with minimal effort and maximum flavor.
Step 1: Prepare the Sushi Rice Base
Begin by cooking the 2 cups sushi rice with the 2.5 cups water according to standard rice cooker or stovetop instructions. Once cooked, transfer the hot rice to a large bowl. In a small saucepan, gently warm the 2 tbsp rice vinegar, 1 tbsp granulated sugar, and 0.5 tsp salt until dissolved, then fold this into the rice.
The rice should be sticky but not mushy. Allow it to cool slightly—it needs to be warm but not scalding when you handle it. This temperature control prevents the cornstarch coating from cooking prematurely.
Step 2: Shape and Coat the Rice Cakes
Divide the seasoned rice into 8 equal portions (about ¼ cup each). Wet your hands with water to prevent sticking, then gently shape each portion into a ½-inch thick patty. The rice should hold together firmly but still feel slightly tacky.
Place the 2 tbsp cornstarch in a shallow dish. Lightly coat each rice cake on both sides, pressing gently so the starch adheres evenly. This coating is what creates the crispy exterior in the air fryer. Arrange the coated cakes on a plate, ensuring they don’t touch each other.
Step 3: Air Fry to Golden Perfection
Preheat your air fryer to 375°F for 3 minutes. Lightly brush the air fryer basket with the 1 tbsp neutral oil to prevent sticking. Arrange the rice cakes in a single layer, leaving space between each to allow hot air to circulate.
Air fry for 8-10 minutes, flipping halfway through, until the edges are golden brown and crispy while the centers remain light and tender. Watch closely during the last 2 minutes—the cornstarch can go from perfectly crisp to over-browned quickly.
Step 4: Finish and Garnish
Transfer the rice cakes to a serving platter. Drizzle evenly with the 0.5 tsp sesame oil while they’re still hot—this adds a nutty aroma that complements the crisp texture. Immediately sprinkle with the 1 tbsp sesame seeds and 2 whole green onions, thinly sliced, for freshness and color.
Cut the 2 sheets nori sheets into thin strips and arrange them over the top for a touch of umami and visual appeal. Serve immediately with the 1 tbsp soy sauce on the side for dipping, as the rice cakes are best enjoyed fresh from the air fryer.
Pro Tips For Making Air Fryer Rice Cake
- Precook the Rice: I learned this the hard way—using uncooked sushi rice in the air fryer leaves you with a crunchy, underdone mess. Par-cook the rice first (about 80% done) so it crisps up properly without burning.
- Dry the Rice Well: After cooking and seasoning the rice, spread it on a tray and let it sit for 10 minutes. Sounds weird, but it works: the drier the rice, the crispier your rice cakes will be.
- Skip the Overcrowding: After burning three batches, I finally figured out that stacking or overfilling the air fryer basket steams the rice instead of frying it. Give each piece space—about 1 inch apart.
- Chill Before Frying: My grandmother swore by this, and she was right: pop the formed rice cakes in the fridge for 15-20 minutes before air frying. It helps them hold their shape and crisp up evenly.
Creative Variations of This Dish
Korean Kimchi Style
Mix ½ cup finely chopped kimchi and 1 tbsp kimchi juice into your seasoned rice before shaping. This adds tangy, spicy depth. I top with 1 tsp gochujang drizzle after air frying for extra heat. The kimchi’s acidity balances the crispy texture beautifully. 🌶️
Cheesy Fusion
Press ¼ cup shredded cheddar into the center of each rice cake before coating. The cheese melts into a gooey surprise. I use sharp white cheddar for maximum flavor impact. Serve with a side of sriracha mayo for dipping.
Herb Garden
Fold 2 tbsp chopped fresh herbs into the rice mixture—try parsley, dill, or chives. The freshness cuts through the richness. I add 1 tsp lemon zest for brightness. These make excellent light appetizers for spring gatherings.
Spicy Sriracha
Combine 1 tbsp sriracha with the rice vinegar mixture before folding into the rice. The heat builds gradually. I garnish with extra sriracha drizzle and sliced jalapeños for those who love bold flavors. The air fryer intensifies the spice slightly.
Teriyaki Glaze
Brush both sides with 2 tbsp teriyaki sauce after the first flip in the air fryer. This creates a sweet, sticky glaze. I use Kikkoman teriyaki for consistent quality. Finish with 1 tsp sesame seeds for crunch.
Everything Bagel
Skip the sesame seeds and sprinkle with 1 tbsp everything bagel seasoning before air frying. The garlic and onion flavors pair perfectly with the crispy texture. I serve these with cream cheese on the side for a brunch-worthy treat. 💫
Nutrition Facts
Frequently Asked Questions
Can I use leftover rice for this?
Day-old rice works even better as it’s drier and holds shape more easily. Just break up any clumps and warm slightly before mixing with vinegar.
Why do my rice cakes fall apart?
This usually happens if the rice is too warm or not sticky enough. Ensure you use short-grain sushi rice and let it cool slightly before shaping. Press firmly but gently.
What’s the best way to reheat them?
Place in the air fryer at 350°F for 3-4 minutes to restore crispiness. Avoid microwaving, as it makes them soggy.
Can I make these gluten-free?
Yes! Use tamari instead of soy sauce and ensure all other ingredients are certified gluten-free. The rice and cornstarch are naturally gluten-free.

- Jollof Rice Sauce Recipe: West African Tomato and Spice Infusion - September 25, 2026
- Japanese Rice Soup Recipe: Umami-Rich Comfort in a Bowl - September 25, 2026
- Homemade Cream Of Rice Recipe: Silk-Smooth Breakfast in Minutes - September 25, 2026