
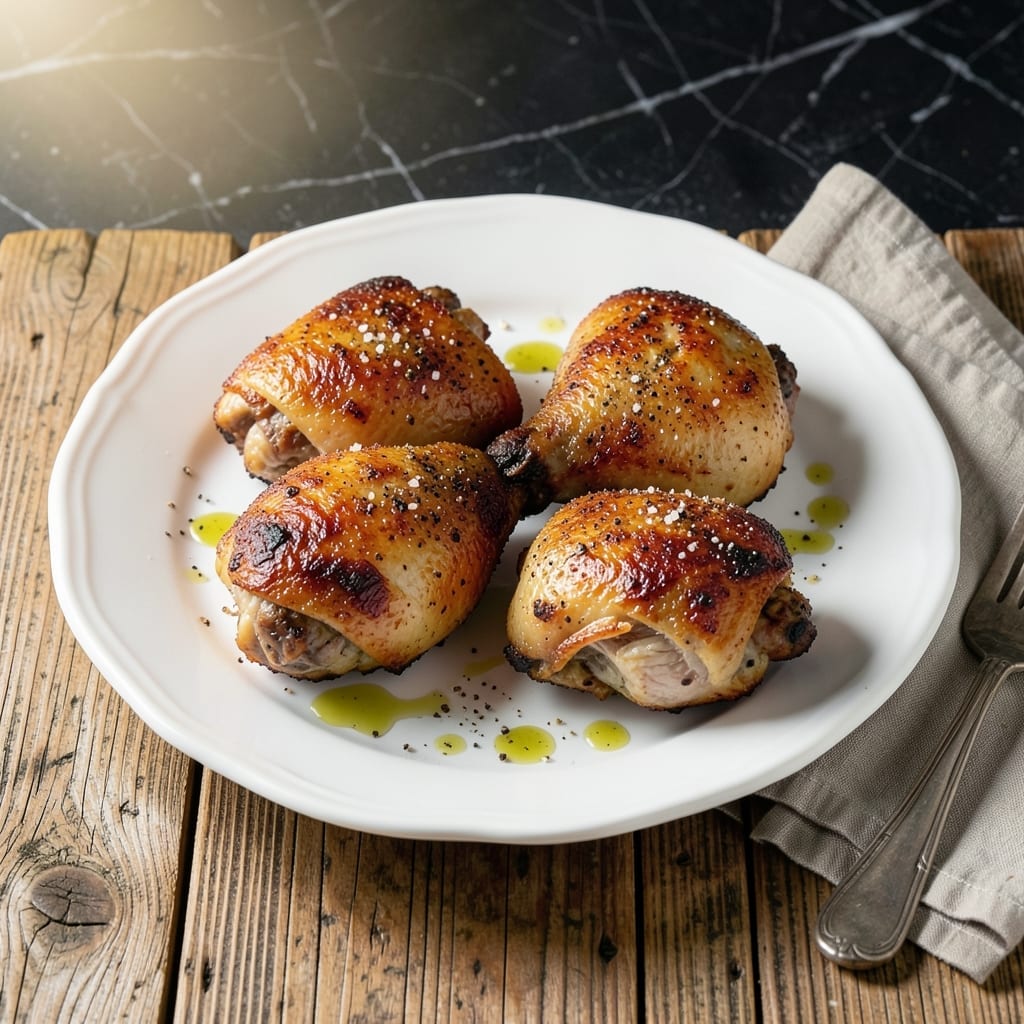
I’ve perfected a method for achieving crispy chicken skin in the air fryer without any deep frying. This approach delivers golden, shatteringly crisp results every time.
The key is patting the chicken completely dry before seasoning and cooking at 400°F. This high heat ensures the skin renders and crisps while the meat stays juicy inside.
You’ll get restaurant-quality chicken with a perfect texture that rivals traditional frying methods. The seasoning forms a flavorful crust that enhances every bite.
No special equipment needed—just your air fryer and a few simple ingredients. The results speak for themselves.
Ingredients for Airfry Chicken
Bone-in, skin-on thighs and a handful of spices. That’s the secret to shattering crispness.
| Ingredient | Amount | Notes |
|---|---|---|
| Chicken Thighs 🍗 | 4 whole | Bone-in, skin-on for crispiness |
| Olive Oil 🫒 | 1 tbsp | Extra-virgin preferred |
| Kosher Salt 🧂 | 1 ½ tsp | Diamond Crystal brand recommended |
| Black Pepper 🌶️ | 1 tsp | Freshly ground for best flavor |
| Garlic Powder 🧄 | 1 tsp | Not garlic salt |
| Onion Powder 🧅 | 1 tsp | Adds depth to seasoning crust |
| Smoked Paprika 🌶️ | 1 tsp | For subtle smoky flavor |
| Dried Thyme 🌿 | ½ tsp | Crushed between fingers |
| Dried Rosemary 🌿 | ½ tsp | Crushed for even distribution |
| Cayenne Pepper 🔥 | ¼ tsp | Optional for heat |
| Lemon Juice 🍋 | 1 tbsp | Freshly squeezed for brightness |
The chicken is everything here. Bone-in, skin-on thighs give you that crispy skin without drying out—Costco and Whole Foods both carry great options. Pat them completely dry (paper towels work best) before seasoning. I always grab Diamond Crystal kosher salt—it sticks better and seasons more evenly than table salt. Look for thighs that are similar in size so they cook through at the same rate.
No smoked paprika? Regular paprika plus a pinch of chipotle powder gets you close. Fresh herbs can sub for dried, but use three times the amount and chop them fine. The lemon juice is key—don’t skip it (bottled works in a pinch). If you’re out of garlic powder, fresh minced garlic at one-third the quantity works, but spread it thin so it doesn’t burn.
Best eaten fresh, but leftovers keep 3-4 days in the fridge. Reheat in the air fryer at 375°F for 5 minutes to revive the crispiness. Freezes well for up to 3 months—just thaw overnight before reheating.
Why You’ll Love This Recipe
- Ready in 20: I toss the thighs with olive oil and spices, pop them in the air fryer, and dinner’s done before the kids finish their homework.
- Crispy Garlic Bite: That garlic powder crust gets so crispy it cracks with every bite, while the inside stays juicy.
- Meal Prep MVP: I make a double batch on Sunday—it’s just as good cold in salads or reheated for tacos.
- Budget Stretcher: Chicken thighs stay cheap, and this recipe turns them into something I’d order at a restaurant.
Step-by-Step Instructions for Air Fry Chicken
This method delivers that addictive crunch without the oil bath—here’s how I do it.
Step 1: Pat Dry and Season the Chicken Thighs
Start by thoroughly patting the 4 whole Chicken Thighs dry with paper towels. This is non-negotiable—moisture is the enemy of crispy skin. I press firmly to absorb every drop, paying special attention to the skin side where water tends to collect.
Place the thighs in a large bowl and drizzle with 1 tbsp Olive Oil. Rub it all over, making sure every surface is lightly coated. Then sprinkle with 1.5 tsp Kosher Salt, 1 tsp Black Pepper, 1 tsp Garlic Powder, 1 tsp Onion Powder, 1 tsp Smoked Paprika, 0.5 tsp Dried Thyme, 0.5 tsp Dried Rosemary, and 0.25 tsp Cayenne Pepper. Massage the seasoning into the meat and skin until evenly distributed.
Finish with 1 tbsp Lemon Juice, tossing to coat. The acidity brightens all the smoky, earthy flavors and helps tenderize the meat. Let the thighs sit at room temperature for 10 minutes while you preheat the air fryer.
Step 2: Preheat the Air Fryer and Arrange the Thighs
Preheat your air fryer to 375°F for 3-5 minutes. This ensures the basket is hot when the chicken goes in, which is crucial for achieving that initial sear that kicks off the crisping process. I use the top rack position for even air circulation.
Arrange the thighs skin-side down in the basket, leaving a little space between each piece so air can circulate. Don’t overcrowd—if your basket is small, cook in batches. The skin should sizzle slightly when it hits the hot surface, a sign you’re on the right track.
Step 3: Air Fry in Stages for Even Cooking
Air fry at 375°F for 12 minutes with the skin side down. This is when the magic starts happening—the skin will begin to render its fat and turn golden brown. Don’t peek during this time; every time you open the basket, you lose heat and momentum.
After 12 minutes, flip the thighs so they’re skin-side up. Increase the temperature to 400°F and cook for another 8-10 minutes. The higher heat now will crisp up that skin to perfection. You’ll know it’s ready when the skin is deep amber and crispy, and the internal temperature reaches 165°F.
Step 4: Rest and Verify Doneness
Transfer the thighs to a wire rack set over a plate and let them rest for 5 minutes. This allows the juices to redistribute, ensuring the meat stays moist. The skin will stay crispy on the rack—if you set them on a solid surface, the steam will make the bottom soggy.
Check that the skin is uniformly crispy and the thickest part of the meat reaches 165°F on an instant-read thermometer. If any piece isn’t quite there, pop it back in for 2-3 minutes. The meat should pull away from the bone slightly when done. Serve immediately while the skin is still at its crispest.
Pro Tips For Making Airfry Chicken
- Preheat the Basket: Always preheat your air fryer for 3 minutes at 400°F before adding the chicken—I learned this the hard way after my first batch came out rubbery.
- Pat Thighs Dry: Use paper towels to thoroughly dry the chicken thighs before seasoning; excess moisture prevents that crispy skin everyone loves.
- Skip the Overcrowding: Leave at least half an inch between pieces so the hot air circulates properly—my first attempt was a sad, steamed mess.
- Flip Mid-Cook: Flip the thighs halfway through (about 10 minutes in) to guarantee even browning on both sides, especially with thicker cuts.
Perfect Pairings for This Recipe
Side Dish Ideas
This chicken pairs beautifully with a simple cucumber-tomato salad tossed with red wine vinegar and dill. The cool, crisp veggies balance the richness perfectly. I like English cucumbers from Trader Joe’s for their thin skin. 🥗
Starch Pairings
Garlic mashed potatoes soak up all the flavorful juices from the chicken. For a lighter option, roasted baby potatoes with rosemary and sea salt complement the smoky seasoning. Both options are comfort food at its finest.
Wine Pairings
A crisp Sauvignon Blanc from New Zealand cuts through the fat with its citrus notes. For red lovers, a light Pinot Noir from Oregon works wonderfully. I always keep a bottle of Kim Crawford Sauvignon Blanc on hand. 🍷
Beer Options
The carbonation in a pilsner or lager refreshes your palate between bites. Modelo Especial or Stella Artois are my go-to choices. Avoid heavy IPAs that might overwhelm the chicken’s seasoning.
Quick Breads
Cornbread or buttermilk biscuits make excellent companions. I love the contrast of sweet cornbread with the savory chicken. Stonewall Kitchen makes a great cornbread mix if you’re short on time.
Finishing Touches
Add a squeeze of fresh lemon wedges right before serving to brighten the flavors. A sprinkle of chopped parsley adds a pop of color and freshness to the plate. These small details make a big difference. 💛
Nutrition Facts
Frequently Asked Questions
Do I need to preheat the air fryer?
Yes, always preheat to 375°F for 3-5 minutes. This ensures the chicken starts cooking immediately, which is key for crispy skin. Skipping this step can lead to uneven cooking.
Can I use boneless thighs instead?
You can, but they may dry out faster. Reduce cooking time by 3-4 minutes per side and check internal temp early. Bone-in thighs stay juicier and crisp better.
Why is my skin not crispy?
Most likely from excess moisture. Pat the chicken very dry before seasoning and don’t overcrowd the basket. Also, cooking at 400°F for the final stage helps.
Can I cook frozen chicken directly?
Not recommended. Thaw first for even cooking. If in a rush, add 5-7 minutes to total time and check temp reaches 165°F.

- Jollof Rice Sauce Recipe: West African Tomato and Spice Infusion - September 25, 2026
- Japanese Rice Soup Recipe: Umami-Rich Comfort in a Bowl - September 25, 2026
- Homemade Cream Of Rice Recipe: Silk-Smooth Breakfast in Minutes - September 25, 2026