
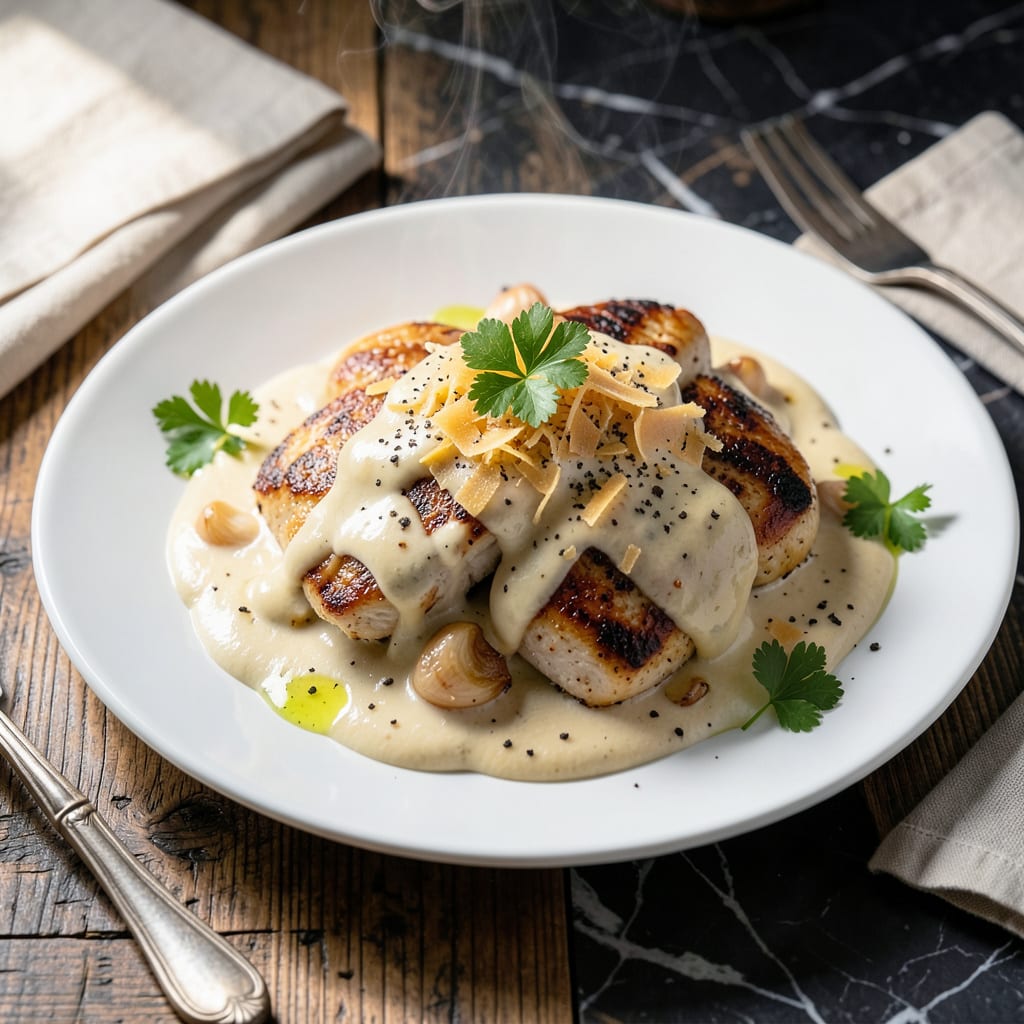
This authentic sauce brings Italian restaurant quality to your kitchen with a velvety texture that clings perfectly to pasta and chicken.
Using real Parmesan and heavy cream, this proven method delivers a rich, smooth sauce that’s both traditional and foolproof. Store in the fridge for up to 5 days.
Ingredients for Authentic Chicken Alfredo Sauce
Nine ingredients transform into a velvety restaurant-quality sauce that clings beautifully to pasta.
| Ingredient | Amount | Notes |
|---|---|---|
| Heavy Cream 🥛 | 2 cups | Full-fat for richness |
| Unsalted Butter 🧈 | ½ cup | Cut into tablespoon pieces |
| Parmesan Cheese 🧀 | 1 ½ cups | Freshly grated from wedge |
| Garlic Cloves 🧄 | 4 cloves | Minced finely |
| All-Purpose Flour 🌾 | 2 tbsp | For thickening sauce |
| Whole Milk 🥛 | ½ cup | Warm for smooth integration |
| Salt 🧂 | ½ tsp | Kosher or sea salt |
| Ground White Pepper 🌶️ | ¼ tsp | For subtle seasoning |
| Fresh Nutmeg 🌿 | 0.125 tsp | Newly grated preferred |
[recipeingredientscaler]
The Parmesan is non-negotiable for authenticity. Parmigiano-Reggiano from a wedge—pre-grated lacks the melt and depth. Whole Foods or Costco carry quality blocks. Heavy cream must be full-fat (36-40%) for that signature richness. The butter should be high-quality like Plugrá or Kerrygold—unsalted so you control the seasoning. Freshly grated nutmeg adds that subtle warmth professional kitchens insist upon.
No heavy cream? Whole milk plus melted butter (1:1 ratio) works in a pinch, though less luxurious. Out of Parmesan? Pecorino Romano at two-thirds the amount offers a sharper profile. White pepper can be swapped for black, but the flavor will be more pronounced. All-purpose flour is essential for the roux—cornstarch won’t give the same velvety texture.
Sauce keeps 5 days refrigerated in an airtight container. Press plastic wrap directly on the surface to prevent a skin from forming. Freeze for up to 3 months, though the texture may separate slightly upon thawing (re-whisk to restore). Always warm gently to maintain that silky consistency.
Why You’ll Love This Recipe
- I’ll be real: it thickens up even better the next day, and reheats like a dream for quick lunches.
- One Pot Magic: I melt the butter, whisk in flour, then just let the cream and parmesan do their thing—no fancy steps.
- Garlic Parmesan Heaven: That rich, velvety sauce with real grated parmesan and fresh garlic? Honestly, I could drink it with a straw.
- Feeds My Crowd: From weeknight dinners to Sunday suppers, this sauce clings perfectly to pasta, chicken, or even veggies.
Step-by-Step Instructions for Chicken Alfredo Sauce
Master the authentic technique for creating this classic sauce with professional precision and care.
Step 1: Create a Roux Base
Melt the 0.5 cup Unsalted Butter in a heavy-bottomed saucepan over medium heat. Once melted, whisk in the 2 tbsp All-Purpose Flour to form a smooth paste. This roux serves as the foundation for your sauce, providing structure and preventing lumps.
Cook the roux for 1-2 minutes, stirring constantly, until it turns a pale golden color and emits a light, nutty aroma. This cooking step removes the raw flour taste. Be careful not to let it brown, as that would impart unwanted color and flavor to your white sauce.
Step 2: Build the Cream Sauce
Gradually whisk in the 2 cups Heavy Cream, adding it a little at a time to prevent lumps. Once all the cream is incorporated, add the 0.5 cup Whole Milk. The mixture will thicken as it heats—keep whisking constantly to maintain a smooth consistency.
Bring the mixture to a gentle simmer over medium heat, then reduce to medium-low heat. Cook for 3-4 minutes until the sauce begins to thicken and coat the back of a spoon. This step develops the velvety texture that defines an authentic Alfredo.
Step 3: Incorporate Aromatics and Cheese
Add the 4 cloves Garlic Cloves (minced finely) to the sauce and cook for 30 seconds until fragrant. Be careful not to let the garlic brown, as it can become bitter. The garlic should infuse the sauce with its aroma without overpowering the delicate cheese flavor.
Reduce heat to low and gradually add the 1.5 cups Parmesan Cheese, whisking constantly until each addition is fully melted and smooth. Freshly grated cheese melts beautifully and creates the authentic texture you’re after. Stir in the 0.5 tsp Salt, 0.25 tsp Ground White Pepper, and 0.125 tsp Fresh Nutmeg.
Step 4: Final Adjustments and Serving
Taste and adjust seasoning if needed, though remember that Parmesan is naturally salty. If the sauce is too thick, thin it with a splash of warm milk. If it’s too thin, simmer for another 1-2 minutes to reach the desired consistency.
The finished sauce should be smooth, velvety, and rich with a subtle garlic aroma. It should coat the back of a spoon and ribbon off it slowly. Serve immediately over cooked pasta with your prepared chicken, as the sauce thickens as it cools.
Pro Tips For Making Authentic Chicken Alfredo Sauce
- Low and Slow Heat: I learned this the hard way—crank the heat too high and your heavy cream will split. Keep it at medium-low and stir constantly for that silky texture.
- Grated Parmesan Only: Skip the pre-shredded stuff; it’s coated in anti-caking agents that make your sauce grainy. Freshly grate your Parmesan for a melt that’s actually smooth.
- Bloom the Garlic: Cook your minced garlic in the butter for just 30-45 seconds until fragrant—any longer and it turns bitter. Pull it off the heat if you’re unsure.
- Temper the Cream: After making your roux with butter and flour, let the cream warm slightly before adding it. Cold cream can cause clumping, and nobody wants lumpy Alfredo.
Pro Cooking Tips for authentic chicken alfredo sauce
Roux Perfection
Cook your butter-flour mixture for exactly 1-2 minutes until pale golden. This removes the raw flour taste without browning. I use a heavy-bottomed All-Clad saucepan for even heat distribution. The nutty aroma tells you it’s ready for the next step.
Cream Integration
Whisk in the heavy cream gradually, adding just ¼ cup at a time to prevent lumps. Keep the heat at medium and maintain constant motion. This slow incorporation ensures a silky base before adding milk. 💡
Cheese Melting Technique
Always use room temperature Parmesan and add it in 3 additions, waiting for full melt between each. Off the heat helps prevent graininess. Freshly grated Parmigiano-Reggiano creates that restaurant-quality texture we all love.
Temperature Control
Never let your sauce boil—keep it at a gentle simmer. If it gets too hot, the sauce can separate. I keep a thermometer handy and aim for 160-180°F. The low and slow approach maintains that velvety consistency.
Seasoning Timing
Add your salt, white pepper, and nutmeg only after the cheese is fully incorporated. This prevents over-salting since Parmesan varies in saltiness. Taste as you go—you can always add more but can’t take it out.
Final Consistency
If your sauce thickens too much, thin with warm milk 1 tbsp at a time. For a thinner sauce, remove from heat earlier. Remember, it will thicken as it cools, so aim for slightly thinner than your final desired consistency. 🔥
Nutrition Facts
Frequently Asked Questions
Can I use pre-shredded Parmesan?
Pre-shredded cheese contains anti-caking agents that prevent smooth melting. Always use freshly grated Parmesan from a wedge for that velvety texture.
Why does my sauce turn grainy?
Graininess usually means the cheese was added too quickly or at too high heat. Use room temperature cheese and add it slowly over low heat while whisking constantly.
How do I thin a sauce that’s too thick?
Whisk in warm milk 1 tbsp at a time until you reach the desired consistency. Remember, it thickens as it cools.
Can I make this ahead?
Yes! Store in an airtight container in the fridge for up to 5 days. Press plastic wrap directly on the surface to prevent a skin from forming.

- Jollof Rice Sauce Recipe: West African Tomato and Spice Infusion - September 25, 2026
- Japanese Rice Soup Recipe: Umami-Rich Comfort in a Bowl - September 25, 2026
- Homemade Cream Of Rice Recipe: Silk-Smooth Breakfast in Minutes - September 25, 2026