
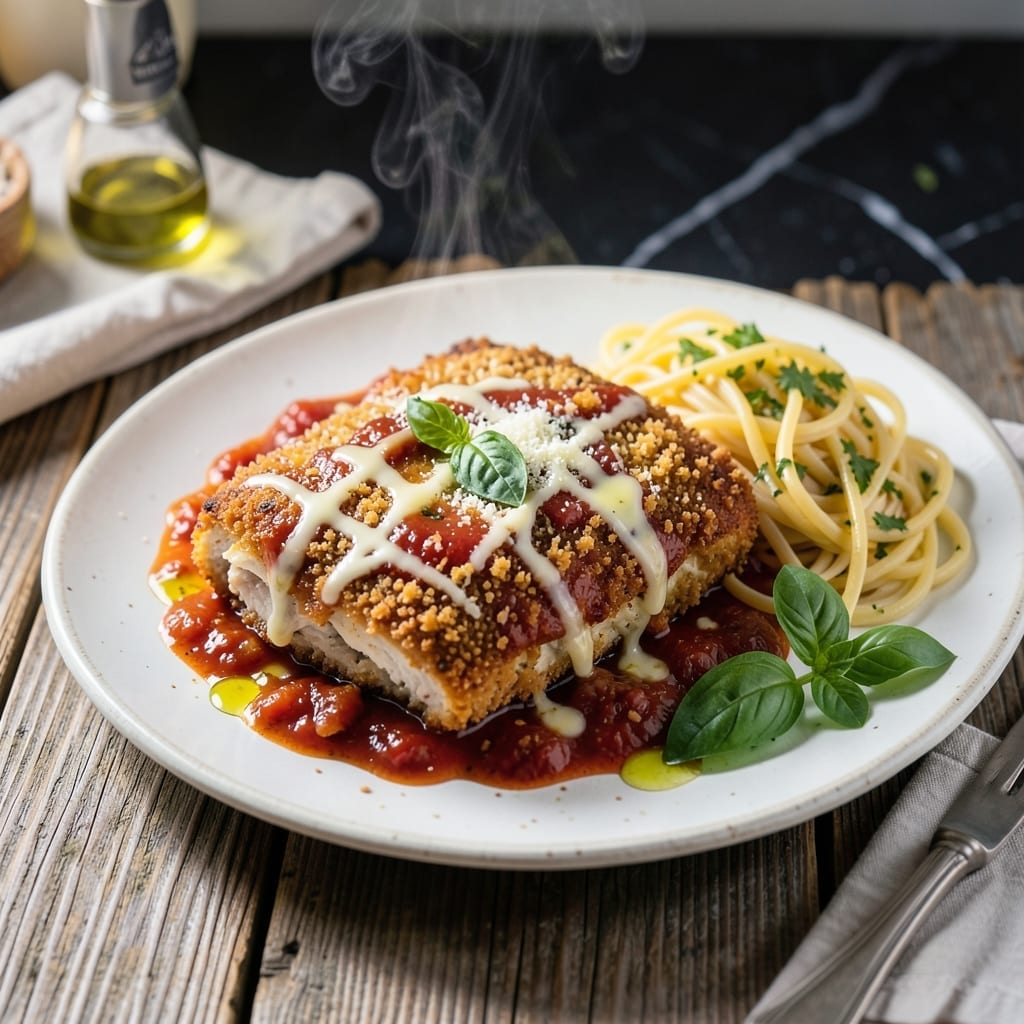
I’ve spent years perfecting this dish to match the versions I tasted in Italian kitchens. The key lies in breading the cutlets properly and layering them with homemade marinara and melted cheese for that signature texture.
Each step builds flavor: thinly pounded chicken ensures even cooking, while a light egg wash and breadcrumb coating create a crispy exterior. The marinara, simmered with fresh herbs, adds depth that store-bought sauces can’t replicate.
Baking the assembled dish melts the cheese into a golden, bubbling layer that seals in moisture. The result is authentic chicken parmesan with a perfect balance of textures and flavors.
Serve with pasta or a fresh salad to soak up every last bite of sauce and cheese.
Ingredients for Authentic Chicken Parmesan
Pantry staples meet a few fresh picks for genuine Italian flavor. No shortcuts here.
| Ingredient | Amount | Notes |
|---|---|---|
| Chicken Breast 🍗 | 1 ½ lb | Boneless, skinless, pounded to 1/2-inch thickness |
| All-Purpose Flour 🌾 | 1 cup | For initial dredging |
| Large Eggs 🥚 | 2 whole | Beaten for egg wash |
| Italian Breadcrumbs 🍞 | 1 ½ cups | Panko for extra crispiness |
| Parmesan Cheese 🧀 | 1 cup | Freshly grated from wedge |
| Marinara Sauce 🍅 | 2 cups | Homemade preferred |
| Mozzarella Cheese 🧀 | 8 oz | Fresh mozzarella, sliced |
| Olive Oil 🫒 | ½ cup | For frying cutlets |
| Fresh Basil Leaves 🌿 | ¼ cup | Chopped for garnish |
| Garlic Cloves 🧄 | 4 cloves | Minced for marinara |
| Salt 🧂 | 1 tsp | Kosher or sea salt |
| Black Pepper 🌶️ | ½ tsp | Freshly ground preferred |
| Dried Oregano 🍃 | 1 tsp | For marinara seasoning |
| Red Pepper Flakes 🔥 | ½ tsp | Optional for heat |
The chicken is make-or-break. Boneless, skinless breasts pounded thin cook evenly—look for air-chilled at Whole Foods or Costco for better texture. The Parmesan needs to be real Parmigiano-Reggiano; pre-grated gets clumpy. Fresh mozzarella (the kind packed in water) melts better than low-moisture blocks. Don’t skip pounding the cutlets—it’s what gets them crispy without drying out.
No Italian breadcrumbs? Panko plus a teaspoon of Italian seasoning works in a pinch. Short on fresh basil? Dried at one-third the amount (but fresh really shines here). For the marinara, San Marzano canned tomatoes are the gold standard if you’re not making it from scratch. Olive oil should be good enough to drizzle on bread—California Olive Ranch is a solid grocery store pick.
Assemble and bake within 2 hours for best texture. Leftovers keep 4-5 days refrigerated or freeze for 3 months. Reheat covered to prevent drying out—microwave works, but oven’s better.
Why You’ll Love This Recipe
- One Pan Wonder: I bread the chicken, bake it, and melt the cheese all on one sheet pan—so easy.
- Crispy, Cheesy Bliss: The parmesan in the breadcrumbs gives it that golden crunch, and the melted cheese on top? Pure comfort.
- Crowd Pleaser: I’ve served this at family dinners and casual get-togethers, and it’s always a hit.
- Leftovers? Yes Please: Honestly, it tastes even better the next day—perfect for meal prep or a quick lunch.
Step-by-Step Instructions for Chicken Parmesan
Here’s my foolproof method for achieving that perfect crispy exterior and gooey, cheesy interior.
Step 1: Bread the Chicken for Maximum Crunch
Start by patting the 1.5 lb chicken breast dry with paper towels. Season both sides with the 1 tsp salt and 0.5 tsp black pepper. This removes moisture and ensures the breading adheres properly.
Set up a breading station with three shallow dishes. Place the 1 cup all-purpose flour in the first, beat the 2 whole large eggs in the second, and mix the 1.5 cups Italian breadcrumbs with the 1 cup Parmesan cheese in the third. Dredge each piece of chicken in flour, shaking off excess, then dip in egg, and finally press into the breadcrumb mixture, coating completely.
Step 2: Pan-Fry to Golden Perfection
Heat 0.5 cup olive oil in a large skillet over medium-high heat until shimmering. Working in batches to avoid crowding, fry the breaded chicken for 3-4 minutes per side until golden brown and crispy.
Don’t flip too soon—wait until the edges look set and the bottom is deeply golden. Transfer the fried cutlets to a paper towel-lined plate to drain excess oil. These will finish cooking in the oven, so they don’t need to be fully done yet.
Step 3: Layer with Sauce and Cheese
Preheat the oven to 375°F. Spread 1 cup marinara sauce in the bottom of a baking dish. Arrange the fried chicken cutlets in a single layer over the sauce. Spoon the remaining 1 cup marinara sauce over the chicken.
Top each cutlet with slices of 8 oz mozzarella cheese, overlapping slightly. Sprinkle any remaining breadcrumb mixture over the cheese for extra texture. This layering ensures every bite has that perfect ratio of crispy, saucy, and cheesy goodness.
Step 4: Bake Until Bubbly and Browned
Bake for 15-20 minutes until the cheese is fully melted and starting to bubble at the edges. Then switch the oven to broil and broil for 2-3 minutes until the cheese is golden brown in spots. Watch closely to prevent burning.
The cutlets should reach an internal temperature of 165°F. The sauce will be bubbling around the edges, and the cheese will have that beautiful, stretchy quality that makes this dish so satisfying.
Step 5: Garnish and Serve Immediately
Remove from the oven and let rest for 5 minutes—this helps the cheese set slightly so it doesn’t all slide off when serving. Sprinkle with the 0.25 cup chopped fresh basil leaves for a pop of color and freshness.
Serve hot with extra marinara on the side if desired. The contrast of the crispy breading, tangy sauce, and melted cheese is what makes this dish truly authentic. Real talk: this is even better the next day, if you can wait that long.
Pro Tips For Making Authentic Chicken Parmesan
- Pound the Chicken: Use a meat mallet to pound the chicken breasts to an even 1/2-inch thickness—this guarantees even cooking and prevents dry, chewy edges. I learned this the hard way after pulling dry, overcooked pieces from the center of thick cuts.
- Double Dredge: Dip each piece in flour, egg, then breadcrumbs mixed with Parmesan, then repeat the egg and crumb step. Sounds tedious, but it creates that extra-crispy crust that stays put, even under a blanket of sauce and cheese.
- Fry in Batches: Resist the urge to crowd the pan—fry two pieces at a time in about 1/4 inch of oil over medium-high heat. After burning three batches, I finally figured out that overcrowding steams the breading instead of frying it.
- Rest Before Baking: Let the fried cutlets rest on a wire rack for 5 minutes before topping with sauce and cheese and sliding them under the broiler. This keeps the crust from turning soggy when the hot sauce hits it.
Troubleshooting This Dish
Breading Falls Off
If your breading isn’t sticking, the chicken likely wasn’t dry enough before dredging. Pat each piece thoroughly with paper towels and let it sit for 5 minutes after seasoning. Also, press the breadcrumbs firmly into the egg wash to create a strong bond. 💡
Soggy Bottom Layer
Prevent this by using a baking rack over a sheet pan instead of a deep dish. This allows air circulation underneath, keeping the breading crisp. If using a baking dish, preheat it with 1 tbsp olive oil to create a barrier.
Cheese Doesn’t Melt
This usually means the oven wasn’t hot enough. Ensure it’s fully preheated to 375°F before baking. Also, slice the mozzarella thinly (about ¼-inch thick) so it melts evenly. Fresh mozzarella packed in water melts better than low-moisture blocks.
Oily Sauce Pooling
If excess oil collects in your baking dish, blot the fried cutlets more thoroughly before layering. Alternatively, spoon off excess oil from the dish halfway through baking. I keep a stack of paper towels handy for quick cleanup during assembly.
Dry Chicken
This often happens from overcooking during frying. The cutlets only need 3-4 minutes per side in the pan—they’ll finish in the oven. Also, pound the chicken to an even ½-inch thickness for consistent cooking. 🌡️
Bland Flavor
Boost the taste by seasoning each layer: add ½ tsp salt to the flour and egg wash, and mix 1 tsp dried oregano into the breadcrumbs. Fresh basil at the end adds brightness that dried herbs can’t match.
Nutrition Facts
Frequently Asked Questions
Can I use chicken thighs instead of breasts?
Yes, boneless thighs work well and stay juicier. Pound them to ½-inch thickness and adjust frying time to 4-5 minutes per side since they’re fattier. The breading may brown faster due to the higher fat content.
Why does my breading fall off during frying?
This usually happens if the chicken isn’t dry enough before breading. Pat it thoroughly with paper towels and let it rest 5 minutes after seasoning. Press the crumbs firmly into the egg wash to create a strong bond.
Can I bake instead of frying?
For a lighter version, bake breaded cutlets at 400°F for 15-18 minutes on a rack. They won’t be as crispy but will still hold together well when topped with sauce and cheese.
How do I prevent soggy bottoms?
Use a baking rack over a sheet pan instead of a deep dish. This allows air circulation underneath, keeping the breading crisp. Preheating the dish with 1 tbsp olive oil also helps.

- Jollof Rice Sauce Recipe: West African Tomato and Spice Infusion - September 25, 2026
- Japanese Rice Soup Recipe: Umami-Rich Comfort in a Bowl - September 25, 2026
- Homemade Cream Of Rice Recipe: Silk-Smooth Breakfast in Minutes - September 25, 2026